What To Do After Stump Grinding

What To Do After Stump Grinding

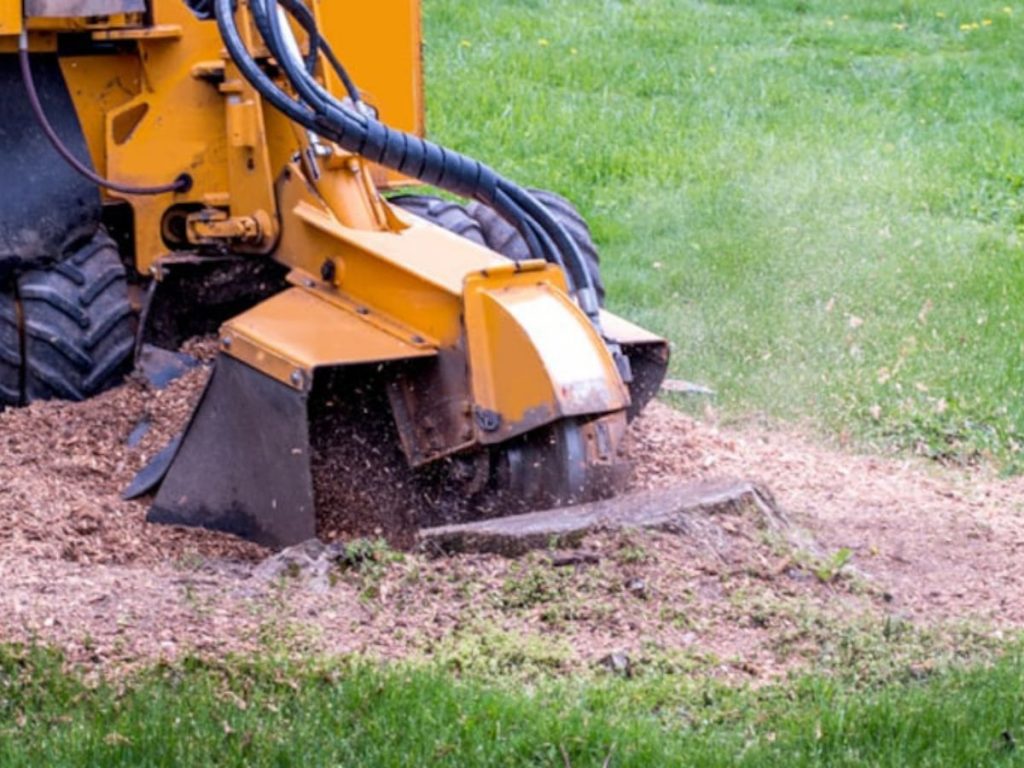
Most people are familiar with the process of stump grinding – after all, it’s not exactly an uncommon sight. You’ve probably seen a large machine with a large spinning blade whirring away at a tree stump in someone’s yard before. But what happens after the stump is gone? What do you do with all the sawdust and debris that’s left behind?

After you’ve had a tree stump removed, it’s important to take care of the remaining holes and roots. If you don’t, you may end up with an unsightly hole in your yard, or worse, new tree sprouts. Here are some tips on what to do after stump grinding to make sure your yard looks its best.

Blog Body:

  1. Dispose of the stump properly – If you have a large stump, you may need to rent a dumpster or call a professional to haul it away. If the stump is small enough to fit in your trash can, make sure to double bag it so that the debris doesn’t make a mess.
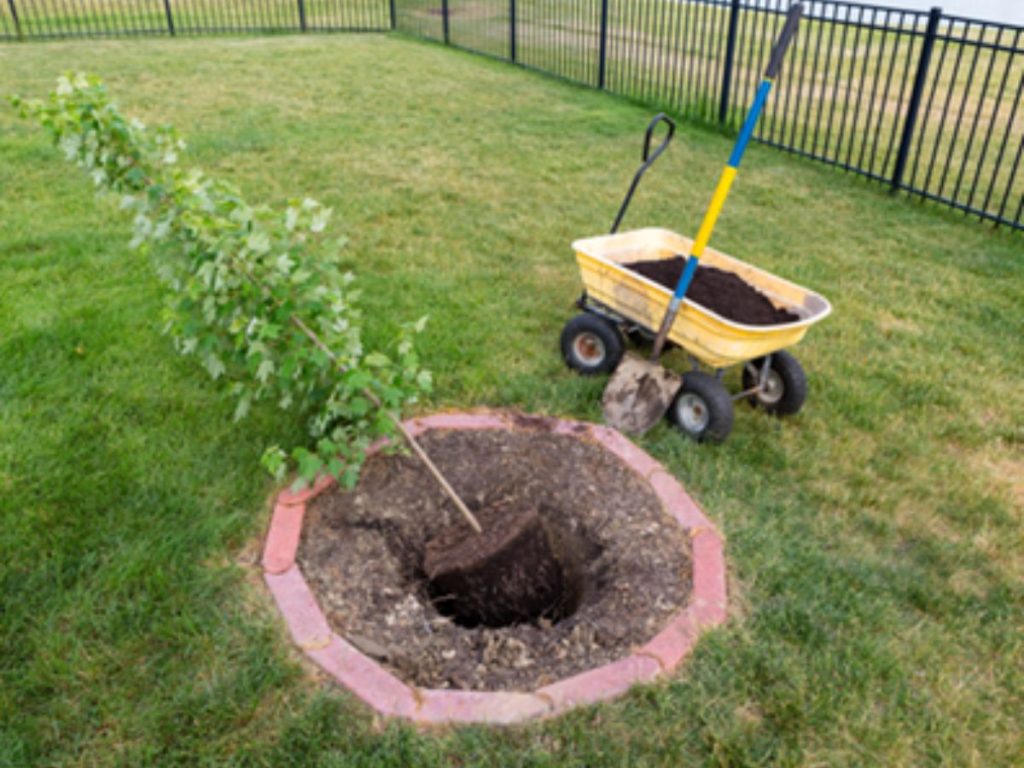
  2. Fill the hole – Once the stump is gone, you’ll be left with a hole. This can be filled with topsoil, compost, or other fillers. Be sure to compact the filler so that it doesn’t settle over time. You may also want to consider planting grass seed or filling the hole with mulch.
  3. Remove the roots – Depending on how big the tree is, you may have some roots left behind. These can be removed with a shovel or other gardening tools. If the roots are too big or too deep to remove yourself, you may need to hire a professional.

The Right Tools for the Job

You can rent a stump grinder from your local hardware store or equipment rental company. If you have several stumps to grind, it might be worth purchasing your own grinder. Either way, make sure you get the right size machine for the job. A too-small grinder will take forever to grind down a large stump, while a too-big grinder can damage your lawn or landscaping.

Best Practices for Grinding a Stump

  • When grinding a stump, there are a few best practices to follow:
  • Wear proper safety gear, including gloves, eye protection, and hearing protection.
  • Clear the area around the stump of rocks and debris that could damage your grinder or injure you if they’re thrown by the machine.
  • Start by grinding the top of the stump until it’s level with the ground. Then grind downward at an angle until you’ve exposed the entire root system. Finally, grind along the length of the roots until they are completely ground up.
  • Fill in the holes left behind by the stump with topsoil and seed or sow grass seed to blend in the area with your lawn.
  • Have a plan for what to do with the stump once it’s ground

The first thing you need to do is clean up the area. This means sweeping up all the sawdust and debris that the stump grinder has left behind. Depending on the size of the stump and the type of tree, this can be a fairly sizable task. Once you’ve got all the debris cleaned up, you’ll need to figure out what to do with it.

Here are a few ideas:

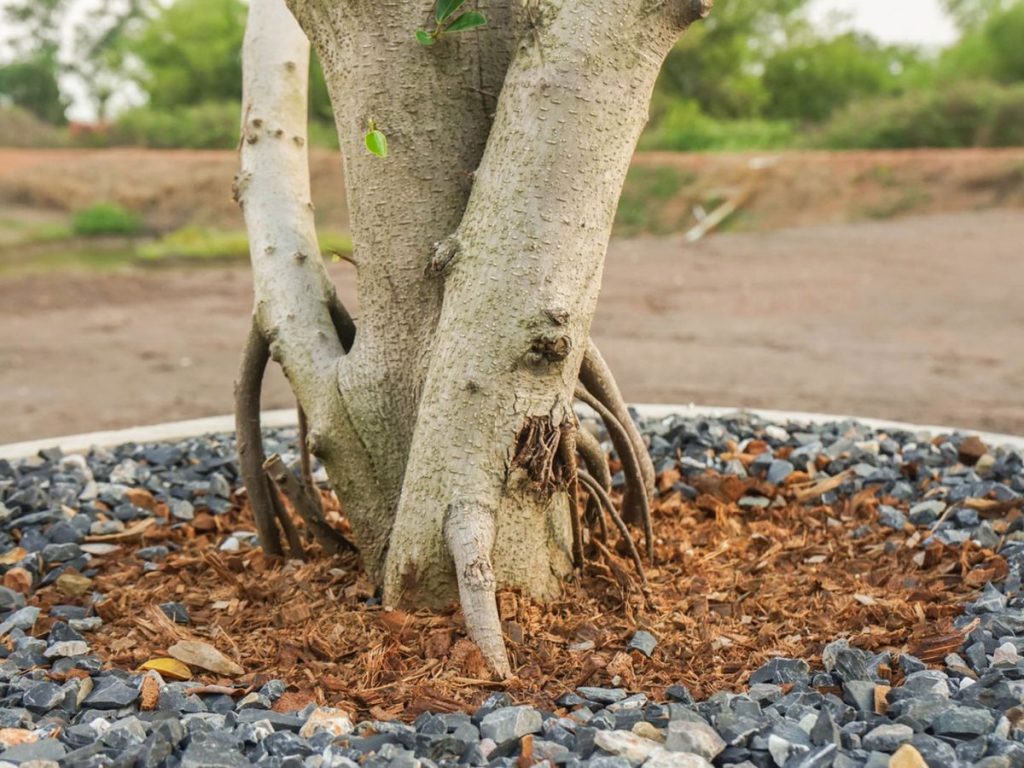
– Use it as mulch in your garden: The debris from a stump grinding can be quite good for your plants. Wood chips can help retain moisture and protect your plant’s roots from extreme temperatures. Just make sure that you don’t use too much, as this can lead to problems with drainage.

– Use it as compost: If you have a compost bin, adding the wood chips from a stump grind can speed up the decomposition process. Just make sure that you chop up the larger pieces into smaller ones so they will break down more easily.

– Dispose of it: If you don’t want to deal with the hassle of disposing of the stump grinding debris yourself, there are companies that will do it for you. Many tree service companies offer this as an add-on service, so it’s worth checking with them before you call a dumpster company.

– Burn it: Another option is to simply burn the debris. This is only an option if there are no burning restrictions in your area, of course. But if there are no such restrictions and you have a fire pit or incinerator, burning the debris is one way to get rid of it quickly and easily.

Conclusion:

As you can see, there are a few different options for what to do with the debris left behind after a stump grinding. It’s really up to you which one you choose – just make sure that you take care of it sooner rather than later so that your yard looks neat and tidy!

We hope this article was helpful in giving you some ideas of what to do with your stump grinding debris. If you have any other questions or would like to learn more about our stump grinding services, please contact us today!

from AAA Tree Lopping Ipswich https://ift.tt/3WPxf4j
via IFTTT

When to Transplant a Tree

When to Transplant a Tree

Many homeowners find themselves with a tree that has outgrown its planting spot. Maybe the tree was too small when it was originally planted, or maybe it’s just grown faster than anticipated. Whatever the case may be, if you have a tree that needs to be transplanted, when is the best time to do it?

Are you thinking about transplanting a tree on your property? If so, you’re not alone. Many homeowners choose to transplant trees for a variety of reasons, including improving the look of their landscaping, increasing privacy, and creating a windbreak.

No matter why you’re considering transplanting a tree, it’s important to know that timing is everything. The best time to transplant a tree is in the fall or winter when the tree is dormant. This is because transpiring leaves require less water during these months, making it easier for the tree to adjust to its new location.

Additionally, deciduous trees are less likely to suffer from transplant shock when they are moved during the dormant season. Evergreens, on the other hand, can be transplanted at any time of year. Keep reading to learn more about the best time to transplant a tree.

Have you ever walked through your neighborhood and noticed a tree that seems out of place? It might be too close to the house, crowding the sidewalk, or competing with other plants in the garden. In these cases, tree transplanting is a great option. Transplanting allows you to move the tree to a more suitable location, giving it room to grow and thrive. But when is the best time to transplant a tree? Read on to find out.

When to transplant a tree?

The best time to transplant a trees vary depending on the species of tree, but there are a few general guidelines that apply to all trees. For deciduous trees (trees that lose their leaves in winter), the best time to transplant is during the late fall or early winter, when the tree is dormant. This is because cooler temperatures help reduce stress on the tree, giving it a better chance of surviving the transplant. Evergreen trees (trees that keep their leaves all year) can be transplanted at any time of year, although spring or early summer is best. This allows the tree to establish its roots before winter sets in.

When choosing a transplant site, make sure it’s large enough to accommodate the adult size of the tree. The hole should be twice as wide as the root ball and just deep enough so that the tree is at the same level it was previously growing. Once you’ve transplanted the tree, water it deeply and regularly for the first few months. After that, continue to water it during dry periods. With proper care, your tree will soon take root in its new home and begin thriving.

Why Fall and Winter are the Best Times to Transplant a Tree

As we just mentioned, the best time to transplant a tree is in the fall or winter when the tree is dormant. This is because transpiring leaves requires less water during these months, making it easier for the tree to adjust to its new location.

Additionally, deciduous trees are less likely to suffer from transplant shock when they are moved during the dormant season. Evergreens, on the other hand, can be transplanted at any time of year. Keep reading to learn more about the best time by which you should transplant your particular type of tree.

The Case for Transplanting in Fall vs. Winter      

While both fall and winter have their advantages when it comes to transplanting trees, some experts believe that fall is actually the slightly better option—for two primary reasons. First of all, temperatures during this time of year are milder than they are in winter, which can make it easier on both you and your tree. Secondly, there tends to be more rain in fall than winter (at least in most parts of North America), which can help keep your newly transplanted tree hydrated as it adjusts to its new home.

Some tips for transplanting a tree during the growing season:

-Choose a cool, cloudy day for transplanting.

-Water the tree well the day before you plan to transplant it.

-Dig a large hole at the new location, wide enough so that you can easily spread out the roots of the tree.

-Carefully remove the tree from its current location, taking care not to damage the roots

-Place the tree in the hole at the new location and backfill with soil, tamping it down gently as you go.

-Water the tree well after transplanting.

How to transplant a tree?

One of the most important things to consider before transplanting a tree is the type of tree it is. Different types of trees have different root systems, which means they respond differently to being transplanted. For example, deciduous trees (trees that lose their leaves in winter) are best transplanted in late fall or early winter, while evergreen trees (trees that keep their leaves all year) are best transplanted in early spring.

Another thing to consider is the size of the tree. A small tree can typically be transplanted more easily than a large one. This is because a small tree’s root system won’t be as extensive, so there will be less damage to the roots when the tree is moved. Additionally, small trees are easier todig up and replant than large ones.

If you’re planning on transplanting a tree yourself, you’ll also need to take into account the amount of time and effort it will take. Transplanting a large tree is a big job, and it’s not something that should be undertaken lightly. If you’re not sure you can handle it, it’s best to hire a professional who has experience transplanting trees.

Conclusion:

If you follow these guidelines, you will be more likely to have success when transplanting a tree. Keep in mind that even with the best care, some trees do not survive being transplanted. If you are not confident in your ability to transplant a tree, it is always best to hire a professional who can do it for you

Whenever possible, it’s best to transplant trees in fall. However, if that’s not possible, spring is also a good option. Early spring should be avoided if at all possible, as that’s when new growth begins and the roots are more fragile. If you have any questions about transplanting your tree, please don’t hesitate to contact us! We would be more than happy to help.

from AAA Tree Lopping Ipswich https://ift.tt/5fveuFI
via IFTTT

Can You Transplant Established Trees?

Can You Transplant Established Trees?

Many people are under the impression that trees, once they are established, cannot be moved. This is simply not the case. With the right tools and know-how, transplanting an established tree is entirely possible. Of course, it’s not always easy, which is why we’ve put together this helpful guide. Keep reading to learn everything you need to know about transplanting established trees!

Why Would You Transplant an Established Tree?

There are a number of reasons why you might need or want to transplant an established tree. Perhaps you’re looking to add some greenery to your property but don’t have the space for a new tree. Or maybe you’ve recently purchased a home and inherited a tree that’s too close to the house for your liking. Whatever the reason, it’s important to understand that transplanting an established tree is a big job. Not only do you have to dig up the tree, but you also have to replant it in a new location and make sure that it has all the necessary nutrients to continue growing and thriving.

Before You Transplant…

Before you even think about transplanting an established tree, there are a few things you need to take into consideration. First of all, how large is the tree? The size of the tree will play a big role in how difficult it will be to transplant. If the tree is small enough, you might be able to move it yourself. However, if it’s larger than 15 feet tall, you’ll probably need to hire a professional tree service to help with the job.

Another thing you need to think about before transplanting an established tree is its root structure. A healthy root system is vital for the successful transplant of any tree, so make sure that the roots are in good shape before proceeding with the move. Once you’ve determined that the roots are healthy and strong enough for transplanting, you can begin digging them up. This is usually done using a Bobcat or other type of excavator equipped with a bucket or teeth attachment.

The Preparation Process

The first step in transplanting an established tree is to assess the tree and its current location. This will help you determine if transplanting the tree is actually feasible. Some factors that you will need to consider include the size of the tree, the type of soil it is currently growing in, and the condition of the roots. Once you have determined that transplanting the tree is indeed possible, you will need to prepare both the tree and its new location.

For the tree itself, you will need to prune back any branches that extend beyond the root ball. This will help make transplanting easier and will also reduce stress on the roots. You should also water the tree well a few days before transplanting to help soften the ground and make digging easier. As for the new location, you will need to dig a hole that is twice as wide as the root ball and just as deep. Once you have done this, you should mix some compost or manure into the hole to help provide nutrients for the roots.

Transplanting an established tree can be a difficult and time-consuming process, but it is definitely possible with the right preparation. By taking the time to assess the tree and its current location, prepare both the tree and its new location, and transplant it carefully, you can ensure that your tree will take well to its new home.

The Benefits of Transplanting an Established Tree

There are a few benefits that come along with transplanting an established tree:

  • Giving the tree a new lease on life: If the tree is struggling in its current location, transplanting it to a new spot can give it the fresh start it needs.
  • Rejuvenation: Established trees can become less vigorous over time. Transplanting can give them the boost they need to start growing vigorously again.
  • Improving the landscape: If you’re not happy with how your landscape looks, transplanting an established tree can be a great way to improve it.

Of course, there are also a few challenges that come along with transplanting an established tree. These challenges include:

  • Finding a new location: If you’re going to transplant an established tree, you need to make sure you have a good location for it. The new location should have rich, friable soil and plenty of room for the roots to spread out.
  • Digging the hole: When you’re transplanting an established tree, you need to dig a hole that’s large enough to accommodate all of the roots. This can be challenging, especially if the roots are spread out far from the trunk of the tree.
  • Watering: Water is essential for any transplanted tree – but it’s especially important for an established tree. Make sure you water your transplanted tree regularly and deeply until it becomes established in its new location.

Conclusion:

Transplanting an established tree may seem like a daunting task, but with a little planning and effort, it can be done! Just remember to take your time; rushing through any part of the process could lead to problems down the road. Now that you know all there is to know about transplanting established trees, what are you waiting for? Get out there and start digging!

from AAA Tree Lopping Ipswich https://ift.tt/fcPz5kC
via IFTTT

How to Get Rid of Thrips on Your Plants Naturally

Thrips Removal: Control and Prevention

Do you get the feeling that something is draining the vitality out of your plants?

Some insects feed on the leaves of your plants by piercing and sucking the vitality out of them. As a consequence, the leaf surface becomes discolored or unappealingly flecked, and the flower hesitates to continue blossoming. That is not what anybody wants.

A thrips is one such bug.

Let’s learn more about this plant-sucking bug and how to avoid thrips to preserve your valuable plants.
What exactly are Thrips?

Thrips are tiny yellow-brown or black insects that live on flowers in the summer. Most of these insects are as thin as a needle and less than 5 millimeters long. They all have one thing in common: they want the sap from your plant.

Despite the fact that many thrips have wings, they are frequently hesitant flyers until there is a rainstorm. They will then take flight in large numbers, which is why they are also known as thunderflies. Furthermore, thrips are seldom seen alone; being highly gregarious animals, they are frequently found in groups.

Life Cycle of Thrips

Because there are over 6,000 kinds of thrips worldwide, the precise thrips life cycle is determined by the species, as well as the area and host plant.

Adults, on the other hand, overwinter in plant bark, trash, or other substances. They become active in early spring and cut slits in leaf tissue to deposit their eggs. A female may lay up to 50 eggs at a time. Three to five days later, the eggs hatch, and the larvae feed on the sap of your plant.

Baby thrips develop swiftly to maturity and may breed within three weeks, allowing populations to grow quickly.

While thrips adults have a one-month lifespan, they may produce up to 15 generations each year in the wild, ensuring that thrips are present throughout the growing season.

Thrips Identification

Thrips management begins with understanding how to identify these pests.

Many thrips species prefer to feed inside plant buds or curled leaves, making them difficult to identify. Furthermore, since they are so little, they might be difficult to see until infestations grow rather substantial.

If you suspect thrips, insert a piece of white paper beneath the plant’s leaves or blossoms and shake it. If you have thrips on your plant, some may fall off, revealing their black, slender bodies on the white paper.

Thrips Damage: How Does Thrips Damage Appear?

Yellow or bleached blotches on your plant’s leaves are usually the first symptom of a thrips infection. Deformed leaves or splotches on flower petals are also possible.

Thrips leaf damage appears as the infestation progresses, with a silvery thin appearance and black dots. This is the conclusion of thrips draining plant sap from the leaves and then excreting it.

Thrips damage on plants progresses to the point where the leaves and petals become so thin that they wilt, die, and eventually fall off the plant.

Thrips’ Most Commonly Affected Plants

Thrips eat woody plants, flowers, fruits, and trees that provide shade. Some of the most typically affected are:

  • Dogwood Azalea
  • Gardenia
  • Hibiscus
  • Iris Rose Gladiolus Magnolia Maple Viburnum Impatiens Chive Fig Iris Rose Gladiolus

Thrips Prevention and Control

Because thrips damage might seem similar to that of mites or lace bugs, it’s critical to identify thrips before taking action.

Learning how to avoid thrips starts with keeping plants wet, since thrips are attracted to plants that are too dry.

Early identification and monitoring are critical in this situation. This implies that you monitor your plants on a regular basis for thrips and take action only if you correctly identify and detect their existence and damage.

Thrips Removal Method

Thrips management entails employing insecticidal soaps and low-toxicity contact pesticides after these pests have been identified. Always read and follow label guidelines when applying pesticides, and only use chemicals that are expressly designated for the insect and plant that requires treatment. Soaps may harm plants and blossoms, particularly in hot weather. Before using, carefully read all label directions.

Unfortunately, since thrips eggs are sheltered in plant leaves and their life cycles are short, thrips pest treatment may be necessary throughout the growing season. Contacting a trained landscaping and tree care specialist who can correctly identify and target the pest may also provide you with a more rapid plan of action and help you avoid any extra and needless plant damage.

Source link

from AAA Tree Lopping Ipswich https://ift.tt/ik7eBLn
via IFTTT

The Benefits of Mulching Your Garden

5 Reasons to Mulch Your Yard

If you own or manage property, keeping it in good shape requires paying attention to the fundamentals. When it comes to maintaining the health of your trees, flowerbeds, and other important landscape elements, good mulching is as simple as it gets.

Mulch is a coating of organic material (often bark, although other forms exist) applied on exposed soil. Shielding soil in this way gives several essential advantages that may enhance the health and look of your property. When you know how vital mulching is, you’ll always want to make sure you do it!

Here are five compelling reasons to mulch your yard.

1. Moisture Retention

There are numerous locations in Texas where it may become exceedingly hot and dry. Your soil is likely to dry out unless you continuously water your landscape with a large amount of water. Fortunately, mulch can prevent this from developing too soon.

Mulch may help hold moisture underneath the soil since it is put on top of it. This implies that your plants’ roots receive a longer chance to absorb the moisture they need without further watering. It also means your soil may keep wet enough to prevent it from fully drying up and blowing away in the wind.

2. Weed Suppression

Weeds may make your home seem unsightly, particularly if they occur in flower beds or critical places of attraction. Worse, weeds may deprive your plants of essential nutrients, water, and space, all of which they need to grow.

Mulch may inhibit weeds by delaying their germination and spread in a limited region. You could see a few weeds come up over time, but eventually, you’ll see considerably less than if you had left your soil exposed. Perhaps the greatest feature of this weed suppression strategy is that it doesn’t include any pesticides that can damage other plants, animals, or humans.

3. Pest Control

Mulch is also useful for keeping some pests at bay. Certain organic components put into pest-repelling mulches may offer your garden with protection against insects such as cockroaches and beetles. Cedar bark is often used because it may immediately kill insects and disintegrate their eggs and larvae.

Don’t be concerned about how mulch may damage helpful earthworms in your landscape. It won’t damage them — in fact, when worms appear from under the earth, the layer of mulch above them may keep them secure from predators seeking for their next meal!

4. Adding Nutrients to Your Landscape Features

Because mulch is organic, its progressive decomposition may supply critical vitamins and minerals to the soil for your plants to consume. Although it is not a replacement for adequate fertilizer, mulch may supply extra nutrients to your plants while still giving all of its other key advantages.

5. Improve the Appearance of Your Property

Lastly, mulch in and of itself may offer your home a certain visual appeal. It’s up to you whether you want it to stand out or blend in. In any case, it may help to make your flowerbeds, trees, and other landscape items seem more consistent.
Purple Care Can Provide the Mulch Services You Need!

Purple Care can assist you with adding fresh mulch to your yard! Our skilled landscapers will work carefully around your current plants and landscaping elements to remove old mulch and replace it with fresh material!

Mulch has several advantages, much too many to mention here! Get in touch with us now to discover more about how mulch might benefit your property!

Source link

from AAA Tree Lopping Ipswich https://ift.tt/cunNh48
via IFTTT

How Does Epsom Salt Work On Tree Stumps?

How to Use Epsom Salt to Remove a Tree Stump

If you have a tree stump on your property, you may be asking how to remove it. Tree stumps may detract from the appearance of a landscape and can even survive and create difficulties in the future. Epsom salts are a natural and cost-effective technique to remove a stump, but how can this common home item be used in tree stump removal?

When Is Epsom Salt Necessary to Kill a Tree Stump?

If you have had a tree cut down on your property, you may believe the difficult part is done. However, falling a tree is frequently only the beginning of the tale when attempting to remove a tree from your landscape. Although the majority of the visible section of the tree will have been gone, the stump and root system will still be there.

There is still life where there are healthy roots, and tree roots will frequently continue to absorb moisture and nutrients in an effort to rebuild. Tree stumps with saplings emerging from them are frequent, and if permitted to develop, they may become full-sized new trees. Some stumps may even produce many seedlings, which might result in several trees growing in close proximity to one other, causing even more complications.

The simplest method to avoid any of these problems is to remove the whole tree, including the stump and all of its associated roots. Unfortunately, removing a tree stump may be highly expensive, time-consuming, and labor-intensive. When it comes to removing the remaining portions of a tree, there are numerous possibilities, one of which is to use Epsom salts. If any of the following circumstances apply to you, you might think about utilizing Epsom salts to destroy your tree stump. Aside from growing plants like tomatoes or roses, Epsom salts may also be used to gently destroy tree stumps with excellent results.

A limited budget

Hiring a tree surgeon or contractor to remove a stump in your yard might cost thousands of dollars. Professionals will often utilize heavy-duty instruments such as stump grinders or smaller tools such as chainsaws and shovels. Whatever technique they choose to remove the stump, it will usually take a full day, if not more, and labor expenses may quickly add up.

Professional tree surgeons have extensive expertise carefully removing tree stumps using potentially risky equipment. As a result, they may charge amounts of money that many people find ridiculous.

If you’re attempting to save money when removing a tree stump, Epsom salt can be an excellent option. Epsom salt is fairly cheap, particularly when purchased in quantity. The extra benefit of utilizing Epsom salts is that you may utilize any leftovers in the bath or for other health reasons if you have any leftovers after the tree stump is gone. This means that there will be no product waste, and hence no money will be wasted.

There are no time constraints.

Hiring a tree surgeon or trying to remove a tree stump manually has the advantage of completing the work in a matter of hours or days. Using Epsom salts will take considerably longer since the Epsom salts will dry out the roots and deprive the tree of moisture and nourishment.

The time it takes may vary depending on the size of the stump, so be prepared to be patient. If you don’t need your tree stump removed right away, an Epsom salt treatment might be a great natural and low-cost choice.

Reduce Physical Work

Many do-it-yourselfers will try to remove a tree stump by chopping it to pieces with an ax or chainsaw or digging it out. These may be viable possibilities for some persons with expertise in these areas. However, tackling a work of this magnitude will be too much for the typical homeowner.

Manually removing a tree stump from the ground is a difficult process that demands a great deal of power and energy. If you don’t want to get your hands filthy, Epsom salts can be a better option. The procedure of removing tree stumps using Epsom salts is straightforward and takes little or no physical effort, making it accessible to virtually anybody.

Commercial Chemical Stump Removal Failed

If you’ve been seeking for a chemical stump removal option to save expenses and physical effort, you may have considered using a commercial stump removal solution, or you may have tried one and found it ineffective.

Commercially available stump removal products are composed of potassium nitrate and are excellent in decomposing and dissolving a dead tree stump. A commercial stump removal solution, on the other hand, will have little to no impact if your tree stump still has strong roots. Epsom salts are a chemical stump removal treatment that has a substantially better success rate.

Concerns about safety

There are several do-it-yourself ways for removing a tree stump, but the most of them are not regarded very safe. Some DIY tree stump removal methods include chaining the stump to a pickup truck and driving away to rip the stump out of the ground, as well as lighting fire to the stump or cutting it apart with a chainsaw. If these solutions seem too risky, a chemical remedy would be a far safer bet. It is both safe and simple to use Epsom salt to destroy a tree stump.

What Effect Does Epsom Salt Have on a Tree Stump?

Magnesium and sulfur are found in Epsom salt. While these are nutrients that plants need to thrive, too much of them may kill plants and weeds. Epsom salt has the ability to pull moisture from whatever it comes into touch with. When applied to a tree stump as advised, Epsom salt will dry up the root system and prevent it from receiving the moisture and nutrients it needs to survive. It will also dry out the tree stump, causing it to decay and break down, at which point it will be easier to remove manually.

How to Kill a Tree Stump with Epsom Salt: A Step-by-Step Guide

Method of Soaking

  1. 1. Combine Epsom salts and water in a one-to-two ratio of Epsom salts to water. The optimal quantity for each stump soak is one gallon of salts and two gallons of water.
  2. 2. Apply the mixture to the stump and any exposed roots.
  3. 3. Cover the stump with a tarp and bathe it once a week until it seems clearly dried out.

Whatever technique you employ, the stump will eventually dry out and decompose, though this may take many months. The stump will degrade naturally after it is dead, but you may speed up the process by applying a high nitrogen fertilizer around the base of the stump.

A decaying stump, on the other hand, may be easily dug out and disposed of. The hole may then be filled with dirt and seeded, or a new flower bed can be planted in its place. Another advantage of using Epsom salt to destroy the tree stump is that it leaves the surrounding soil in better condition than other chemical treatments, which may make it harder to grow plants in the stump’s place after it has been removed.

Conclusion

By drying out the roots and remaining trunk stump, Epsom salts destroy a tree stump. They are a wonderful alternative for removing tree stumps in a number of settings, particularly if you want a safe and non-physically demanding DIY solution. Epsom salts provide a low-cost, simple, and environmentally friendly alternative for tree stump removal.

The main disadvantage of utilizing Epsom salts to destroy a tree stump is that it might take a long time compared to other options. If you don’ mind waiting a few months for Epsom salts to dry out your tree stump, this may be the answer for you.

There are two methods to use Epsom salt to destroy a tree stump, and which one you choose will mainly rely on whether you own and can use a drill.

Drilling Technique

  1. 1. Drill multiple holes into the stump with a 1-inch drill bit, allowing a few inches between each hole. Drill as deep as you can; holes should be at least 8 inches deep.
  2. 2. Fill the drilled holes with Epsom salt all the way to the top.
  3. 3. Fill the holes with enough water to wet the salt. Slowly pour in the salt so that it does not overflow.
  4. 4. Depending on the time of year, you may need to cover the stump with a tarp. This will prevent rainfall from flooding the perforations and diluting the Epsom salts excessively.
  5. 5. Repeat step 5 every three weeks until the stump dies. Pale wood often still has life remaining, whereas dark and brittle wood is dead.

The driling procedure is shown in full in the video below.

Source link

from AAA Tree Lopping Ipswich https://ift.tt/1UBAvbE
via IFTTT

Plant Care: Potting Soil Mix 101

Finding the Right Potting Soil Mix

The topic of potting soil may not seem particularly exciting, but it is crucial to the health of your plants. Potting soils were created for plants grown in containers, which have different needs than plants grown in the ground.

Not all potting mediums are the same. Succulents, for example, require different soil than ferns, just as they do in nature. To meet those requirements, various potting mixes were developed. Knowing what’s in your potting soil will allow you to provide your plants with the nutrients they require to thrive.

WHAT EXACTLY IS POTTING SOIL?

Potting soil, also known as potting mix, is made up of various ingredients that promote the growth of potted plants. These mixes are intended to keep the soil from becoming overly compacted, which can suffocate roots and impede water and nutrient flow. A good potting mix will be lighter in weight and fluffy, with the ability to retain moisture. There are numerous all-purpose blends available, as well as more specialized mixes.

Your potting soil may contain the following basic ingredients:

  • The primary ingredients are organic plant or animal-based materials. Sphagnum peat moss, rice hulls, processed forest products such as aged or composted bark, manure, compost, bat guano, poultry litter, or earthworm castings are examples of these. Coconut coir, a renewable resource made from coconut husks, is increasingly being used to replace less sustainable peat moss.
  • Natural inorganic materials aid in aeration, drainage, and moisture retention. Perlite, vermiculite, pumice, sand, and cinders are examples of these. (For more information on the distinction between perlite and vermiculite, see below.)
  • Fertilizers are the primary source of nutrients and can be all-purpose time-release fertilizers, synthetic blends, or nutrient-dense organic amendments like alfalfa meal, bone meal, and kelp meal. If you are growing edibles, avoid potting mixes that contain chemical fertilizers.
  • Other ingredients may include lime to balance pH levels, beneficial microbes, and wetting agents to aid in moisture retention. Some manufacturers have their own patented additives.

Fillers such as garden soil or topsoil may be present in cheaper or generic brands, compromising texture and quality. Although brand-name potting mixes are more expensive, they are well worth the extra money. Avoid potting soil with no ingredient list on the package.

POTTING MIX, GARDEN SOIL, AND TOPSOIL VS. POTTING SOIL

  • There is a distinction between potting soil and potting mix: even though the terms are used interchangeably. Potting soil may or may not contain soil, whereas potting mix is completely soilless. Because potting mix is sterile, it is safer for plants because it does not contain pathogens like fungus or other diseases.
  • Garden soil vs. potting soil: Garden soil is a mixture of soil and soilless ingredients used to improve garden beds. It is occasionally added to homemade potting mixes, but it is not recommended for use in containers on its own because it compacts more easily, causing root rot and drainage issues.
  • Topsoil vs. potting soil: Topsoil is soil taken from the earth’s top layer. Quality varies greatly. Though it can be used in beds and borders, it is also used for filling in holes, building berms, and other applications where quality is not an issue. Topsoil is less improved than garden soil and should not be used in containers.

POTTING MIXES TYPES

There are numerous blends available to meet the needs of various plants. Here are a few examples of the major types:

  • All-purpose: Designed for indoor and outdoor use with houseplants, hanging baskets, window boxes, ornamentals, herbs, and edibles. Other label descriptions for these include potting soil, potting mix, and container mix. The ingredients differ depending on the brand.
  • Indoor potting mix: can be all-purpose or labeled specifically for indoor plants. They are intended for use with most houseplants. Look for blends that don’t contain any compost or bark, as these can provide a home for fungus gnats, a common indoor pest.
  • Raised beds: These mixes are designed for outdoor raised bed plantings and can be supplemented with nutrient-rich ingredients for growing vegetables and other heavy feeders.
  • Garden soil: This soil-based medium may include organic or inorganic additives, as well as fertilizer. It’s meant to be used in raised beds or in-ground garden beds.
  • This soilless seed starting mix: is lighter and faster-draining to promote healthy root development. The fine texture promotes better germination by allowing more soil contact with the seeds, while the sterilized medium aids in the prevention of growing issues such as damping off disease. (Learn more about how to start seeds here.)
  • Cactus and succulent mix: These low-water plants prefer a leaner, drier soil. These mixes contain a higher proportion of perlite, sand, or other inorganic material to allow for proper drainage and air circulation around the roots.
  • African violet mix: These popular tropical flowering plants prefer a warm, moist environment similar to their native jungle habitat. This mix, designed for additional aeration, improved drainage, and moisture retention, can also be used for other houseplants.
  • Orchid mix: Native to tropical rainforests, these exotic flowers require a soilless potting mix made primarily of bark chips. To improve drainage, charcoal and perlite can be added. This mixture is also appropriate for bromeliads and other epiphytes.

POTTING SOIL QUESTIONS

Is it possible for potting soil to go bad?

Peat moss and other ingredients in potting soil decompose, causing compaction and nutrient loss. Potting soil can become contaminated and harbor pathogens. To achieve the best results, potting soil should be replaced at the start of each growing season. Unopened bags should be used within 6 months of purchase, while opened bags can last 1 to 2 years.

Is it possible to reuse potting soil?

Used potting soil can be rejuvenated, but doing so incorrectly increases the risk of disease. If the mixture smells bad or is moldy, spread it out in the sun to dry and kill pathogens. To lighten the soil, add fresh peat moss or coconut coir. Compost, earthworm castings, bone meal, and kelp meal are examples of nutrient-rich additives. Recycled potting soil can be used in flower beds, vegetable plots, or the compost pile. Reusing soil from a container where a diseased plant has grown is not recommended.

Is it necessary to apply fertilizer?

Regular watering quickly depletes the nutrients in containers. Even fresh potting mix with fertilizer will require additional nutrients. Every two weeks during the growing season, apply a water-soluble fertilizer such as fish emulsion or seaweed.

Denise Kelly, our horticultural editor, recommends wearing a mask when mixing or working with potting soil, especially if it contains fine particles or manures. She adds that breathing in perlite or vermiculite can be harmful because the particles can become lodged in your lungs, and she recommends wetting both products to eliminate airborne dust.

Source link

from AAA Tree Lopping Ipswich https://ift.tt/fSWnugC
via IFTTT

Best Time to Plant a Tree in Spring Season

Planting in the Spring: Choosing the Right Tree

Many homeowners are gearing up to take advantage of the prime tree-planting season as winter melts into spring. Establishing new trees early in the year can help them grow throughout the year and survive when hot weather arrives. However, with so many tree species to choose from, how can homeowners determine which trees are best suited to their landscapes?

“Selection of trees for planting in a home landscape is influenced by several factors, including a suitable growing site and any function they will serve,” explains Tchukki Andersen, BCMA, CTSP*, staff arborist with the Tree Care Industry Association (TCIA). “Will they bring birds into the area?” Can you shade a patio? Unwanted view on the screen? Improve the appearance of your home? “Trees can provide contrast and relief from surrounding buildings, as well as seasonal interest in areas close to the home,” Andersen says.

When choosing a tree, we recommend that homeowners consider the following factors:

  • hardiness (ability of the plant to survive extremes of winter cold and summer heat, and sudden temperature swings) (ability of the plant to survive extremes of winter cold and summer heat, and sudden temperature swings)
  • mature size and spread
  • rate of growth above and below ground
  • available above and below ground space
  • aesthetics
  • moisture requirements for tree survival
  • maintenance requirements for the life of the tree
  • availability in nearby nurseries
  • ornamental effects include branching habit, bark texture and color, flowers, fruit, and foliage

A professional tree care company can assist you in determining which tree species perform well in your area and are appropriate for your desired planting location. Arborists typically examine the specific planting site to determine the tree’s suitability for the location. Environmental factors may include:

  • Problems with disease and insects that may limit your options
  • prior use of the planting location
  • Poor drainage, high or low pH, and soil nutrition are examples of soil conditions.
  • channelized winds’ presence or absence
  • the positioning of utilities above and below ground
  • the plant’s proximity to roads, walkways, and security lighting

Is there enough room for a tree?

The available space at the specific site, as well as mature tree size, are important considerations, and addressing these limits will go a long way toward lowering maintenance costs. Utilities, in particular, should be treated with caution. Plant your tree under or near overhead power lines if it will grow to be 25 feet or taller. Remember the underground utilities; they may need to be serviced at some point, and the tree should never get in the way of this. To ensure that your chosen planting site will not interfere with utility maintenance, dial 811 for the national “Call Before You Dig” hotline. Remember that ground-level utility structures such as transformers and individual service connections require space to be serviced as well.

Planting Locations

Tree planting near power lines, parking lots, streetlights, sewers, traffic control signs and signals, sidewalks, and property lines may be prohibited by local ordinances. Tree planting permits may be required by municipalities for trees planted on city property. City codes frequently require the city to maintain trees on city property, so citizens planting an incorrect selection can cause problems for both themselves and the municipality.

Locate a professional

A professional arborist can evaluate your landscape and work with you to determine the best trees and shrubs to plant and how to protect them. Homeowners who want a professional arborist to evaluate their trees should contact…

Source link

from AAA Tree Lopping Ipswich https://ift.tt/i7qfGgw
via IFTTT

Mulching to Save Time and Water Your Trees in Summer

Mulching properly can help you save water and protect your trees this summer.

Learn why mulching is essential for tree health and how to do it properly.

California residents are doing everything they can to conserve water due to the warmer weather and lack of rain. Though they may not require daily attention, routine care is critical to ensuring the health, beauty, and safety of your property’s trees, especially during droughts.

So, how do you keep your trees healthy and irrigated while also conserving water?

Mulch is one of the best ways to support the health of your mature trees and saplings while conserving water. Mulching is simple, and this protective ground covering not only saves water but also controls weeds and enriches your soil. Mulch is a miracle!

You’ll learn how to mulch trees, how much mulch to use, and which type is best for your needs by following the steps outlined below.

5 Ways Proper Mulching Benefits Trees

First, consider the big picture as well as the specific benefits mulch provides for your trees. Knowing how mulch works can help you focus your efforts and get the most out of it.

1) Preserve soil moisture

Mulching your trees forms an insulating blanket over the soil, reducing evaporation and retaining moisture for the tree’s roots. This is especially important if you’re watching your water usage during a drought.

Mulch also inhibits the growth of weeds and grasses, preventing tree roots from competing for water with invasive plants. When it rains, the mulch will help to prevent water loss through run-off and erosion.

2) Normal soil temperature

You can also moderate soil temperature fluctuations with the right amount of mulch. Mulches protect the ground from the sun and heat during hot weather, keeping the soil cool. This prevents the top soil around the tree roots from drying out and hardening.

Mulches help the soil retain warmth during cold weather, lowering the risk of frost damage or root injury.

3) Enhance soil health

Organic mulch provides structure, nutrients, and aeration to the soil as it decomposes. More on organic vs inorganic is covered in the following section.

4) Provide Security

When mulch is applied properly, it protects the roots, keeps the trunk dry, and prevents soil compaction caused by foot traffic and lawn mowers.

5) Prevent weed and grass growth

Mulching, as previously stated, discourages the growth of weeds and grass. Weeds and grasses that grow at the base of a tree steal not only the moisture from the soil, but also the nutrients that the tree requires.
Organic vs. Inorganic Mulching for Trees

You generally have two options when it comes to selecting the best type of mulch for your landscape: organic and inorganic. Both types have distinct advantages and disadvantages.

Mulch that is organic

Organic mulch is the way to go if you don’t mind a little more routine care and want to improve the health of your topsoil.

Organic mulch comes in several varieties, including:

  • Chips of wood
  • Straw
  • Pine cones
  • Hardwood or softwood shredded
  • Leaves of Bark

As previously stated, organic mulches improve soil structure and fertility as they decompose. However, because organic mulch degrades over time, it may necessitate more maintenance and reapplication.

Mulch (Inorganic)

Inorganic mulch may be a better option if you want something more visually appealing and low-maintenance.

Inorganic mulch comes in several varieties, including:

  • Pebbles or stones
  • Rubber
  • Tarp
  • Gravel

While inorganic mulches do not provide the same soil-enriching benefits as organic mulches, they do provide longer-lasting weed prevention with less upkeep.

Inorganic mulches can also be more aesthetically pleasing. River rocks or other multicolored stones make excellent mulch and can be a stunning addition to your landscape.

Mulch all the way to the drip line

When applying mulch, it’s critical to understand the scope of the area you’re covering and how close you should get to the trunk. Mulch should be applied away from the trunk, starting at the “root flare.” This is the area at the base of the tree where the roots flare out above ground.

As the tree grows, the circumference of the mulch area should expand. The mulch should ideally extend all the way to the tree’s canopy, also known as the “drip line.”

Avoid excessive mulching.

Over-mulching is the most common mulching mistake. It is not advisable to pile mulch over the root flare and up the trunk. Furthermore, the mulch depth should be between two and four inches, or less if the soil is poorly drained.

Finer or denser mulch, such as pebbles, should typically be piled one to two inches deep to ensure adequate oxygen and water reach the root system.
Vintage Tree Care’s arborists are here to assist you.

You now understand how mulching can benefit the health of your trees while also saving water. We’ve also talked about the proper method, materials, and frequency. It’s now time to start mulching those trees.

A certified arborist can assist you if you have a tree that has already been over-mulched or if you are concerned about the general health of your newly planted or mature trees. If your trees are showing signs of stress, call us at (707) 495-4686 or contact us online to schedule an arborist inspection.

Source link

from AAA Tree Lopping Ipswich https://ift.tt/ZwGkFCj
via IFTTT

Keeping Your Home and Property Safe from Wildfire

Regular vegetation control might help to reduce fire fuels surrounding your property.

5 things to do before fire season to build a defensible area around your house

Because of the protracted drought, the Sonoma County fire season now lasts more than half the year. Whatever the season, there is always something that can be done to make the area surrounding your house less susceptible to wildfires. Careful and consistent vegetation care on your land will limit the available fire fuels and create a defensible area.

What exactly is defensible space?

CalFire defines Defensible Space as “the buffer you construct between a structure on your property and the grass, trees, bushes, or any wildland area that surrounds it.” Creating this buffer can slow or stop wildfire spread and make your home less vulnerable to oncoming flames, radiant heat, and embers. It also provides firemen with a safer space to protect your property.

Zones of Defensive Space

CalFire has established three Defensible Zones, with Zone 2 being the farthest away from your house and Zone 0 being less than five feet away. Each zone has its own set of legal rules. Though Zones 0 and 1 will be the major emphasis of this vegetation management guide, it is important to have a general understanding of the needs for all zones.

Zone 0

The Ember-Resistant Zone encompasses the region within five feet of your house or other building. Zone 0 restrictions, which go into effect on January 1, 2023, will prohibit the use of combustible goods or woody landscaping in the area around your house or other building.

Zone 1

Within 30 feet of your house or building is the “Lean, Clean, and Green” Zone. Zone 1 activities are focused on the spacing and trimming of trees and shrubs, as well as the removal of dead vegetation.

Zone 2

Reduce the Fuel Zone 2 covers the region between 30 and 100 feet from your house or building on your land. In this zone, grass and weeds must be no higher than four inches, fallen foliage from trees and shrubs must be no deeper than three inches, and exposed wood piles (which are only permitted in this zone) must be surrounded by ten feet of bare mineral soil.

In Zone 2, there are additional tree spacing rules. Read Defensible Space and Wildfire Prevention to learn more.

How to Manage Vegetation to Create a Defensible Space Around Your Home

Preparing your yard for fire protection entails several tasks that you would typically do while caring for your property. However, executing them properly and as frequently as required becomes more important if you live in a wildfire-prone region or in a drought-stricken area.

Following these five tips will put you on the right track to establishing efficient wildfire defensive zones.

1) Get rid of any dead or dangerous trees.

There are many reasons why you should remove dead or hazardous trees from your property. One example is the risk of fire. Drought-stressed trees are more susceptible to disease, pests, and fire, all of which may lead the tree to collapse before you detect a problem.

A decaying tree is not always obvious to the untrained eye. One or more of the trees on your property may be in danger. Hiring an arborist with a Tree Risk Assessment Qualification may detect troubled trees and remove them if it is too late to rescue them.

2) Prune and trim trees and shrubs

Regular tree cutting and pruning are required to maintain a wildfire-resistant environment. Tree branches should not overhang your roof and be at least 10 feet away from neighboring trees, chimneys, and stovepipe outlets.

Woody bushes may potentially be a fire threat if not trimmed on a regular basis. It’s also a good idea to space them out and keep them away from decks and other combustible materials. To learn more, read Tree Pruning for Fire Prevention & Defensible Space.

3) Get Rid of Dead Vegetation

Consider any dead vegetation on your land as fuel for a wildfire. Never allow it gather anyplace on your property, and clean it from your yard on a regular basis. Dead leaves, twigs and branches, dried weeds and grass, and dead plants are all examples of this.

4) Keep the roof and gutters clean.

A wildfire’s embers might strike your roof. Keep your roof and gutters clean of debris to ensure they don’t locate any fuel.

5) Select Fire-Resistant Landscaping Plants

Plant fire-resistant trees and shrubs, especially within five feet of your house. It is critical to understand that fire-resistant does not imply fireproof, and that all plant is vulnerable to wildfires. Some plants are inherently more flammable and will burn quicker and with more intensity, thus fuelling and accelerating the development of a wildfire.

Avoid plants with woody, non-green interiors, more waxes, resins, or oils, thicker growth patterns, and plants that lose a lot of leaves or bark (kindling). Another factor to consider when planting plants near your house is how tall and quickly they grow, since this may provide an issue with spacing.

Source link

from AAA Tree Lopping Ipswich https://ift.tt/gXVSlhw
via IFTTT