How to Save a Dying Tree with Guaranteed Success

Written by Admin and published on https://worstroom.com/

Trees are living things that live, get sick, and will eventually die; just like human beings. However, when a beloved tree begins to deteriorate, you shouldn’t lose hope! Let us help you! This article will guide you on how to save a dying tree.

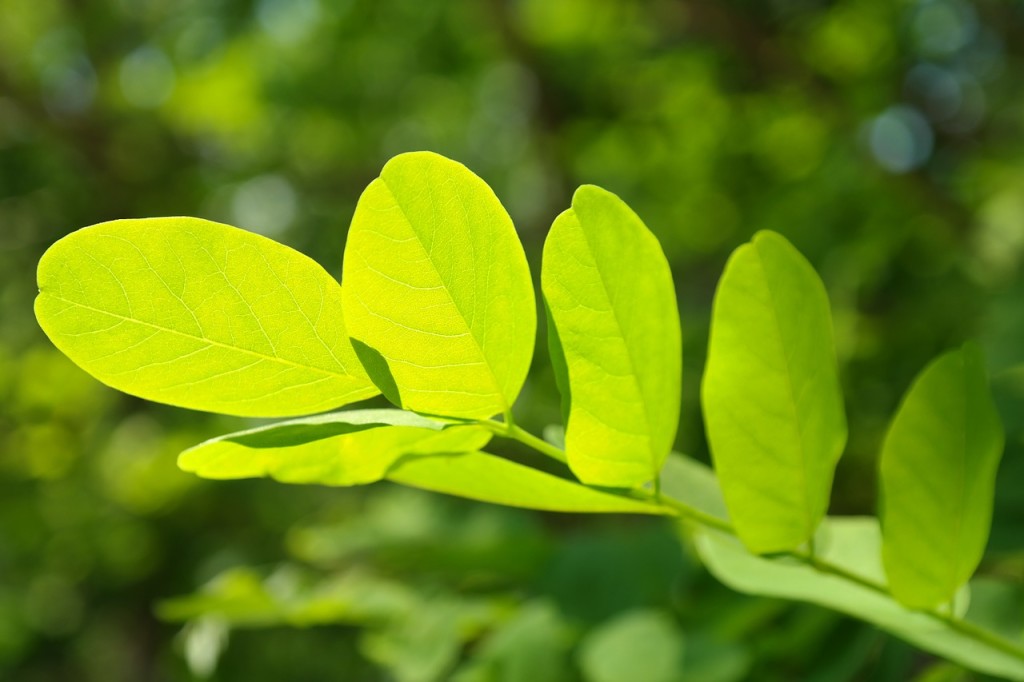
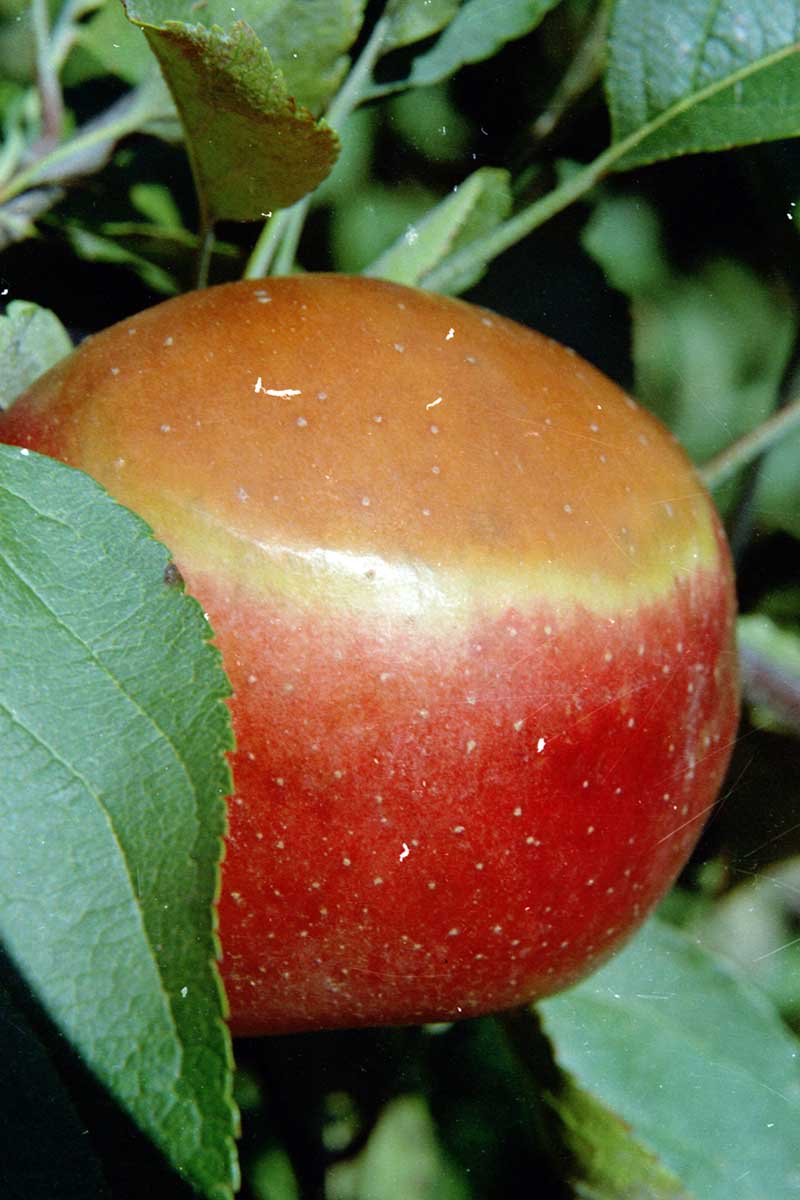
Trees add life as well as color to your garden. They do not only provide flowers, fruits, and shade but also serve as homes to beautiful birds and other animals.
A healthy and beautiful tree can be a real prized ornament in your garden or backyard. However, this is just one side of the story! On the other hand, a sick and dying tree is something that you should be concerned about.

How to Save a Dying Tree: Easy Tree Health Success

how to save a dying tree

It’s a rare event that a tree gets sick. If you’re wondering how to save a dying tree, you’re one of the unlucky, but it’s not a random roll of the dice.

Most trees, once established and mature, have the ability to fend off disease, problems associated with insects, and extreme weather conditions.

But once a tree’s health is compromised, it becomes vulnerable to all of the above problems, making it crucial to act as soon as possible. I’ll help you identify the problem and provide some actionable steps you can do to restore your tree to full health.

Learning how to revive a dying tree is the hard part, but we’ve made it easy here. The easy part is the healing process.

How to Save a Dying Tree

First and foremost you need to confirm that your tree is, infact, dying. Below this section I list out the signs of a dying tree that will help you confirm the problem. Second, you need to identify the specific problem.

Sometimes taking the general steps in this section is enough to help the tree get enough strength to ward off the illness itself. Other times you’ll need to apply some specific actions, which we point out below.

These can include pesticides, restoring macronutrients to the soil, and more. In the worst case scenario you can consult a professional arborist.

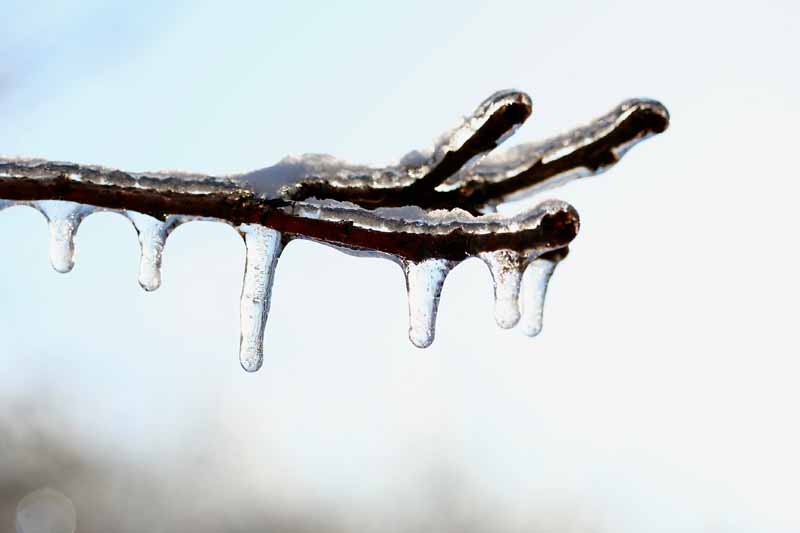
Correct Moisture Problems

Mature trees tend to be able to survive dry seasons or even overly wet ones. Younger trees can face issues associated with too much or too little water.

Over-watering is often a weather issue and not one you’re creating by watering the lawn. It has to do with the drainage of the soil around the tree.

water logged soil can cause over-watering in trees, leading to dying and illness

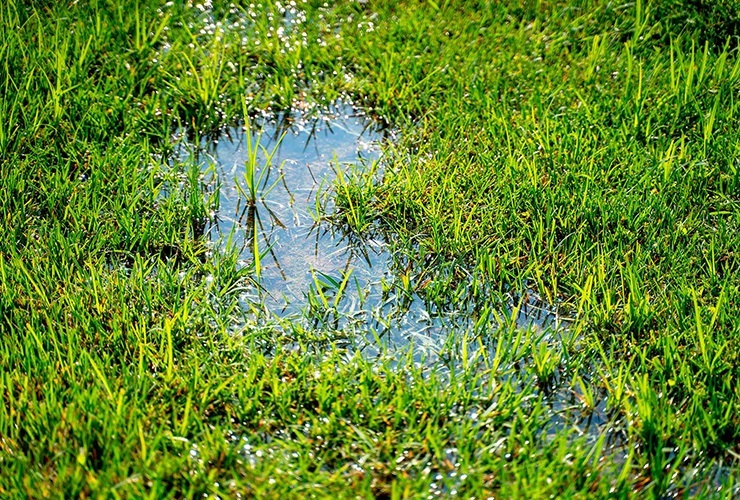
Look for water-logging, where the roots of the tree have become soft and soggy. Other signs include the growth of various types of moss and molds on the dirt around the tree and a lack of grass.

If the soil around the tree is constantly saturated with water, this is a problem and you need to work on getting water to drain away from that area or introduce more sunlight.

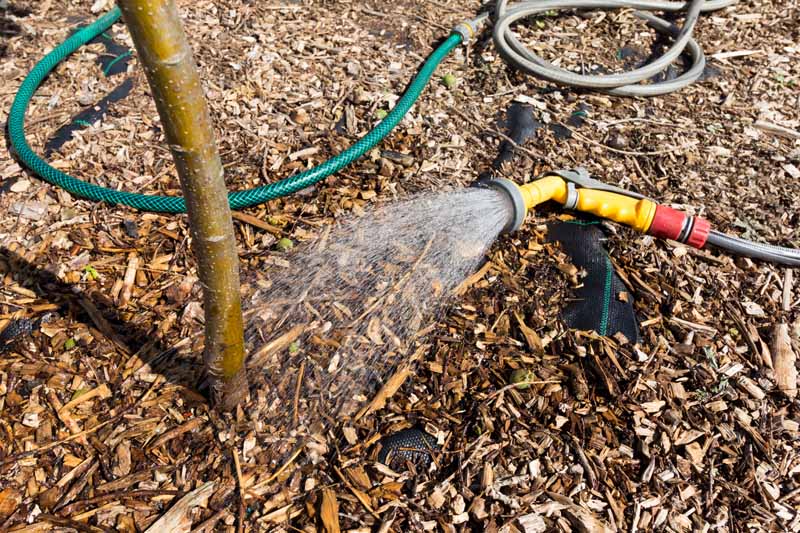
If you believe under-watering is the issue, this is easy to solve with a garden hose or an automatic or alternative sprinkler system. You can even fill up a five-gallon bucket with water and carry it to the tree. Whatever it takes for our friend to feel better!

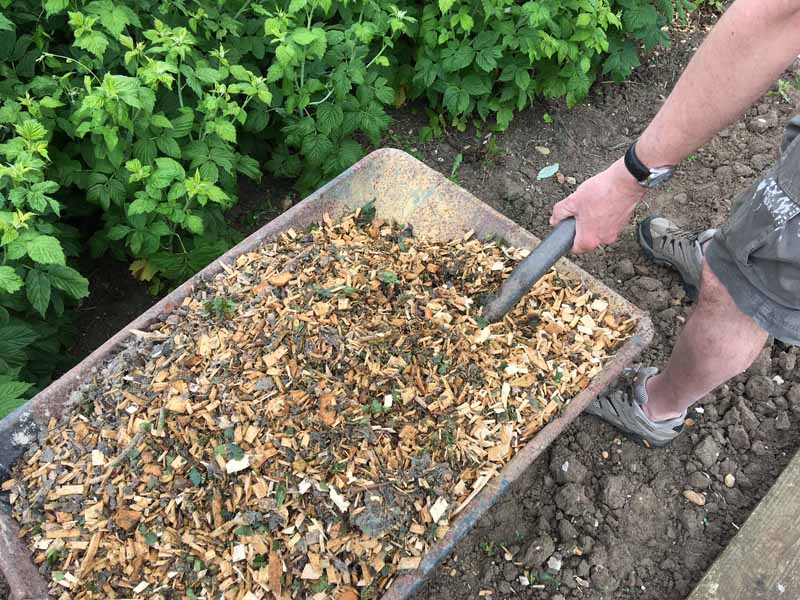
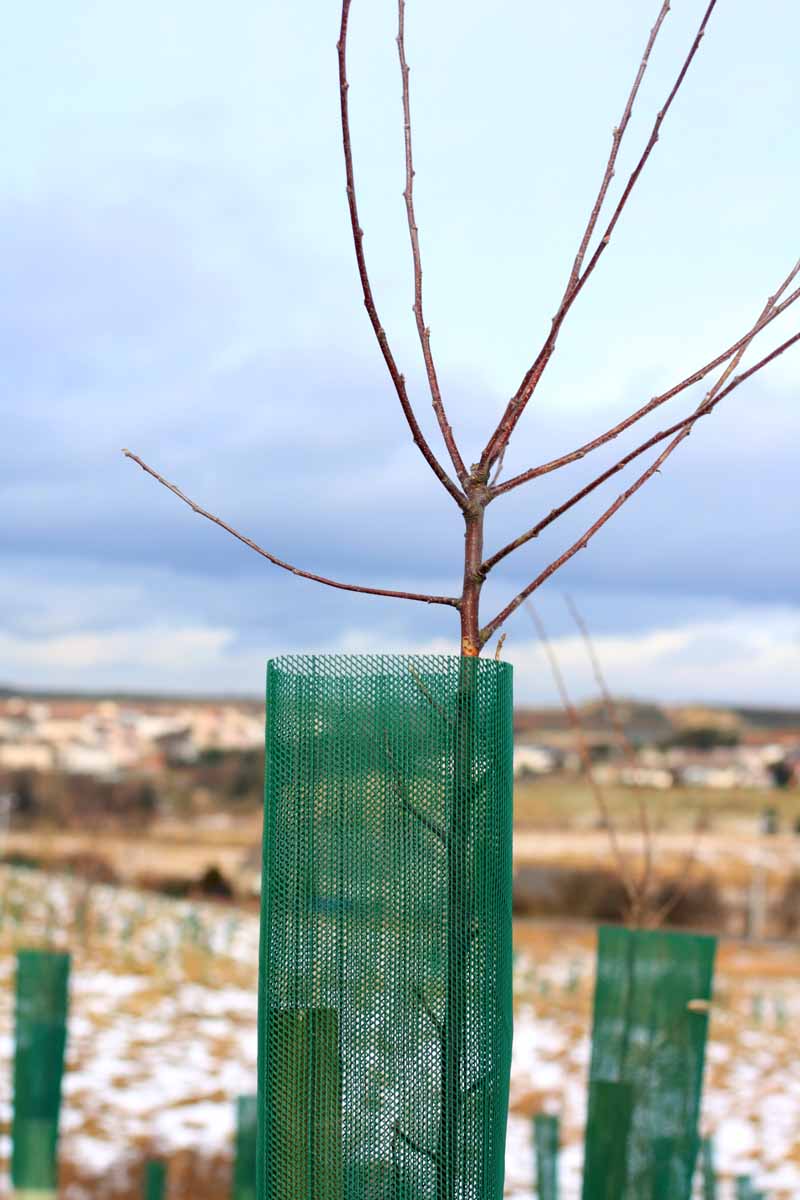
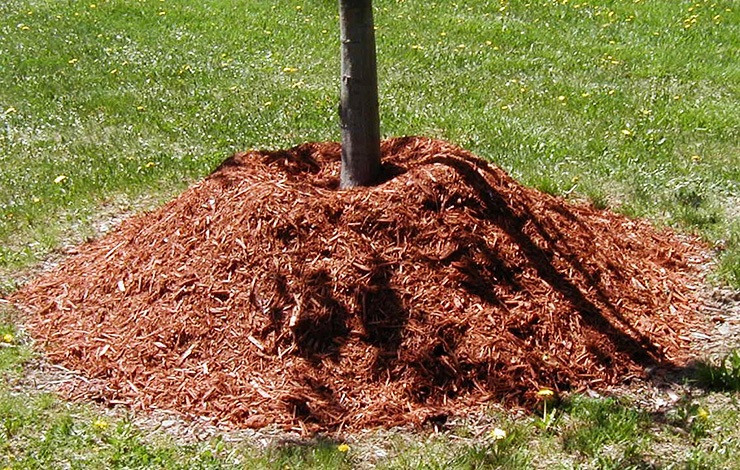
Don’t Add to Much Mulch

Mulch is not bad, but there’s a common problem where people tend to build up a cone around the base of the tree using mulch. I’m not sure why, but so many people do this. There are a ton of problems associated with this:

  • The roots can’t breathe
  • The roots and trunk can begin to rot
  • Insects, fungi, and bacteria will infest and infect the area

If you’re placing thick layers of mulch around the tree, simply thin that area out. If you’ve allowed mulch to build up around the base of the trunk, you need to remove all of it.

too much mulch around the trees can starve the roots of oxygen and lead to bacteria and fungi, which can lead to a dying tree

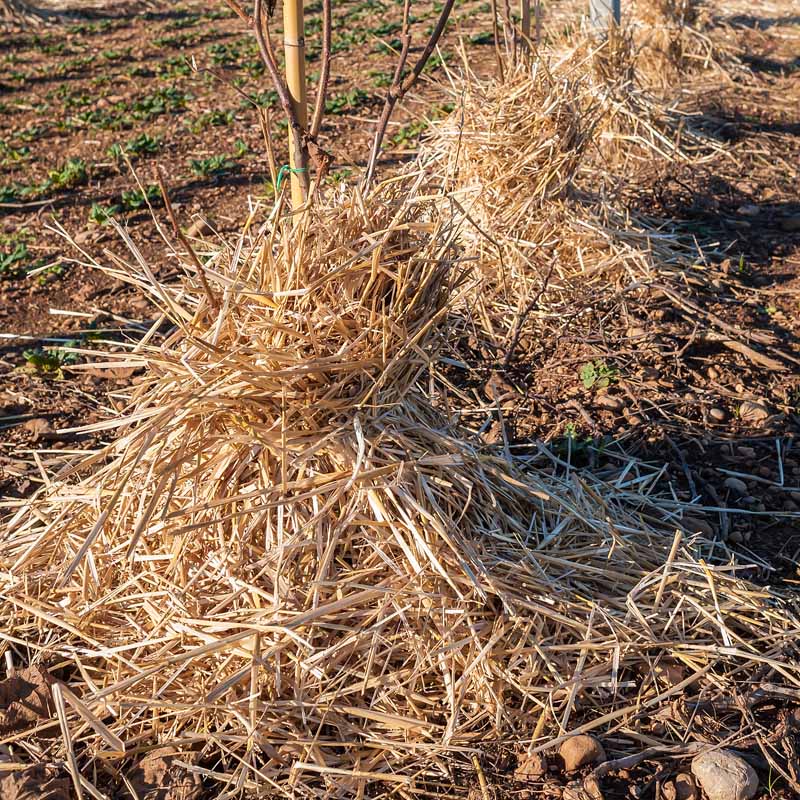
The same goes for fertilizer. Don’t build up a mound around your tree! Fertilizer especially can have ill effects, such as “burns” due to the chemical makeup.

Use the Right Fertilizer

Many people just buy an all-purpose fertilizer and chuck around the tree like mulch. That can be fine but it can also be deadly. What you really need to do is perform a soil test in the area of the dying tree and find out exactly what macronutrients are missing.

These are nitrogen, phosphorous, and potassium, which are what the fertilizer numbers represent on the front of the bags.

Just like mulch, too much fertilizer can allow all kinds of bad bugs and bacteria to make a home around the roots of your tree, which you can think of as the tree’s mouth. We don’t let bugs make a nest around our mouths any more than we should allow that for a tree.

Direct contact of the fertilizer on the roots can also “burn” them chemically, so go light if you’re sprinkling it that close to the tree.

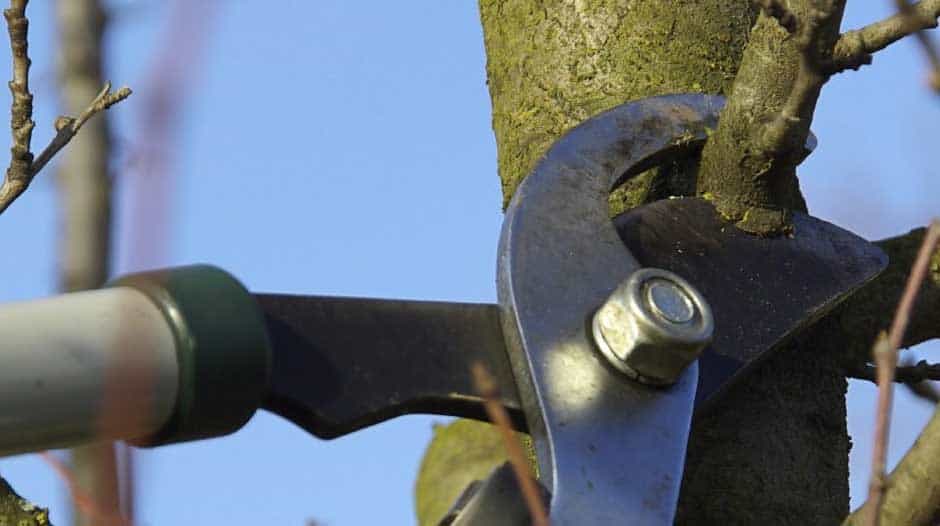
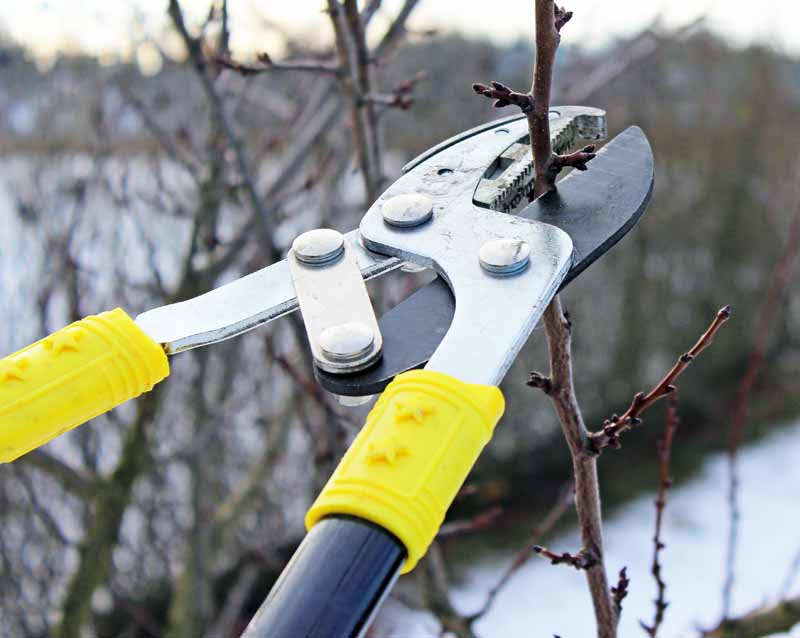
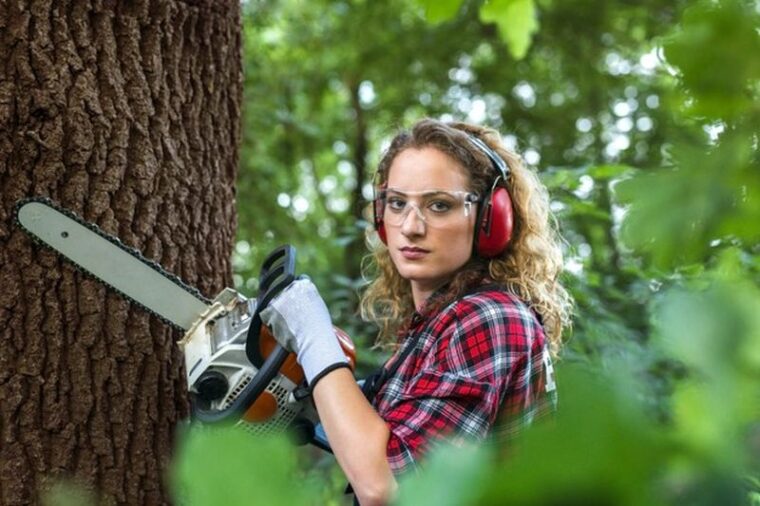
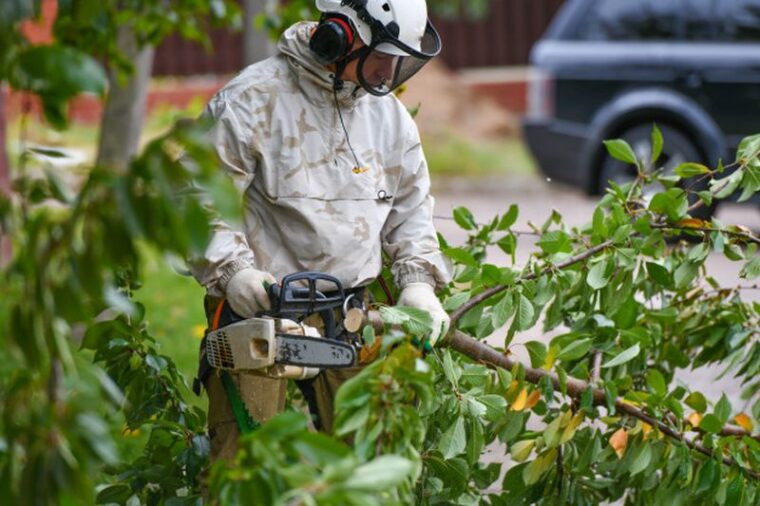
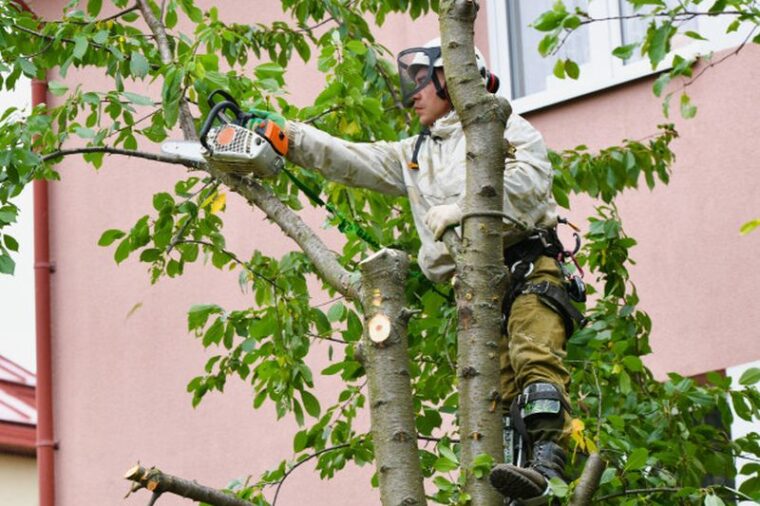
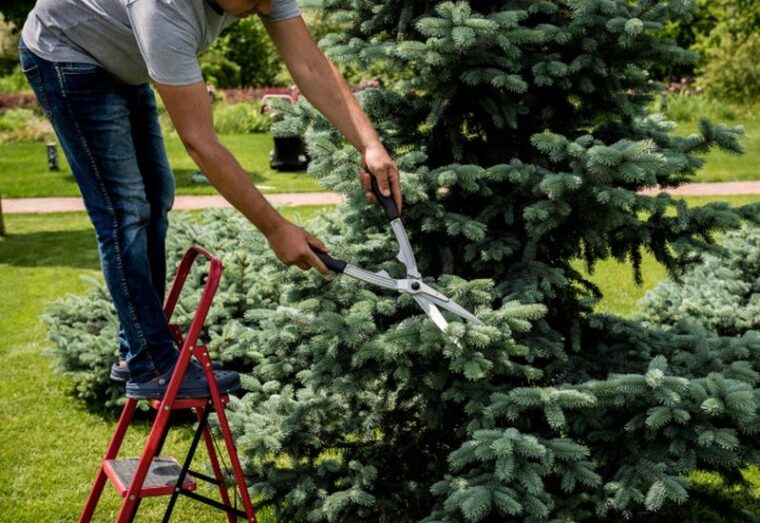
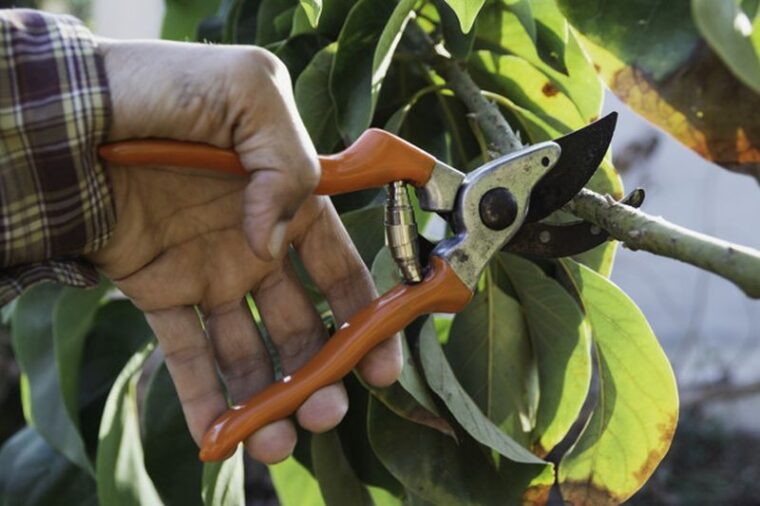
Prune the Sick Limbs

This is tricky because it’s hard to know how far a disease has spread, but it is possible to remove visibly diseased areas from an otherwise healthy tree. By pruning limbs or even sections of bark and trunk, you can stop the illness from spreading.

Make sure, after doing this, that you sterilize your shears, saws, and knives you used to perform the job.

Make sure you research how to prune the type of tree you’re working with. There are various pruning techniques that are appropriate for specific species of trees. Severe pruning can send the tree’s system into shock, and it’s already struggling, so please take care when doing this.

Signs of a Dying Tree

Before you start going to work to save a tree, you need to make sure it actually needs saving and you’re not being overly cautious. There are some obvious signs a sick tree will give.
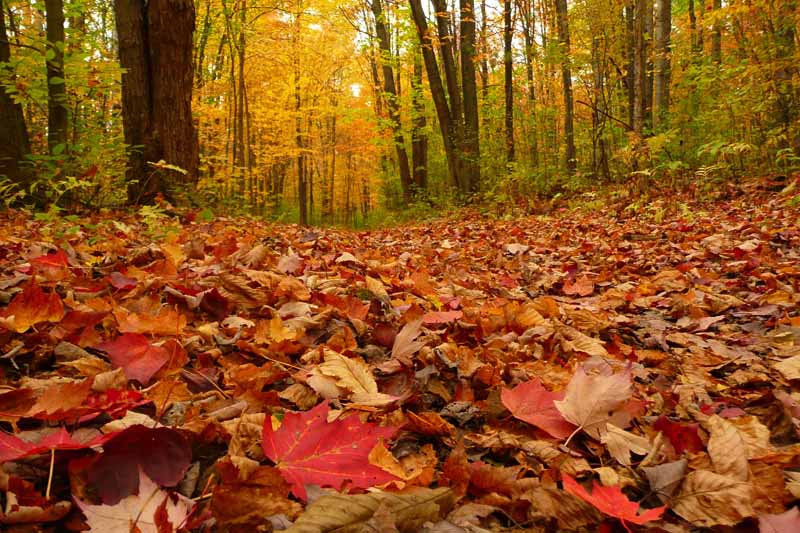
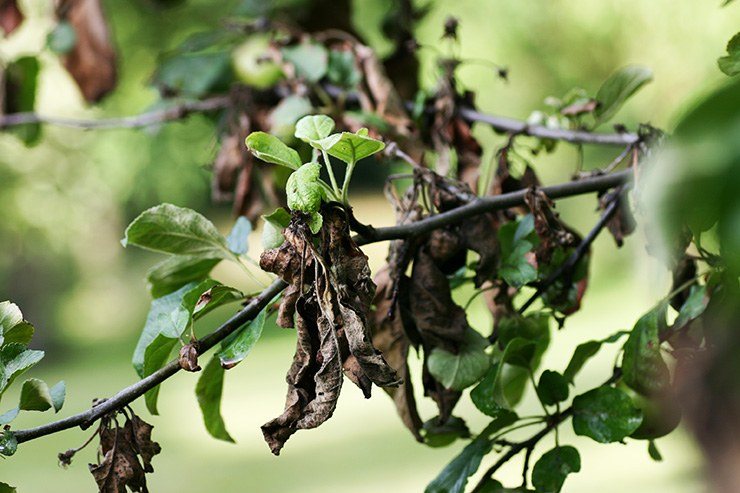
Dried Leaves

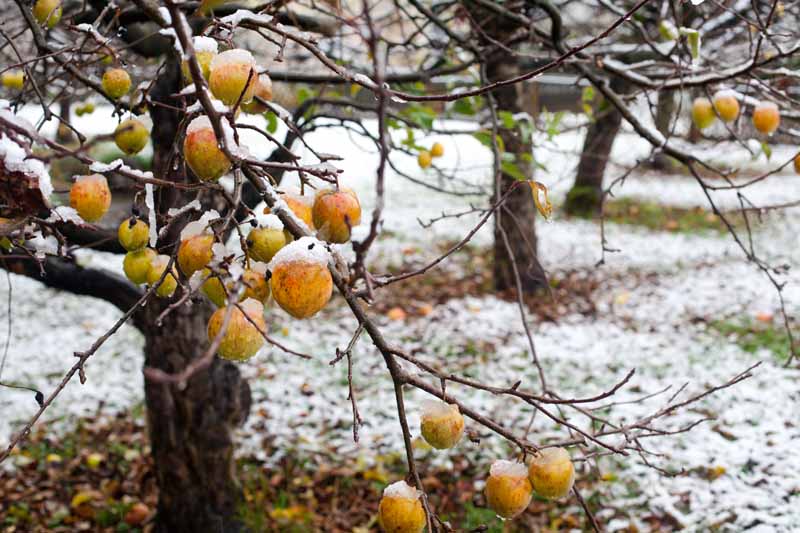
If a tree’s foliage becomes crunchy or loses its leaves during the spring or summer seasons, that’s a sign there is a problem. But don’t overreact during the autumn or winter months.

dried leaves can be a sign of a dying tree if it's not currently autumn or winter

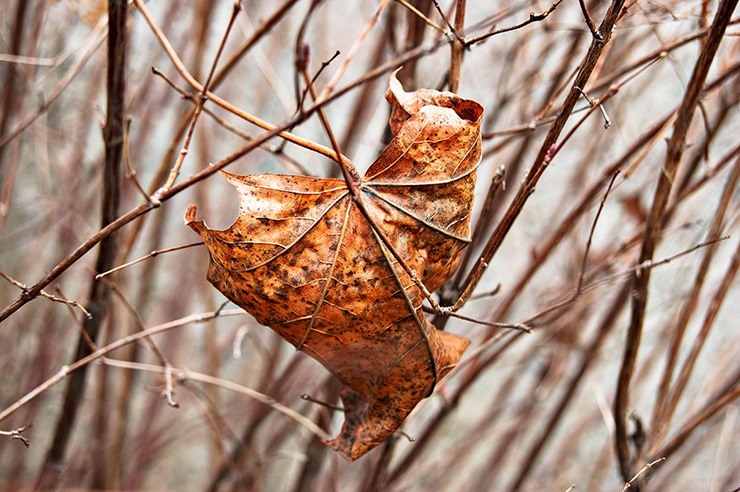
You may notice some branches are completely healthy and full of leaves while others are scanty, or that the entire tree has less leaves than others of the same species at the same time. That’s a bad sign.

Weak Branches

Sometimes the leaves may be doing fine but you notice the branches are starting to sag under their own weight. This happens especially with trees with many and heavier leaves, like the types of willow trees, for instance.

If you see the branches losing strength and sinking under the weight of their own sub-branches and leaves (and even worse during and after a rain), then your tree is likely sick to some degree.

Focus your attention where the branches split off into child branches. Do these joints seem like they could break eventually? Poor joints are a bad sign.

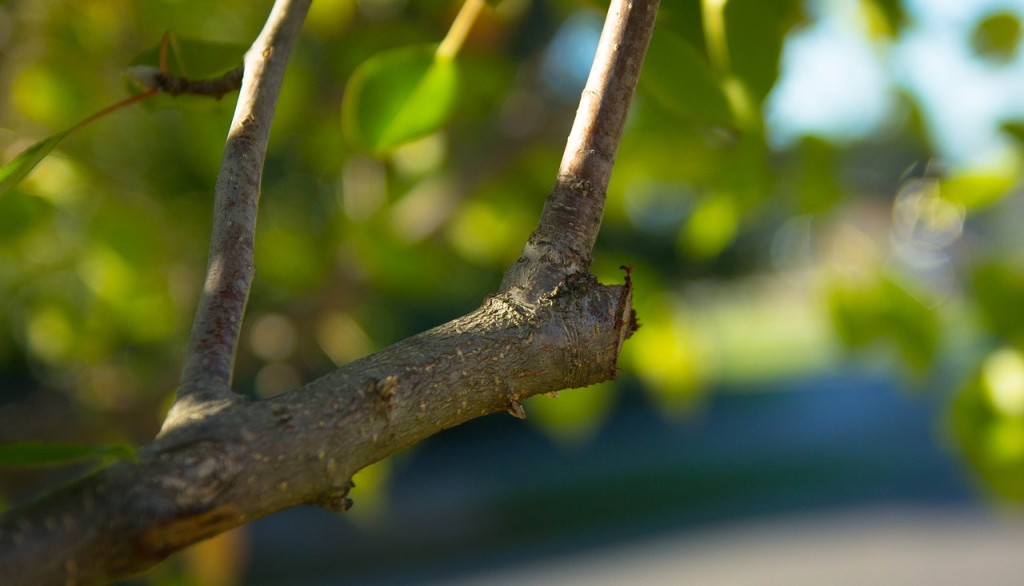
Dried Branches & Trunk

Branches should bend some, even in more naturally brittle trees. Check to see if the branches are still pliable. If they begin to crack and snap far too soon, then you’re looking at deadwood.

All trees have elasticity, even in the trunks, or they wouldn’t be able to survive most winds. A lack of elasticity is a very bad sign.
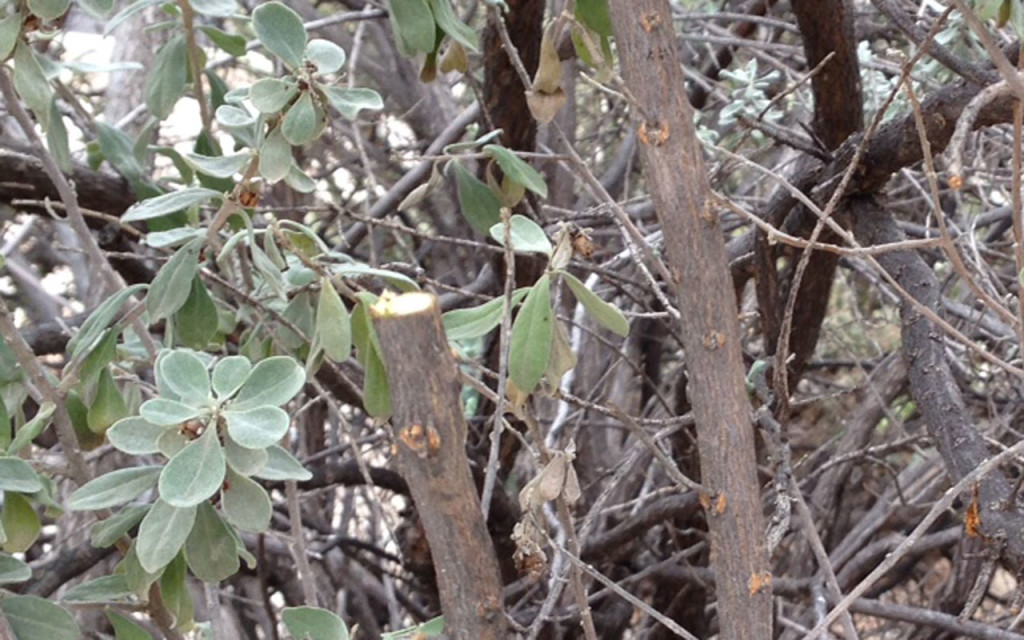
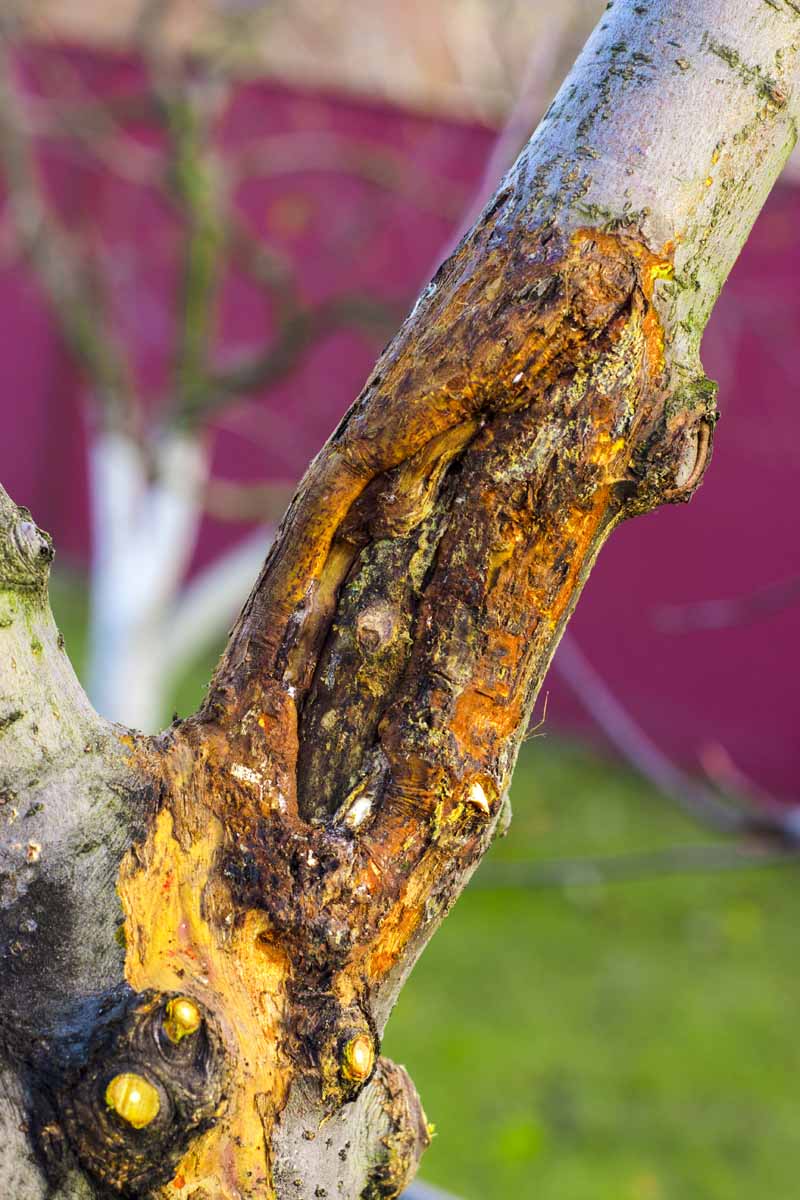
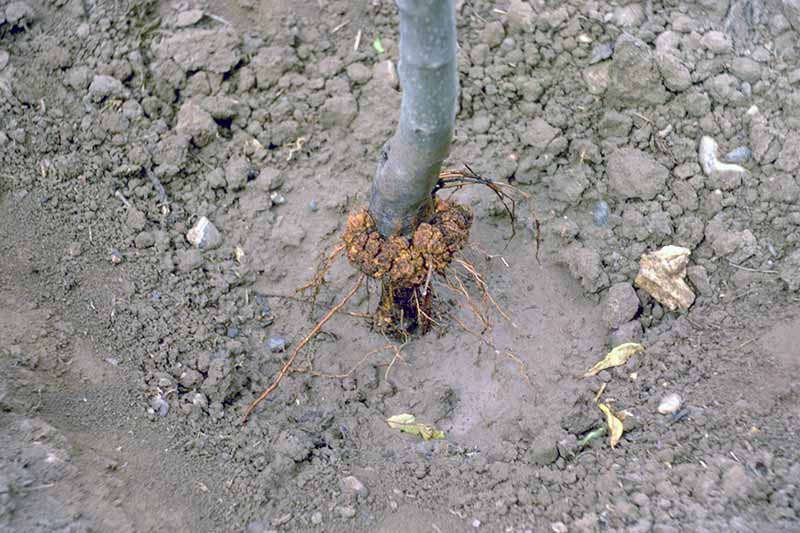
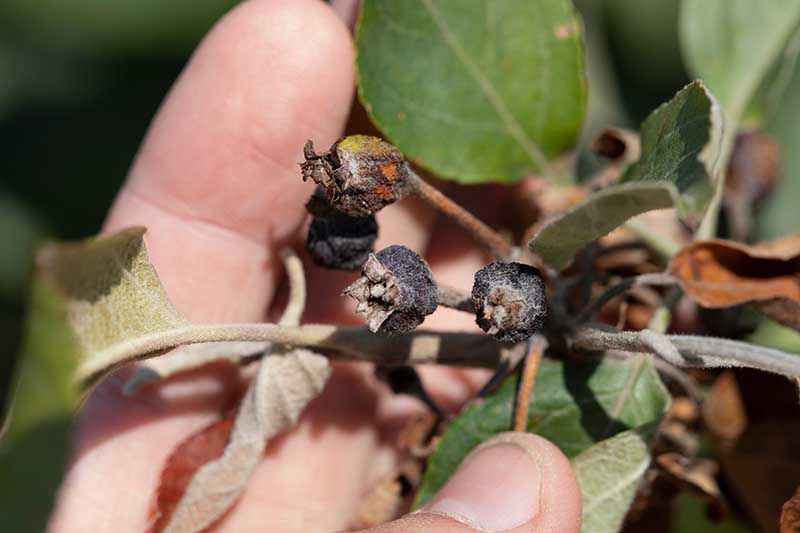
Softness & Decay

If you find softness and decay that’s not related to water-logging, this is a very bad sign that your tree is dying, because it’s not fighting off disease, bacteria, and fungus.

Some fungus or mushrooms growing on the trunk and roots can be fine. But you’ll know there’s a problem when entire areas have become extremely soft to your touch.

a tree canker is a sign of decay in a tree caused by bacteria and fungi that should be pruned immediately to save the tree and return it to full health

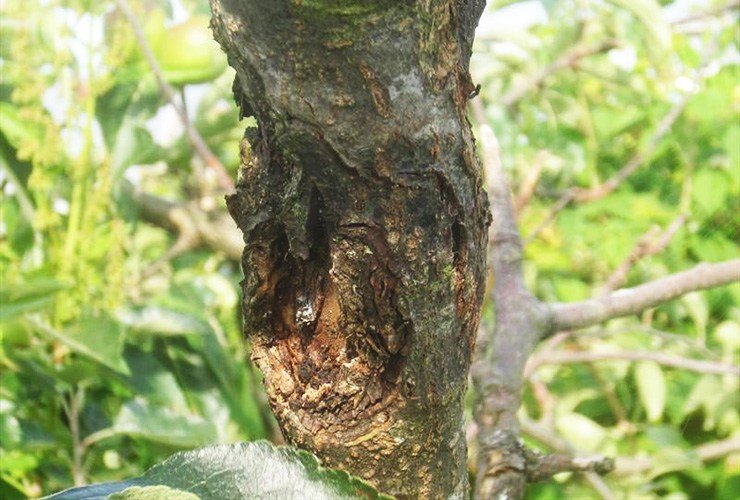
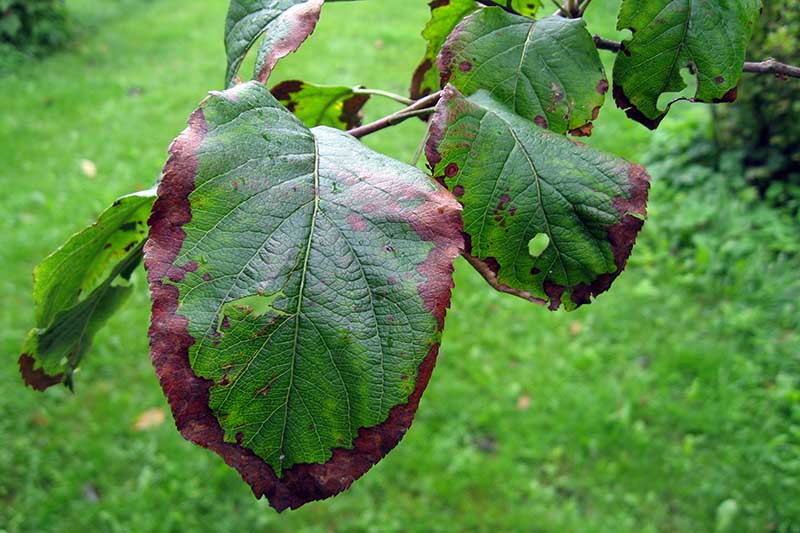
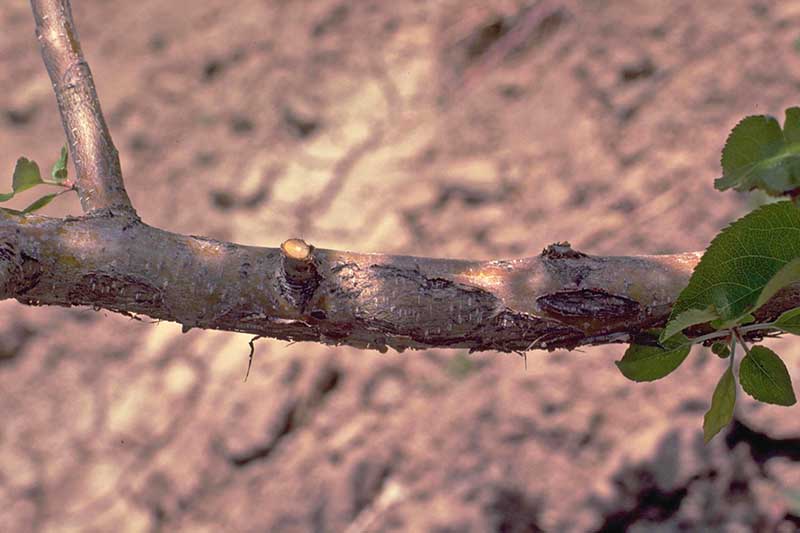
Look for what are called “cankers,” which are sores caused by bacteria and fungi that infect the tree, creating an open wound.

You need to prune these areas soon, because then the illness can penetrate deep into the tree and get beyond the exterior defenses. This stress will make the tree far more vulnerable to other problems.

Leaning Tree

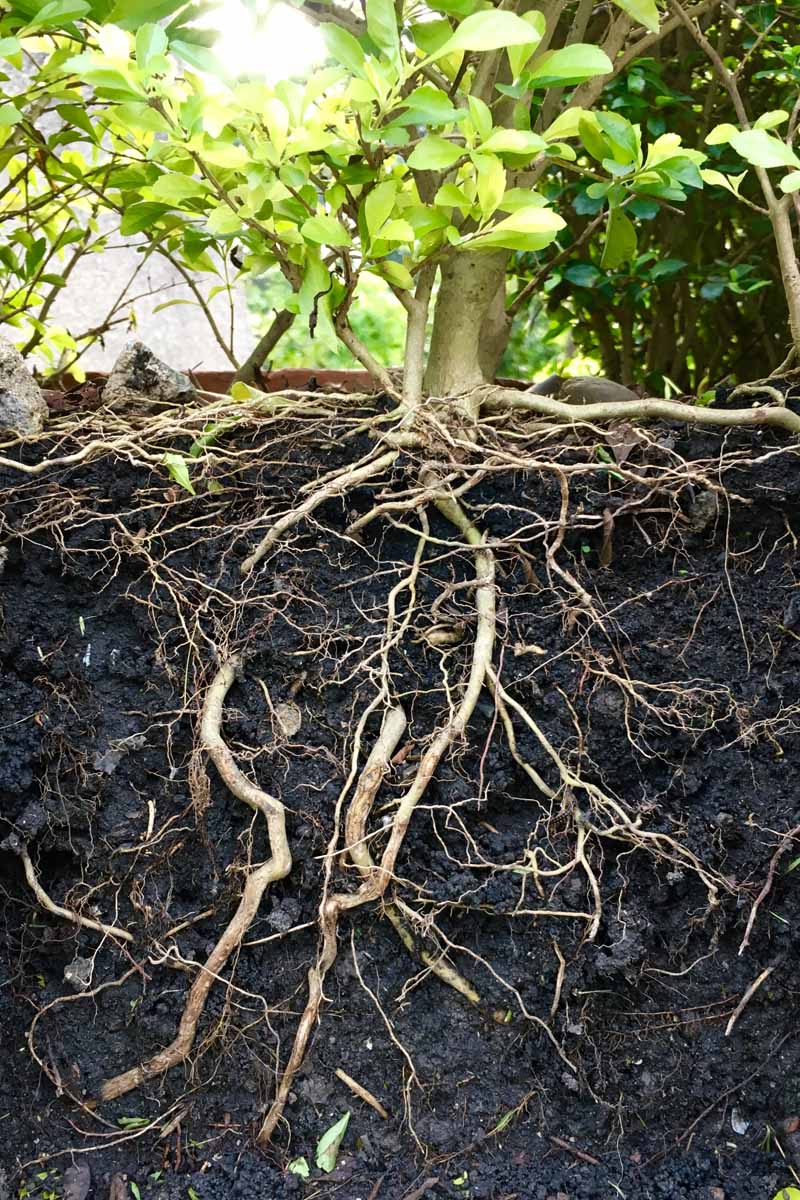
When a tree is dying, the root system becomes weak and the tree can start leaning. I’m not talking about a younger tree growing towards the sun, but the entire structure leaning to one side from the roots and up.

This is because the roots aren’t able to hold it in place in the soil, a big sign there’s an illness involved.

Saving a tree that is leaning isn’t worth attempting. You should consider having it removed, especially if it is leaning towards your house, garage, carport, or those of a neighbor. It’s unfortunate but safety matters more.

Can a Dead Tree Be Revived?

Can a half dead tree be saved? Yes, that’s basically what we’ve been talking about. But can a dead tree be revived, as in a fully dead tree?

Sometimes you can do your best and experience new leaf and branch growth starting lower near the base, spawning off of new roots or a revived root system. But in general, no, you won’t revive the entirety of the tree.

Causes of a Tree Dying

We mentioned above about over and under-watering, a lack of soil nutrients, mulching and fertilizer issues, and disease. Established trees are resistant to most everything, including these problems, except for the worst diseases.

Here are a few common diseases you may encounter:

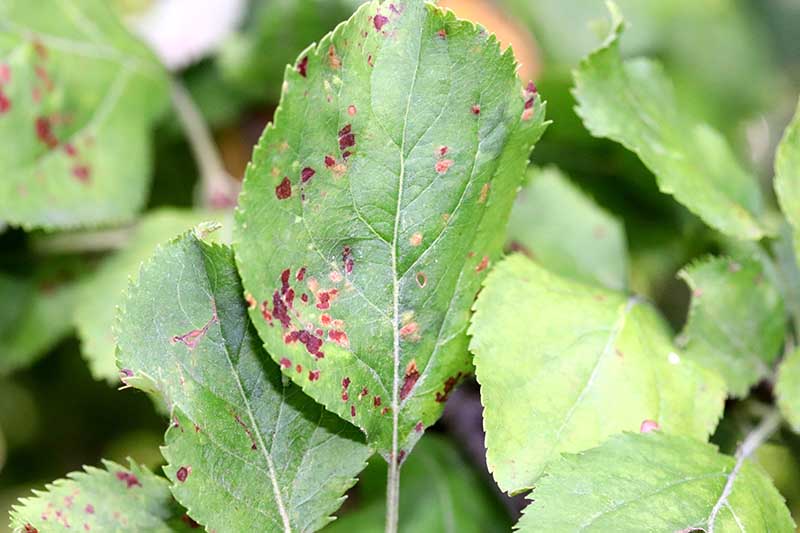
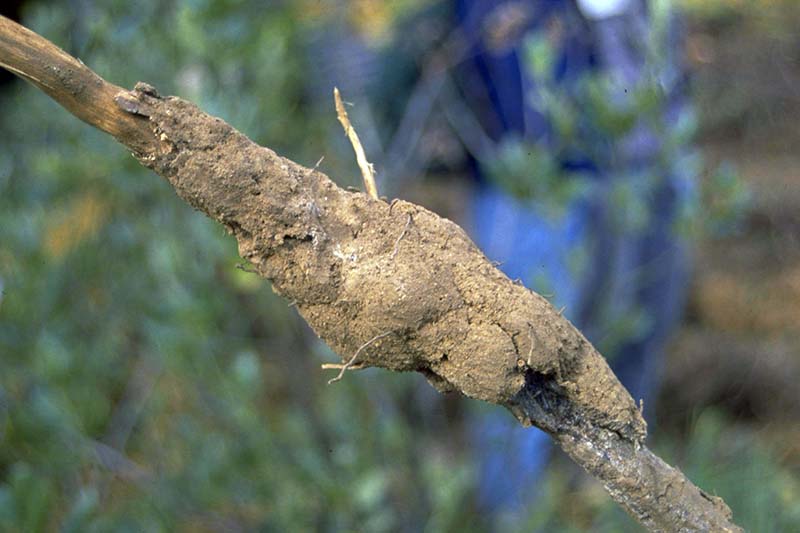
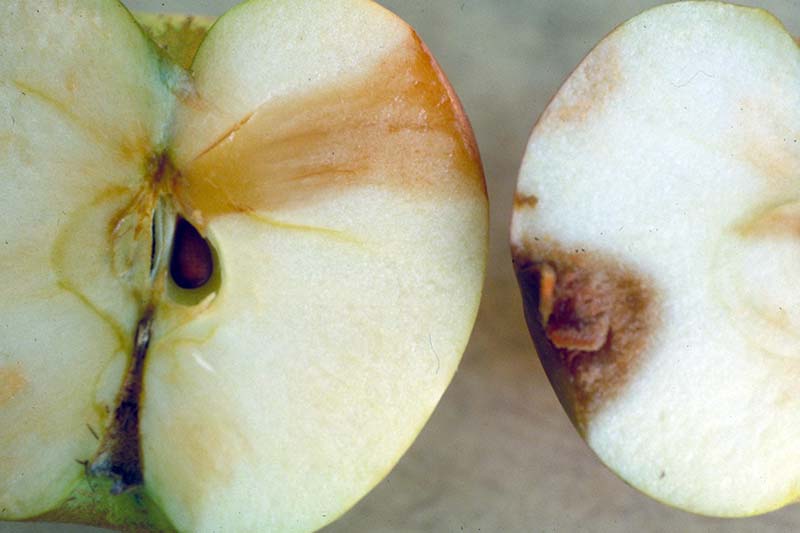
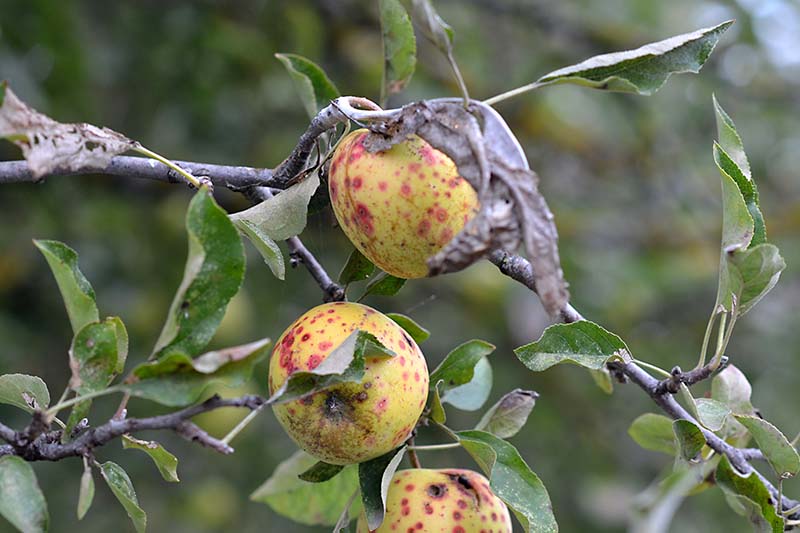
American Chestnut Blight – Caused by the pathogen cryphonectria parasitica, it can cause sunken cankers, orange-colored spots along branches or the trunk, and even cause yellow spores to be emitted.

Professionals can apply a soil compress cure or a hypovirulence transfer.

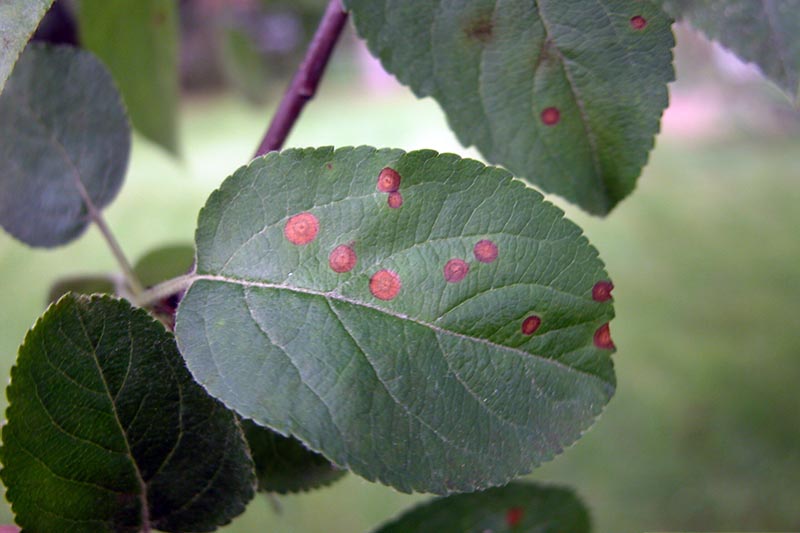
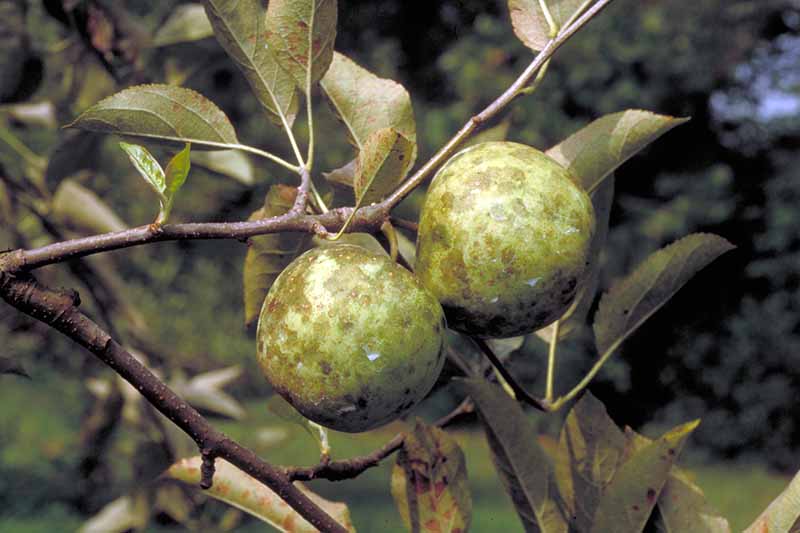
Powdery Mildew – Caused by fungi in the order Erysiphales, it starts on the leaves of the lower branches and works its way up the tree from there.

It grows a white, powdery layer over fruits and leaves, which eventually turn gray and then black. Fungicides like triademefon and propiconazole will end this disease.

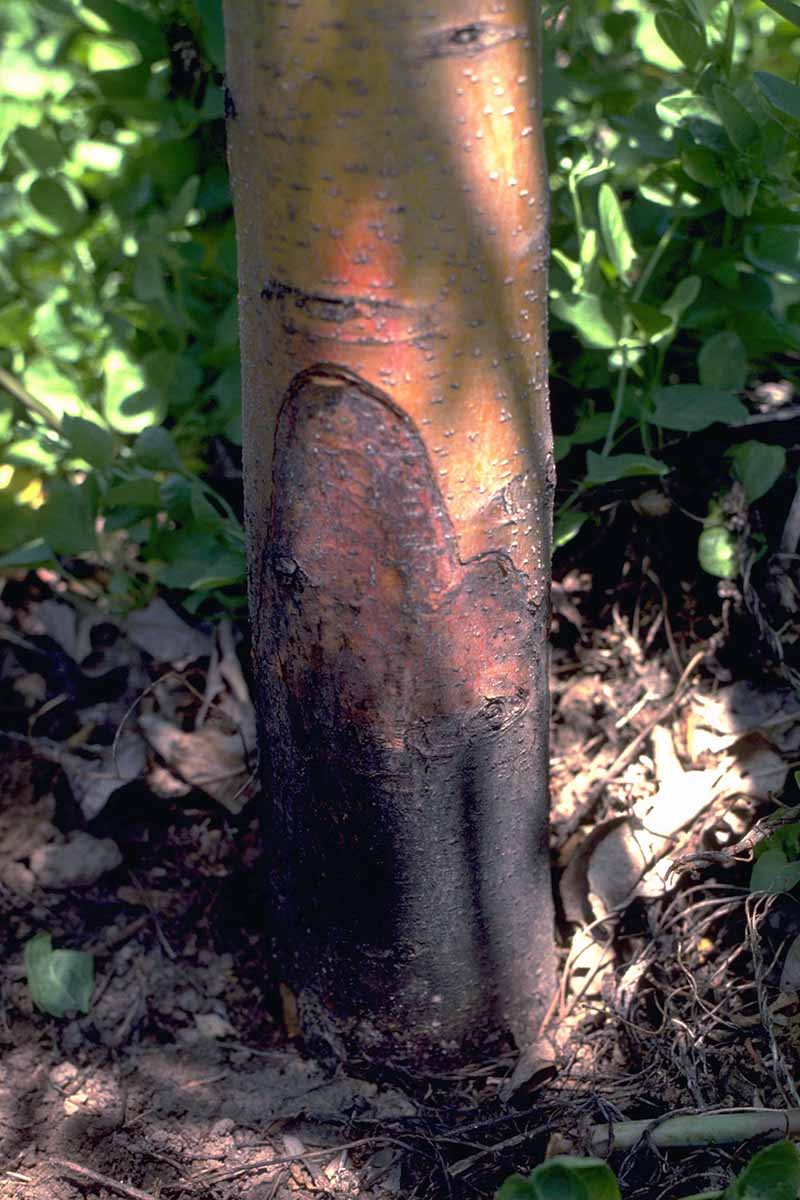
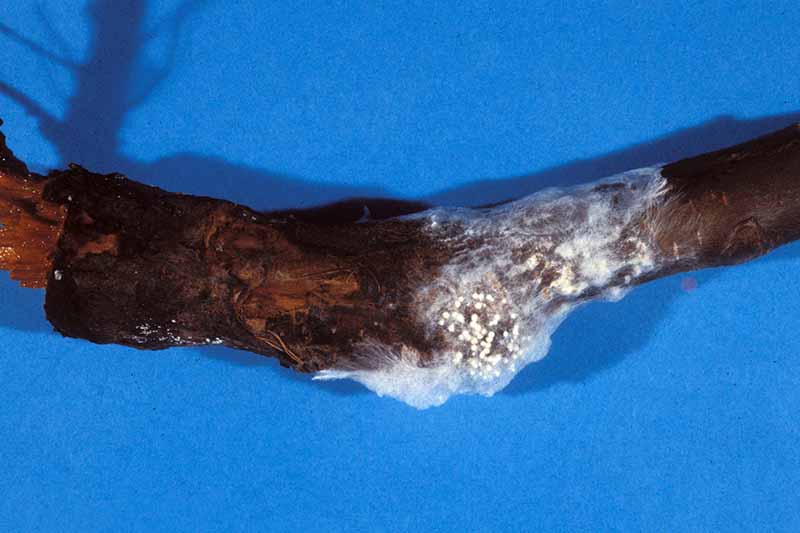
Sudden Oak Death – Caused by a pathogen named phytophthora ramorum, the most outward symptom is that the bark of the trunk will split and begin weeping a dark brown sap.

Eventually the leaves and newer shoots lose their color and wilt. The five-week treatment consists of spraying a phosphonate-based surfactant on the trunk.

Dutch Elm Disease – Caused by the ascomycete microfungi spread by the American bark beetle, this disease spreads to other trees quickly through the root system underground.

Symptoms include wilting and yellowing of branches and leaves starting at the crown and moving down to the base of the trunk. The course of action is to prune the infected limbs and apply a fungicidal injection.

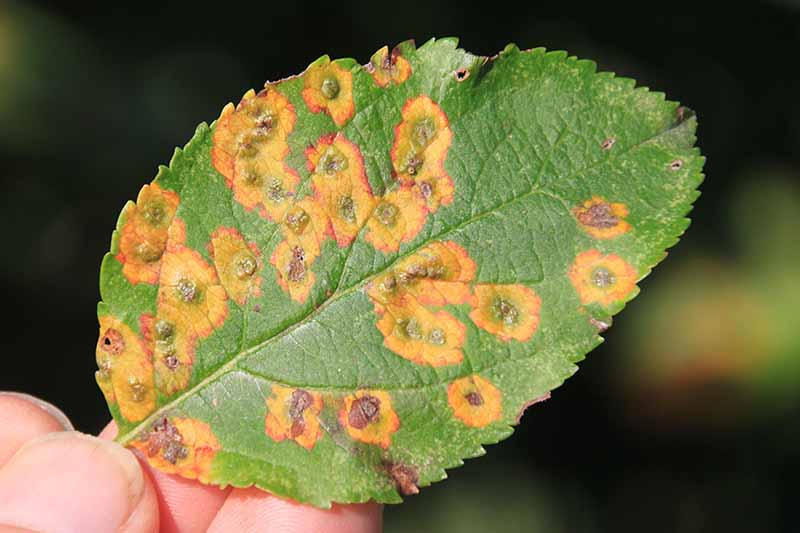
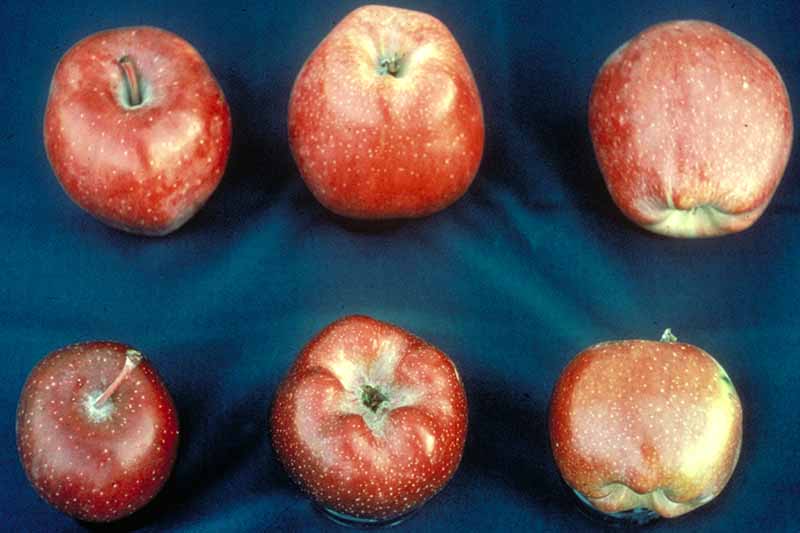
Fire Blight – Caused by erwinia amylovora, this disease affects fruit trees mainly, making them take the appearance of a burnt tree. Affected trees will shrink in size and become blackened.

Professionals suggest pruning affected areas as early as noticed and spraying the tree with antibiotics like terramycin and streptomycin.

the fire blight tree disease attacks fruit trees, causing them to take on the appearance of being burnt

Those fruit trees not planted during the best time to plant fruit trees will be a bit more vulnerable until they’re established, though any can succumb to this disease.

Tips to Keep Your Tree From Dying

Here are some additional tips to boost the health of your tree in addition to those mentioned above. During the dry winter months, trees require little to no nitrogen but still need phosphorous and potassium.

Consider creating a liquid solution of 0-20-20 fertilizer and watering it directly to the tree’s roots.

Try to avoid running over exposed tree roots with your lawn mower. Cutting the tops of the roots down creates injuries that invite bacteria and fungi into the tree’s system. In the same vein, avoid using weed killers near your trees.

Once you prune an ill tree, make sure to sterilize the equipment before working on another tree of plant or you risk introducing the disease to more trees. Watch out for water-logging in areas with poor drainage, and the same goes for over-watering on your part.

Too much mulch around your trees means there won’t be enough drainage and the roots won’t have access to air easily.

Is My Tree Dying or Dormant?

Obviously a dormant tree is not dead, just in a state of low growth and preservation, similar to hibernation. It’s easy to confuse the two due to the most outward symptoms of both being similar, in which leaves wilt, dry up, and fall away.

If you’re trying to determine how your tree is doing, and it’s late autumn or during the winter, you either need to wait until the spring to make a determination or hire an arborist to visit and run some tests. There are a few small tests you can run yourself.

See if the branches will still bend without snapping or cracking. If it does break, check the inside of it to see if it is totally dry or if there are signs of life within. You can scratch away the bark of the branch and see if there is any greenish growth beneath.

Consult an Arborist

In a worst case scenario you can contact an arborist, which is basically a tree doctor. They can run tests on specific trees, identify at-risk trees, spray with preventative chemicals, and brace your trees for added support.

They can also help with pruning, alert you about symptoms of diseases spreading in the area, inform you about the laws in your county for deforestation and using chemicals, and can even let you know if you have any valuable trees you could sell for lumber.

They’re also qualified to climb up your trees, use heavy equipment when removing dead trees, and more.

If you’re unsure about anything but value your trees too much to stand losing them, then definitely consult a local arborist.

How to Bring a Dying Tree Back to Life

When trying to salvage a dying tree that’s having issues from anything but a serious disease, the tips above will be more than enough. For those with big, problematic diseases, you’ll need to contact an arborist to get a real medical treatment in place.

And remember, you can revive a sick tree, but not a dead one. Accepting that sooner than later can save you from it falling over and costing you a lot of money.

Original post here https://ift.tt/35agoG2.

from AAA Tree Lopping Ipswich https://ift.tt/3vkgvJL
via IFTTT

Don’t Make A Deadly Mistake: Top Questions To Consider Before Pruning

Written by Monica Hemingway and published on https://pruningguide.com/

Improper pruning cuts cause irreversible harm that often results in decline in health, structural instability, or death. Before you pick up your pruning shears, it is essential to have a goal in mind. Proper pruning will help maintain a tree’s health and beauty, but if you prune for no reason, you could accidentally cause more harm than good.

Five Questions to Ask Before Pruning Anything

5 questions to ask before pruning

Pruning is an acquired art. It takes practice but, most of all, it requires an understanding of what you’re doing and why.

That’s what our course, Pruning With Confidence, will teach you.

But even if you don’t take the course, these five questions will help you decide what to do.

  1. WHAT kind of plant am I pruning? This will help you decide the answers to the next questions.
    1. Is it deciduous or evergreen?
    2. A shrub, tree, vine, or woody perennial?
    3. What is its natural size and shape?
  2. WHY am I pruning it?
    1. For example, do I want to adjust the shape, improve health, get more flowers, encourage more younger growth, etc.?
  3. WHEN is the best time to prune it? There’s a best time to prune everything.
  4. HOW should I prune it?
    1. Do I cut it back hard, take off just the tips, remove 1/3 of the growth, etc.?
  5. WHERE do I make the pruning cuts?
    1. Should I cut a ground level, a foot above, on one side of the plant only, at specific branches, etc.? The answer here depends on your answers to the questions above.

Before pruning anything, always ask yourself the five questions above.

Never cut off a limb, branch, or stem without having a good reason for doing so.

Original post here https://ift.tt/35cCeZK.

from AAA Tree Lopping Ipswich https://ift.tt/2Tg8hoR
via IFTTT

Pro Guide: Basic Types Of Pruning Cuts

Written by Monica Hemingway and published on https://pruningguide.com/

In good pruning, there are two fundamental types of cuts: thinning cuts and heading cuts. The location of your cut on the plant and its relation to nearby old and young, weak and strong buds and branches determine which type of cut you just made.

It is important to understand that these two types of cuts exist, and second, what response from the plant they provoke. When you read articles or any reference on pruning, directions will tell you to make one kind of cut or the other. Understanding these terms for pruning can be as necessary as knowing what a tablespoon is in cooking.

Types of Pruning Cuts

journal-141494_1280

Basically, there are three types of pruning cuts. Each type of pruning cut is used for a specific purpose.

  • Reduction cut
  • Removal cut
  • Heading cut

Reduction Cuts

This is just what it sounds like – it reduces the length of the branch or stem. The key is that the cut is made just beyond a live lateral branch that’s thinner than the stem you’re cutting.

reduction cut

Reduction Cut – The larger branch has been cut back to a smaller lateral branch.

Removal Cuts

Again, it’s pretty obvious what this pruning cut does – removes a branch or stem entirely. The cut is made just outside the branch collar (the junction where the branch you’re removing is attached to the main trunk or stem).

Heading Cuts

This type of pruning cut is similar to a reduction cut but the cut is made anywhere on the branch or stem, regardless of the position of nearby lateral branches. This usually results in an unsightly, dead stump beyond the first lateral branch.

Heading Cut - The stem has been cut randomly and will likely die back to the ground or put out watersprouts.

Heading Cut – The stem has been cut randomly and will likely die back to the ground or put out watersprouts.

Original post here https://ift.tt/3vg06q3.

from AAA Tree Lopping Ipswich https://ift.tt/3wkqTCW
via IFTTT

Stop Your Tree Branches From Growing Back With This Tips

Written by Smith and published on https://www.yardworkhq.com/

Limbs are usually cut to provide air circulation within the tree, keep the branches off the ground, remove dead limbs and get rid of the disease. However, if you are just trying to maintain a certain height and spacing with your tree, then it might seem like trimming your tree is sometimes a constant battle. To keep from cutting the ends of the same limbs over and over, stop them from regrowing.

You can dictate the shape of a tree without causing damage to the tree by adequately cutting the branches to prevent new growth. Tree branches are usually cut when the tree is at its dormant season.

How to Stop Tree Branches from Growing Back

How to Stop Tree Branches from Growing Back

Tree branches tend to grow branches around the bottom of the trunk, which tends to be counterproductive. As they consume nutrients without necessarily contributing to the production of chlorophyll as they have limited access to direct sunlight. For this reason, it is necessary to trim them. But if not pruned properly, they may grow back. So how do you stop tree branches from growing again?

Stop Trees From Growing Back After Pruning

First, you need to cut the branch in a straight angle to discourage regrowth. Angled pruning cuts encourage branch growth. Cut the limb below the leaf node to prevent it from getting any nutrients necessary for growth. This will stop it from growing again.

Then you need to mix sucker growth inhibitor diluted in water as per the manufacturer’s instructions and apply it to the cut tree limb stub. Use a paintbrush and be generous to diminish all chances of branch regrowth.

You will need to reapply the growth inhibitor again in a few days to make sure that a new branch does not sprout in the same spot. You will also need to cut off any fresh sprouts and coat the areas with a growth inhibitor. Over time, the stub will become growth hardy.

Do Branches Grow Back After Pruning?

A new branch grows in its place. New buds may sprout at the same spot and develop into new branches. But if you prune your tree correctly and top the buds, then they will not develop into branches. It would help if you also sealed the spot after pruning to prevent a new branch from growing.

Sealing Tree Limbs After Cutting

Step 1: Remove jagged edges and debris from the tree limb stub

Step 2: Use liquid pruning sealer to coat the stub using a paintbrush

Step 3: Wait for the sealer to dry and inspect to see if you need to apply another coat of sealer

For larger branches, cut them off using a saw and cut them from the lower and upper side to avoid the cut getting angled. Which may lead to new branch growth. You should also not cut branches that are central to the tree’s support system as this may stunt the tress growth or cause it to grow in a stunted manner. Always use a clean brush to apply the sealer or growth inhibitor to avoid infecting the tree. And causing it to rot.

Original post here https://ift.tt/3vlUISk.

from AAA Tree Lopping Ipswich https://ift.tt/3vdei2L
via IFTTT

Guide On How To Find The Best Small Trees And How To Care It

Written by Admin and published on https://properlyrooted.com/

We don’t all have room for a giant sequoia or huge oak in our backyards. But there are many small trees that should suit your space. Whether you are looking for a little shade or a bit of color to brighten your property, these trees mature at around 15 feet tall and generally require minimal maintenance to look great. Here are some small trees that are ideal for landscaping tight spaces.

Our Guide to Finding the Best Small Trees for your Yard

best small trees

Our recommendations for the best small trees are the Weeping Cherry Tree and the Ann Tulip Magnolia Tree. We wanted the most bang for our buck. So, we opted for a small tree that is attractive enough to be a focal point. We also wanted a hardy tree that can adapt to a variety of conditions. We found several standout trees in addition to those, which you can find in our list below.

Our Top Picks for the Best Small Trees

#1 Weeping Cherry TreeOUR RATING5/5DESCRIPTION
#2 Ann Tulip Magnolia TreeOUR RATING5/5DESCRIPTION
#3 Kousa Dogwood TreeOUR RATING4.5/5DESCRIPTION
#4 Potted Mimosa TreeOUR RATING4.5/5DESCRIPTION

Defining a Small Tree

We’ll begin with our definition of a small tree which will provide the framework for our choices. Because they are sometimes the same size, we’ll lay out the differences between a tree and shrub. Both are perennial woody plants. That’s where the similarities end. While a shrub may have several perennial stems, a tree has a single one. The newest bark is inside the stem.

For our purposes, a small tree is under 25 feet tall. The spread or width will vary with the form. A conical tree, for example, has a much smaller spread than a sprawling redbud. Both dimensions matter, of course, when it comes time to pick a small tree especially for a small yard. Consider the mature height rather than the diminutive size of the tree at the garden center.

Choosing a Tree

There are several other things you need to consider when picking any tree. Your goal is to match the tree’s needs with the environmental conditions of your site. Locations can vary widely even on the same property. Stick to the exact spot where you will be planting. Factors like drainage may differ even in a small space. In some cases, it can mean the difference between thriving and surviving.

Soil Type

The texture of your soil is its mixture of sand, silt, clay, and loam. It’s an important detail to match your tree with the site. Some trees adapt well to various soil types. Others prefer a particular kind and won’t tolerate deviations. A soil test can provide basic information like pH and nutrient levels.

You can determine the soil type you have by scooping up a handful and lightly squeezing it. Clay soils keep their shape when you open your hand. Sandy soils will not flow through your fingers. Loams will stay compacted for a short time, but fall apart if you poke at it. The type goes hand-in-hand with other environmental variables.

Moisture

The soil type directly influences its water-holding capacity and drainage. Many trees, small and large, prefer well-drained soils. Water doesn’t tend to pool, and they don’t become waterlogged. These moist conditions can pose a threat of rot and bacteria development. For susceptible trees, it is a major issue you can’t ignore. Likewise, dry soils can stress trees that aren’t drought tolerant.

Sun Exposure

The amount of sunlight or shade a location gets also factors into the mix. While some trees don’t mind the shade, others won’t survive without adequate light. You should consider how much sunlight the tree will get at the location. Take into account anything that may block the sun, both now and later as other trees in the surrounding area mature.

Sunlight is an essential factor to consider. It’s one thing that you have less control over than say moisture. You can water a tree or fertilize it. But you can’t change sun exposure. One option you have is to choose a small tree that has a range of tolerance levels for shade to cover all your bases. As a general rule of thumb, fruit trees prefer full sun.

Maintenance

All trees will need some maintenance, some more than others. You’ll need to prune your tree to encourage new healthy growth. If moisture is an issue, you may need to water your tree during dry spells. Before you commit to a particular tree, take the time to research what each one needs and balance it with what you can provide.

This video from the Utah State University Extension walks you through the process of planting a bare root tree.

Hardiness

Both winter and summer are trying times for all plants. Extreme temperatures can kill plants unaccustomed to frigid or sweltering conditions. The USDA Hardiness Zone Map can help you determine your area’s lowest extreme temperature. It divides the country into 26 zones based on historical weather data. It comes in handy when researching small trees.

The label on your tree will provide its zone so that you can stick with ones suitable for your area. While the USDA map is the most common, other ones exist, so make sure you’re getting the right information. The hardiness zone is only one part of the puzzle. Heat extremes are just as harmful. Your cooperative extension service can help you with any questions.

Finding Your Tree’s Purpose

Small trees can serve many uses. You may just want an ornamental tree that looks nice on your front yard for curb appeal. Take time to think about the other things you want out of a tree to narrow down your choices. For example, a maple will provide welcome shade in your backyard. If you want something with a lot of color, it’s hard to beat the beauty of a mimosa. If you need privacy, an evergreen can fit the bill. Other things to consider are fragrant trees which can be lovely or invasive.

A Note about Appearance

The chances are you have a clear picture in your mind of what your ideally best tree looks like. Think of things like flowers and foliage. Small trees can function well as a feature or focal point in your landscape design. Consider other varieties of characteristics such as the shape, bark color, and year-round appearance. After all, small doesn’t mean short on features.

Our Recommendations: Ann Tulip Magnolia Tree and Weeping Cherry Tree

Narrowing your choice down to a small tree still gives you a wide playing field. In the end, it comes down to purpose. We focused on trees that were low maintenance. We also wanted a tree that was hardy and tolerant of a variety of environmental conditions. And since a tree is an investment, we leaned toward an attractive tree that would give our landscape a boost.

The Ann Tulip Magnolia Tree is a gorgeous tree with big rosy pink blooms. It grows to a mature height of 10 feet with a 9-foot spread. It is hardy and produces a late spring bloom to protect it from a late frost. We liked its open shape and beautiful foliage. With a sweet, delicate scent, the Ann Tulip Magnolia Tree does double duty as an ornamental tree.

The Weeping Cherry Tree is less dramatic than the magnolia tree, but that’s its charm. It forms a lush carpet of small pinkish flowers. We thought it resembled a miniature weeping willow tree. It’s a compact tree with a height and spread both of 8 feet. It tolerates Zones 5 through 8, making it a hardy example of an ornamental cherry tree.

Even if you have limited space, you can still enjoy the beauty of a small tree. With colorful flowers and beautiful bark, they can make an attractive center point for any garden. And their small size means you get the benefits of perennial feature without the added trouble of a larger tree.

Original post here https://ift.tt/3ixdrr1.

from AAA Tree Lopping Ipswich https://ift.tt/3xgHmYC
via IFTTT

Preparing Your Fruit Trees For This Coming Winter

Written by Heather Buckner and published on https://gardenerspath.com/

As the weather gets colder, fruit tree growers start preparing their fruit trees for winter. That is because unprotected fruit trees are vulnerable to frost damage. And frost damage can take a toll on the health of your tree in the long run. 

Some of us have planted our fruit trees directly into the ground. Others plant them in raised beds or in permanent outdoor pots. Either way you need to take steps towards preparing your fruit trees for winter and we will discuss that in this article.

HOW TO PREPARE FRUIT TREES FOR WINTER

There is always so much to do to get ready for winter.

With the mad rush to harvest the last of the crops, mulch and cut back perennials, and surround the cool-weather vegetables with hoop houses, it can be so easy to forget about the trees!

But while fruit trees may seem resilient, they are still susceptible to damage from frost and cold temperatures, and it is important to take steps to prepare them for winter.

A close up vertical image of a winter garden with a tree that has been wrapped in burlap to protect it from the snow. To the center and bottom of the frame is green and white printed text.

This article will teach you how to winterize the fruit trees in your yard, as well as those planted in containers.

What You’ll Learn

  • It’s All About the Roots
  • Clean Up!
  • Layer on the Mulch
  • Water Deeply
  • Protect from Animal Damage
  • Prune after Dormancy
  • Protect Potted Trees
  • Winterizing Tips

Readying fruit trees for winter only takes a little time and effort, and doing so will keep them from being harmed by freezing temperatures, cold winds, and hungry animals.

It’s All About the Roots

The roots are such a crucial component of a tree. They are the link between the tree and the nutrient-rich soil below.

A close up vertical image of a plant with the soil removed around its roots to expose them to the air.

During the spring and summer, the roots absorb water and nutrients from the soil, drawing them into the trunk, branches, and leaves.

As the autumn days become shorter and the temperature drops, the tree prepares for dormancy. Deciduous trees will drop their leaves, halting the production of energy via photosynthesis.

Metabolism slows and active growth stops, to conserve energy through the winter months. The tree uses stored energy reserves to survive.

A close up horizontal image of rows of fruit trees in an orchard in the autumn months pictured on a blue sky background.

Healthy roots are crucial to a healthy tree, so it is important to protect them from harsh winter conditions.

Periods of freezing and thawing can cause damage to roots, especially for young or cold-sensitive trees.

Both soil and bark expand when it is warm, and shrink when it is cold.

During freeze-thaw cycles, when temperatures fluctuate from above freezing to below 32°F and back up again, the upper layers of soil thaw and expand during warm days.

At night, when the temperatures drop below freezing, the soil shifts and cracks as it shrinks back.

This process of expansion and contraction can break roots or even lift them out of the soil completely, causing significant damage to young saplings.

A close up vertical image of large cracks in the branches as a result of frost, pictured on a soft focus background.

Frost cracking is another way that trees can be harmed during freeze-thaw cycles. Bark expands when daytime temperatures are warm.

At night, the outer layers of bark refreeze and contract faster than the inner layers, which can cause vertical cracking in the trunk and broken branches.

These weak points in the bark are the perfect place for pests and diseases to get in.

A close up horizontal image of a branch covered in ice pictured on a soft focus background.

Luckily, there are several steps that home gardeners and orchardists can take in the fall before a hard freeze hits to protect their trees and prevent damage from happening, even during the coldest winters.

Clean Up!

Start by cleaning up debris around the base of plants.

Remove any fallen fruit that is rotting on the ground as well as any left on the branches.

Rake up fallen leaves, and be sure to dispose of anything that shows signs of pests or disease rather than mulching it or putting it on the compost pile.

Layer on the Mulch

Speaking of mulch, this is another important factor in protecting your trees through the coldest time of year.

Mulch insulates the roots, protecting them from the detrimental effects of freeze-thaw cycles.

A horizontal image of a forest floor covered by fall leaves, pictured in light autumn sunshine.

Think about a healthy forest, for example: During the winter there is no bare soil. Instead, the leaf litter serves as a layer of mulch, keeping roots safe and snug through the winter.

Cultivated trees are no different in their need for insulation, but they lack a forest’s interconnected network of plants that results in more resilient trees with natural checks on pests and disease.

A close up horizontal image of a hand from the right of the frame digging mulch out of a wheelbarrow.

This is why it is a good idea to first clean up any fallen debris and rotted fruit around the base and then apply wood chips, shredded leaves, or straw mulch.

Feel free to apply your chosen material liberally, applying a layer at least a few inches thick in a wide ring around the trunk of each of your trees, at least three or four feet in diameter.

A close up square image of a row of plants mulched with straw for winter protection.

It is also a good idea to leave a few inches of space between the mulch material and the trunk to prevent a buildup of moisture that can cause the bark at the base to rot.

Avoid using compost or rotted manure as these could provide an unwanted boost of nitrogen, triggering new growth at a time when plants should be headed into dormancy.

Water Deeply

A couple of deep waterings before the ground freezes solid will help to strengthen and insulate the roots in preparation for dormancy.

A close up horizontal image of a plant surrounded by mulch being watered with a garden hose.

This is especially important for saplings, and during particularly dry periods of autumn weather.

In late autumn, after the leaves have fallen, give the trees a couple of thorough waterings.

Use a soaker hose to water slowly and deeply, making sure the water penetrates about a foot into the soil. Do this early in the day when temperatures are above 40°F.

Protect from Animal Damage

With other sources of food being less available in winter, the local wildlife will begin searching for anything they can find.

Young saplings in particular have branches that are just the right height for hungry deer or moose to reach.

A close up vertical image of a trunk wrapped in hardware cloth to protect it against rodents during the winter months, pictured on a snowy background.

Trust me, because I speak from experience – investing in a few tree cages is definitely worth it!

Cages need to be tall enough to prevent deer from reaching over the top.

Small rodents can also do damage during the winter by gnawing on roots and trunks.

You can use a hardware cloth barrier around the base of the tree. Make sure the cloth extends at least 12 inches into the soil.

Prune after Dormancy

To prevent branches from sprouting new, fragile growth in the fall, wait until the leaves have fallen and trees have gone dormant to prune.

This should generally be done anytime between December and February, after trees have gone dormant but before budding begins in spring.

A close up horizontal image of a pair of pruners cutting branches in the winter months. In the background is a winter garden scene with snow on the ground.

Pruning correctly can improve air flow and help to prevent disease.

Using sterile pruners, remove dead or diseased branches, suckers, branches that are growing across each other, or any branches that are growing straight up.

Some trees require special pruning techniques. For instance, bananas should be cut back to about six inches tall before winter.

Protect Potted Trees

While it is important to winterize fruit trees that are planted directly in the ground, it’s absolutely critical to protect those that are planted in pots.

Since they are not insulated by the earth, roots in container-grown plants are more susceptible to the cold, and more likely to freeze and die – without a little extra help from you, at least.

There are a few different ways to winterize potted trees. You can store them in a protected spot, insulate them, plant them temporarily in the ground right in their pots, or bring them indoors.

Before determining which method to use, be sure to do the necessary research to understand the species that you are working with:

  • How cold hardy is it?
  • What climate does it prefer?
  • Does it require some sunlight through the winter, or can it overwinter in a dark place?

For instance, many citrus species are tropical and can not be exposed to freezing temperatures at all.

Apples, on the other hand, are hardy and most can tolerate some amount of freezing.

A close up of unharvested apples on a tree covered in a light dusting of snow pictured on a soft focus background.

Once you have a sense of what each plant can tolerate, you can choose a protection method:

1. Store in a Protected Spot

Choose a location that won’t freeze, such as a garage or shed. Ideally, this should be an unheated space that is protected from wind, with consistent temperatures in the upper 30s or low 40s.

This method works best for cold hardy species such as fig, cherry, or apricot trees that have a natural period of dormancy.

2. Insulate with Mulch

There are several ways to do this. One method is to surround the trunk with a ring of chicken wire and fill in the frame with straw, shredded leaves, or another type of mulch.

A close up vertical image of a trunk wrapped in spruce bows and metal mesh fencing to protect it from ice and snow, pictured in light sunshine.

To do this, create a wide circle around the container with the chicken wire, leaving about six inches of space between the cage and the pot.

Cut the cage to size and secure it by using pliers to fold in the cut edges, attaching them to the other end.

Stuff the space between the cage and the pot with mulch, up to the surface of the pot. Add about a foot more mulch over the top of the pot as well for added insulation.

When spring arrives, remove the mulch. You can spread it out in the veggie garden, or put it to good use elsewhere!

A close up horizontal image of young saplings wrapped in burlap to protect them from snow and ice during the winter months.

For young saplings or cold sensitive species such as citrus, you can provide extra protection by wrapping the pot in burlap before adding the mulch and wire.

3. Plant the Container

You can temporarily plant your trees in your yard if you have the space, container and all.

Before the first frost, dig a hole that’s big enough to bury the container. Spread six to 12 inches of mulch on top and leave it there until the soil thaws in spring.

This is a useful method if you are planning to transplant young trees into the ground later on, as you will already have a ready-made hole that you dug when the ground was easy to work with!

4. Bring Indoors

Another option is to bring the pots inside.

A close up horizontal image of a small red container with a citrus plant growing indoors with cabinetry and furniture in the background.

While this may not always be practical, especially for large or bulky trees, it is a great option for tropical species – such as avocados, bananas, or breadfruit – that prefer warm temperatures and sunlight year round.

Winterizing Tips

  • Select varieties that are hardy to your climate to reduce the risk of damage.
  • Avoid fertilizing past midsummer to discourage new growth late in the season.
  • Water deeply in the fall a few times before the first freeze, especially during a dry season.
  • Prune while trees are dormant, in late winter or early spring.

Keep Warm and Cozy Through the Winter

Winterizing fruit trees is a no brainer.

And it’s worth taking a few extra minutes in the fall to ensure that these valuable assets to the landscape are well protected until spring.

A close up horizontal image of an apple tree in the winter with snow on the branches and fruits pictured on a soft focus background.

What methods do you use to winterize your fruit trees? Please share your tips and tricks in the comments below!

Original post here https://ift.tt/2SsseZr.

from AAA Tree Lopping Ipswich https://ift.tt/3zk2KxU
via IFTTT

List Of DIY Ways On How To Kill A Tree Stump

Written by Admin and published on https://worstroom.com/

Trees can be fantastic garden additions, but they also cause their fair share of trouble. Even the most striking trees on your property could fall foul to disease or a particularly nasty storm. As simple as that, you’re left with a whole load of clearing up, including a still-in-tact tree stump.

This can leave your garden looking scruffy, as well as posing potential problems for unsightly regrowth. If this happens, you may well find yourself asking, “How do you kill a tree stump?” In reality, there are a few different options, including killing, rotting, and eventual removal, and we’re going to talk you through the main options here. 

How to Kill a Tree Stump: 4 DIY Ways to Remove it for Good

how to kill a tree stump

You don’t need to be a specialist to know how to kill a tree stump. Anyone can whip up a homemade tree stump killer and engage in DIY tree stump removal, all using things you already have in your home.

We have multiple reasons to cut down trees. Generally, we do it to clear the land for building, for lumber, or to reduce the risk of one falling over onto our homes during a storm.

The end result is we have one or several tree stumps in our front or backyards. We have to mow and weed-eat around them. They’re ugly, the kids might fall into them, and so forth. Let’s talk about how to kill a tree stump easily without any special tools.

How to Kill a Tree Stump: 4 DIY Methods

If you’re wondering how to kill a tree stump without wasting your hard-earned money, energy and time, read on to see the four easiest methods. We’ve laid out the steps of each technique so you can decide which one of the tree stump removal methods is the right option for you.

Use Epsom Salt

epsom salt as a homemade tree stump killer

By using Epsom salt, you can fairly easily get rid of a tree stump. It’s a cheap method that doesn’t require a lot of time or effort, and many of us have Epsom salt already in our houses. I have some now in the bathroom sink cabinet for when I want to soak in the tub. You probably do, too.

This method is easiest if you have a drill bit and a power drill, but you can also create the holes with thick and long nails and a hammer, which you’re more likely to have in the garage already.

First, you have to drill holes into the stump as deep as possible. Make sure that these holes are a quarter-inch wide and almost 3 inches from outside a tree stump.

drill holes in tree stump to aid in killing it

These holes should be at least an inch apart from one another. Drill as many holes as you can on the surface of the stump. These holes should intersect with each other under the surface if possible.

Next, fill these holes up with Epsom salt. But leave some space at the top to add water. This will dissolve the minerals, though you may need to return later to add more water as the process occurs. Be careful while adding water to prevent spillage of the solution.

Then, cover the entire base with a thick layer of powder. As a result, the process of drying is accelerated as it sucks moisture out of the stump. This could be fine cat litter or even cheaper baking soda.

You can skip this “powder” step if you want. It’s not a big deal, because it also sucks moisture from the ground around the stump, so it’s not that effective. Gasoline can also kill the stump, though it won’t aid in drying it out. This all works if you need to kill cactus growth too.

When you’re done, cover the stump up with a water-resistant tarp to protect it from rain and sunlight. After a month or more, you will notice that the stump is drying out. This is when you can more easily remove the stump from your yard with an axe or even a crowbar to pry it up.

Burn The Tree Stump

burn tree stump with fire

Burning is another way of killing a tree stump. Controlled burning can be generally free of cost, however, you need to take some necessary precautions to make sure it’s safe.

Also, this method can’t be performed in many areas because of the fire codes, like in a suburb usually. Outside of city limits in the county is usually okay.

For this procedure, it works best if you drill holes again. The holes should be an inch apart and over 10 inches deep. You don’t have to do this, but it might be harder to get the interior of the stump to light up.

Once you have drilled the holes, fill those up by pouring kerosene oil or gasoline until the whole stump is thoroughly soaked. Pour along the top as well and down the sides. Then ignite it by placing a scrap wood or charcoal on the top or the side of the stump.

The fire must reach down to the roots and convert it into ashes. Also, you can use a burn barrel to burn off the tree stump. By placing a metal barrel filled with wood over the tree stump, you can start a fire.

In some cases, you have to repeat this method a few times before you cut the stump off. One thing to be aware of is if there’s a lot of root systems from other trees around, there is a risk of burning those too, and even fire leading to another dry tree, so please monitor the surrounding area over time.

Block The Sunlight

tarp over tree stump

With this technique, you have to steal the sunlight away from your tree stump. As we all know, trees need sunlight to complete their photochemical reactions, and they will eventually die if they don’t get an appropriate amount.

You can use a variety of materials to cover a tree stump such as canvas, polyester coated with polyurethane, sheets made of plastics like polyethylene, or even a black garbage bag.

All you have to do is to take one of these materials and seal the stump under them by using duct tape. To make this work bettr, cut down the seedlings that are growing around the stump.

Remember, you have to check the progress from time to time. This procedure takes a lot of time because it’s a slow method to starve a stump of light and then to rot.

You have to wait until it rots and falls apart on its own. This is an effective method to kill a stump as it stunts the growth of the plant and then causes it to decay. It’s the easiest DIY tree stump removal method if you have the patience, possibly months.

As a bonus interesting side note: in ancient times, people used to insert copper nails into the living cells of the tree stump. This method takes almost a year to work, but you can use it to fasten the decaying process. Copper nails slowly poison the tree stump. As a result, it dies in a couple of months.

Use Boiling Water

boiling water for DIY tree stump removal

This is one of the best and cost-effective ways from our guide on how to kill a tree stump. This technique also affects the roots using a simple homemade tree stump killer: boiling water. Damaging the roots of the tree stump is the aim of this method.

Take a pot and add a substantial amount of water into it. Place it on the stove and wait until it is boiling thoroughly. Then pour this hot water directly on the roots of the tree stump. For this method to work, it’s crucial to be sure that the majority of the root system is wholly burnt.

If you can, scrape away the dirt and chase the roots out as far as you can. You can pour the water on them, but it may be easier to cut them closer to the stump with an axe so you have less of a job to do in terms of finding the roots and hitting them with the water. You can just focus on the uncut portions instead.

If you want to speed up the process, you can make holes on the tree stump so that the heat will spread throughout the tree stump. Like the other techniques on this list, this will also kill the tree stump by deteriorating it.

Why You Should Kill & Remove Tree Stumps

After we cut a tree, a small part of the trunk is typically left over. This part of the trunk contains roots, which means that it can regrow or at least be a continuing nuisance.

In most cases, a tree stump is unable to grow shoots because it is half dead, though some will. In such cases, it’s nothing but an unpleasant view that may ruin your backyard’s beauty. Plus, if we choose to keep a tree stump at our house, it may attract some insects and even pests. 

Additionally, a tree stump just occupies that extra space that you can use for so many other things. If left undealt with, a tree stump may also cause accidents.

For instance, anyone can trip over a tree stump and hurt themselves. Furthermore, the roots of a tree stump can absorb water from the other trees, reducing the overall health of your lawn in general.

However, pulling these stumps out of the ground isn’t an easy task. Even though it may look like a tough nut to crack, there are several ways to remove it.

At times, the roots of these tree stumps can damage our houses’ water and sewerage pipelines. This is why you should quickly act on the information you found after searching “how to kill a tree stump“.

And That’s How to Kill a Tree Stump

tree stump grinding

All the ideas that are discussed in this list are highly effective. You can use these methods anytime without worrying about not having any tools or heavy-duty equipment.

If you don’t want your backyard to look unkempt and shabby, you must take care of this. Also, you’re not using any harmful chemicals or herbicides when you perform these methods. Other than that, there are some precautions that you need to be aware of, mentioned above.

No matter which idea you pick to remove this unwanted portion of a tree, they will all work wonders for you. However, it is always a better idea to hire a professional tree removal service to take care of the job if you have specific queries or confusions about the errand and want it done fast. They can also guide you on how to save a dying tree.

They know how to kill a tree stump the fast way, typically with a big saw blade that turns them into sawdust in a few passes, called a stump grinder. Then you fill in the hole and grow grass over it, and that’s a happy ending.

Original post here https://ift.tt/2RKDdxc.

from AAA Tree Lopping Ipswich https://ift.tt/3zjzTKr
via IFTTT

The Difference Between Tree Pruning and Lopping in 2021

Written by John Marmolejo and published on https://we7.com/

The tree is one of the most complex and perfect plant forms and has a specific anatomy consisting of a root system, a tree, and a canopy. In order for a tree to be healthy and vital for tens or hundreds of years, it is necessary that all these parts are in great shape. However, sometimes these are also extremely old trees. They were not taken into account in the past, so they have outgrown their dimensions, are visibly affected by plant diseases, and pose a danger to the safety of people and their property. Therefore, the canopy should be pruned.

It is necessary to do it in accordance with its biological properties and needs. It requires knowledge and familiarity with trees, patience, experience, and responsibility throughout the process. When trees are maintained in this way, better vitality, longer lifespan, and better aesthetic and functions are possible. There is one dilemma when it comes to the term used to describe this procedure. People are often confused when they hear it and are not sure what the difference is between tree pruning and lopping. If you do not understand the difference, find out in the rest of the text.

5 Differences Between Tree Lopping and Pruning- 2021 Guide

Maintaining a backyard is a laid-back and simple process. You need to cut your grass, trim some bushes, what are your plans and that is about it. But, if you have larger trees on your property, things get a little bit more complicated. The level of complexity will vary depending on the type of plant we are talking about. Usually, after a few years, they can get quite big and start to cause problems. Because of this, you will have to consider whether you want to call for tree lopping or pruning services.

But, if you have not had any kind of experience with either of these services, how can you know which ones you need to choose? What are the differences, the benefits, or the disadvantages? You probably do not want to make the wrong decision which is why you have decided to look for a guide online.

Well, you came to the right place because I wrote this guide for 2021 to explain to everyone about the differences between tree loping and pruning.

Do I need any of these services?

Before we start talking about those differences, maybe it would be best for you to focus on whether you really need this kind of service. Obviously, if you do not have any larger trees in your backyard, there is no reason to consider either lopping or pruning.

But, if you do have such a plant in your backyard, you will have to figure out whether you need such as service or not. So, what are the “requirements” that you have to consider?

Well, you have to consider just how large your tree is getting. For some, this might not be a problem depending on the size of the property, but for others, it might pose a threat. It can either be too big and blocking pathways on your property or blocking too much of your field. Making your entire land seem smaller than it really is.

There is also the threat of a branch hitting your home which could cause some serious damage. It is not that uncommon for a branch to break off and fall onto the roof of a house. Not only is this kind of a situation very dangerous, but replacing your roof is also very expensive.

So, if you want to avoid this, it is best to maintain your tree properly.

Lopping focuses on larger branches and the trunk itself

One of the main differences between these two methods is the fact that lopping focuses more on shaping the tree, cutting larger branches, or maybe even the trunk itself. Usually, people have to settle for this method because the tree is becoming a much larger problem than it should be. Whether it is too big or it poses a threat to your house or to the property of your neighbors, you simply have to do something about it.

Unfortunately, a lot of people do not know or do not understand that do not have to get rid of it entirely. Lopping exists for a reason. Why cut down your tree permanently when you can reduce it in size, save it and let it keep providing you with its fruits.

Lopping is riskier

This method of cutting down or shaping a tree is much more dangerous because it involves cutting larger branches or even the tree trunk itself. These branches can weigh up to 200 pounds or more. You can imagine what could happen if it falls down on someone or something.

That is why I never recommend anyone trying lopping by themselves. Instead, you should hire a professional team that will ensure the safety of your home and also ensure a healthy regrowth of the tree as suggested by lakesidetreesandstumps.com.au

Pruning is simpler

Like I mentioned previously, the main difference between these methods is the amount of work that needs to be put in. Pruning is simple and involves cutting down or shaping smaller branches of a tree or even a bush. There is no need to cut the trunk or larger branches that might be risky for the tree’s health.

Naturally, you should opt-in for this method whenever you feel like certain branches are too big or have started moving in the wrong direction. If you want to keep a proper shape and to stop it from entering your neighbor’s property or getting in your way, pruning is definitely the way you should go.

However, if you are dealing with a much bigger problem and much bigger branches, pruning is probably not the answer for that kind of situation.

Pruning stimulates growth

Another major difference that I assume is very important to you is the fact that this method can stimulate growth. Lopping can do the same thing, but that can never be insured. Because by lapping the trunk or larger branches, there is always a chance that growth can stop entirely and the tree can dry out and completely die.

Although keep in mind, that depends on the professional services that you have hired. An experienced worker will ensure that your plans will stay in pristine shape either after pruning or lopping.

With pruning, the chances that your plant might catch a disease or for it to stop growing are very small. In fact, it might even be healthier for the plant to cut some of its smaller branches. This can stimulate growth and even help it produce more fruit.

Pruning is regular maintenance

With lopping, you cut down a larger branch or a part of the trunk and there is no need to do that again at least for the next several years. However, there is a constant growth of new and smaller branches. In other words, there is a need for pruning more regularly. Some people like to hire pruning services at least once or twice a year. I think that will be more than enough, no matter what kind of plant you have.

I hope that this guide has helped you understand the differences between tree lopping or pruning and that you can now finally make the right decision.

Original post here https://ift.tt/3fOav6l.

from AAA Tree Lopping Ipswich https://ift.tt/3zgVNOa
via IFTTT

All You Need To Know About Tree Topping

Written by Monica Hemingway and published on https://pruningguide.com/

Topping trees is an overused, crude pruning strategy where the Arborist cuts all the major branches such that blunt ends are left without any secondary branches left to assume the dominance. Topping is not an acceptable pruning method and should rarely or never be used. Yet, it is very common among inexperienced tree services. Topping trees not only diminishes the tree’s overall aesthetics, but has serious negative repercussions for the tree’s structural integrity. 

Tree Topping: What, Why and Why Not

topped maple tree

This topped maple tree was twice the size the following summer.

What is Topping?

Topping is the practice of drastically cutting back all of a tree’s larger branches at a random point to make them shorter. The result is a tree with large, stubby branches sticking out in all directions.

Effects of Tree Topping

Topping a tree is often sold to the homeowner as a way to reduce the size of the tree, open up the view, and make it safer.

The reality is the exact opposite.

After topping, the tree will quickly grow back to the same size (or even larger) but will have lost its natural shape (the word “ugly” comes to mind) and the new growth will be weaker and poorly attached to the trunk (making the tree more dangerous). Add to that the fact that the large, non-selective heading cuts made when topping the tree don’t heal well (leading to rot, disease, and insect infestations) and you have a recipe for disaster.

The Costs of Topping

While the initial removal of tree branches through topping is often less expensive than proper pruning, the long-term costs far outweigh the supposed savings. Here are the typical results of tree topping and the associated costs.

  1. The Tree Keeps Growing – Fast: Topping doesn’t keep trees small. Instead, it promotes the growth of water sprouts (thin branches that grow straight upward) that grow 4 to 10 times faster than normal branches. And they multiply exponentially each time they’re cut off. The end result is an endless cycle of topping every year to keep the tree in check. More money for the person doing the topping, less money for you.
  2. A More Dangerous Tree: Water sprouts are weakly attached to the branch, meaning that they’re likely to break off as they grow larger. This is made worse by the cut branch rotting at the end where the water sprouts appear (due to the non-selective heading cut). The end result? Branches falling off for no apparent reason. Think of the increased liability and insurance costs if those branches fall on something or (God forbid) someone.
  3. An Ugly Tree: Remember those trees you drew in kindergarten? The ones with a round green circle on a brown stick? Trees aren’t meant to look like that. But that’s what topping does. The tree looses all of its natural form and it will never come back. That doesn’t do good things to your property value.
  4. Increased Disease and Insect Problems: Topped branches have large wounds that don’t heal properly. Rot sets in, moves down the branch, and leaves an open door for disease and insect infestation. So now you’re paying for tree inspections and spraying to try to keep it healthy. Eventually, the branch dies and in some cases, so does the tree.
  5. A Dead Tree: Some trees simply can’t tolerate topping. By removing much of the foliage, the tree cannot make enough “food” to sustain itself. Within one growing season you have a dead tree. And it’s not cheap to remove and/or replace a mature tree.

Original post here https://ift.tt/3ixc3oA.

from AAA Tree Lopping Ipswich https://ift.tt/3zqyxO7
via IFTTT

Apple Tree Diseases: How to Treat Them

Written by Helga George and published on https://gardenerspath.com/

Apple trees are perhaps one of the most popular fruit trees to grow in the home garden, but are among the most prone to disease and problems as well. But, if you are aware of the most common growing problems, you can take steps to keep them away from your apple tree and the fruit, which means you can enjoy more and better apples from your trees.

Fortunately, it is easy to identify if your apple tree is suffering from an infection. Identification is the first step in helping your apple tree battle against infection, and recover quickly to become healthy again. To help you identify what disease is affecting your apple tree here is a list of the four most common diseases that can help you figure out what to do if you notice your plant showing symptoms of an ailment:

HOW TO IDENTIFY, TREAT, AND PREVENT COMMON APPLE DISEASES

If you’ve ever seen apple trees growing in the wild, you may already know they are privy to a wide range of diseases. But what about homegrown apples?

An apple enjoyed fresh off the tree is delectable, but you may have to work hard for your shiny piece of fruit.

Many different types of fungi and some varieties of bacteria can cause infections in a home garden.

A close up vertical image of apples growing in the garden suffering from disease, with one of them completely rotten, pictured in light sunshine with blue sky in the background. To the center and bottom of the frame is green and white printed text.

Your best bet to prevent the onset of disease is to plant varieties that are resistant to the major pathogens in your area.

Of course, this advice won’t do much good if you already have an apple tree, or if symptoms are actually due to a physiological problem like a nutrient deficiency rather than an infectious ailment.

In this guide, we’ll cover the most common apple diseases, how to identify them, and what action to take.

Common Apple Diseases

  • Bacterial Infections
    • Crown Gall
    • Fire Blight
  • Fungal and Water Mold Infections
    • Anthracnose Canker and Bull’s-Eye Rot
    • Apple Scab
    • Armillaria Root Rot
    • Frogeye Leaf Spot and Black Rot
    • Phytophthora Crown Rot, Collar Rot, and Root Rot
    • Powdery Mildew
    • Rust
    • Sooty Blotch and Flyspeck
    • Southern Blight
    • White Rot (aka Bot Rot)
  • Viral Infections
    • Flat Apple Disease
  • Physiological Disorders
    • Bitter Pit
    • Chlorosis
    • Cork Spot
    • Soggy Breakdown
    • Sunscald
  • How to Prevent Disease in Your Apple Trees
    • Practice Good Hygiene in the Fall
    • Sterilize Your Pruning Shears Between Cuts
    • Practice Good Water Management When Planting

Bacterial Infections

There are two very serious apple diseases caused by bacteria.

One is the generally fatal crown gall. The other is the highly contagious fire blight. This is a key disease to be aware of, so that you can strike quickly at the first sign of infection and have some chance of containing its spread.

Crown Gall

This unusual disease affects a wide array of plants, and the bacteria that cause it may be found in soils throughout the world.

A close up horizontal image of a young apple tree suffering from crown gall.

The causal agent is Rhizobium rhizogenes (aka Agrobacterium tumefaciens). This species of bacteria genetically engineers plants naturally by changing the plant’s DNA causing it to produce characteristic galls, which are a type of tumor.

Woolly apple aphids also cause the production of galls, but you can tell the difference because crown galls are not hidden in white cottony wax.

Unfortunately, crown gall on apples is usually fatal.

Fire Blight

Does your apple tree look like someone set fire to its tips? If so, the tree may be infected with fire blight bacteria (Erwinia amylovora).

This disease is the most severe on new shoots but can rapidly spread to all parts of the tree above ground.

A close up horizontal image of foliage infected with fire blight, a devastating bacterial infection.

The weather greatly affects the spread of this disease. Rain and high humidity cause it to spread rapidly, and it is particularly severe in temperatures between 75 and 85°F.

When these conditions occur, you should discontinue overhead irrigation, if using, to try and reduce the amount of moisture on the foliage.

A close up horizontal image of a hand from the left of the frame showing the symptoms of a fire blight infection on an apple tree.

Pruning can go a long way toward controlling this disease. You can also spray with copper to treat it, but be careful. Too much copper can damage the fruit or cause the bacteria to become resistant.

Fungal and Water Mold Infections

Unfortunately, apple trees are susceptible to many different fungal pathogens.

And to make things worse, they are also prone to infections by water molds – insidious fungal-like organisms that live in the soil and thrive under moist conditions.

We will cover the main pathogens in this category to help you diagnose and treat your trees.

Anthracnose Canker and Bull’s-Eye Rot

Anthracnose canker is a severe disease that most commonly occurs in the Pacific Northwest region of the US. This disease is a problem throughout the world – from the UK to China.

A close up horizontal image of a stem suffering from an infection by Neofabraea fungi pictured on a soft focus background.

It is caused by different species of Neofabraea fungi (N. malicorticis and N. alba) that produce apple tree cankers that can lead to a fruit infection known as bull’s-eye fruit rot.

The canker phase is considered the most serious, and these can severely damage trees. Commercial growers sometimes have to replace entire orchard blocks to prevent its spread.

The cankers mature in about a year and start producing spores, which infect the fruit and lead to bull’s-eye rot.

You should prune out the cankers, remove stems or even entire trees with heavy canker infections, and burn all affected plant material if this is permitted in your area. Since it can be hard to spot all of the cankers, you should also apply fungicide treatments.

The spores from anthracnose canker can infect the fruit at any point after bloom and throughout the growing season.

Unfortunately, the fruit infections on the tree are latent – or in other words, not detectable – and are only observed post-harvest, about four to seven months after the fruit have been put in storage.

When Neofabraea infect the fruit, they can cause distinct symptoms. N. alba becomes a soft rot with white mycelia, whereas N. malicorticis produces sunken, circular, brown lesions.

To control bull’s-eye rot, you should apply fungicides before the autumn rains, at petal fall, and pre-harvest.

Apple Scab

This serious fungal disease caused by Venturia inaequalis first manifests as small lesions on the bottoms of the leaves in the spring.

From there, it spreads to the tops of the leaves and then to the fruit where it exhibits like little brown scabs.

A close up horizontal image of foliage showing symptoms of apple scab.

Apple scab can result in total foliage loss by midsummer, which then makes the tree susceptible to other diseases.

While spraying with fungicides in the early spring can help prevent infestations, this fungus is difficult to control. Be sure to bag up the previous year’s leaves and fruit to prevent the disease from spreading.

A close up horizontal image of a fruit displaying symptoms of apple scab pictured in light sunshine on a soft focus background.

Your best bet to avoid this fungal disease is to plant resistant varieties. These include ‘Enterprise,’ ‘Jonafree,’ ‘Liberty,’ ‘Pristine,’ and ‘Williams Pride.’

Unfortunately, ‘Cortland,’ ‘McIntosh,’ ‘Red Delicious,’ and ‘Rome Beauty’ are all susceptible.

Armillaria Root Rot

In addition to being a fatal pathogen of a large number of trees, shrubs, and woody vines, the claim to fame of Armillaria mellea, the honey mushroom, is that it is the largest organism known worldwide.

A close up horizontal image of the branch of an apple tree suffering from armillaria root rot pictured on a soft focus background.

A colony in Oregon spreads for almost two and a half miles. This species is one of several that have been associated with root rot in eastern deciduous forests.

The wide host range of this fungus bodes poorly for apple trees because fungal inoculum infests small pieces of wood in the soil in the form of mycelia, and these can go on to infect apples.

Infected apple trees have reduced terminal shoot growth, and their leaves may turn purple in the fall much earlier than those of healthy trees. And then there is the symptom that is impossible to miss – the sudden collapse of diseased trees in midsummer.

Mushrooms may also form at the base of infected trees in late summer or fall.

There is no way to treat an apple tree that is infected with Armillaria. As with so many other fungal pathogens, prevention is the only way to avoid this fungus.

It is probably small solace that honey mushrooms are delicious and safe to eat.

Frogeye Leaf Spot and Black Rot

These two diseases are caused by the same fungus, Physalospora obtusa (syn. Botryosphaeria obtusa), but at different points in its life cycle.

A close up horizontal image of the foliage of an apple tree suffering from frogeye leaf spot aka black rot.

Brown spots on the flower ends of the fruit are the first sign of infection. These spots will grow into concentric circles and rot the fruit.

The tree’s leaves may develop small holes or purplish brown spots that look like a frog’s eyes. At this point, the disease is known as frogeye leaf spot. Eventually the disease spreads to the limbs and kills the tree by forming cankers – at this point it is known as black rot.

You should immediately prune all the infected parts of the tree and either burn or get rid of them as quickly as possible. You may spray with sulfur or an appropriate fungicide in the early stages of the disease.

However, by the time you notice the signs of an infection, it might be too late for fungicides to make a difference.

Phytophthora Crown Rot, Collar Rot, and Root Rot

These diseases are among the most serious ones that affect apples.

They are caused by various species of Phytophthora – close cousins to the organism that caused the Irish potato famine. While once thought to be fungi, these pathogens are now known as oomycetes, or water molds.

A close up vertical image of the trunk of a tree suffering from Phytophtora crown rot.

The symptoms of a Phytophthora infection on apples can be difficult to distinguish from other problems. The tree may be noticeably less vigorous, and the leaves may turn yellow.

This group of diseases can affect different parts of the trees. The crown is the point where the roots meet the stem, and if that is infected, the disease is called crown rot.

Collar rot takes place at the trunk’s scion portions. In the most serious cases, the roots will rot.

Infected trees will probably die, either over a long period, or sometimes even in the same year they become infected – particularly if it is an unusually wet year.

Once the soil is infected, it will stay that way. You will be unable to replant apples in an area that has this type of pathogen present.

On the bright side, you have some hope of saving your tree if you catch the disease early enough. You can spray the root zone with mefenoxam or metalaxyl.

Planning ahead and practicing good water management when you plant your trees can help to prevent their loss from these diseases. For example, be sure that you plant them in soil that drains well and avoid overwatering.

Powdery Mildew

Many types of powdery mildew pathogens exist, all specialized for different plants. Apple has its own type – Podosphaera leucotricha.

A close up horizontal image of foliage infected with powdery mildew pictured on a soft focus background.

The classic symptom of powdery mildew is white growth on the underside of the leaves that looks like felt. As the disease gets worse, the tree’s growth will be stunted. Its foliage will wilt, and the leaves and twigs will become covered with specks that look like black pinpoints.

Trees are more resistant to this disease if they are planted in full sun and have enough space around them for air to circulate well.

If your tree is showing symptoms, prune any shoots that are white in the early spring and destroy them. And make sure you disinfect your pruning shears afterwards.

If powdery mildew is a common problem in your area, you can spray with sulfur or a fungicide in the early spring.

An updated version of the classic Bordeaux mix commonly used to treat powdery mildew is available from Arbico Organics.

Rust

If your tree has orange or yellow spots on its leaves and fruit that is mottled or distorted, you are probably dealing with rust.

The most common type of rust on apples is cedar apple rust caused by the fungus Gymnosporangium juniperi-virginianae.

A close up horizontal image of a hand from the left of the frame holding a leaf suffering from cedar apple rust pictured on a soft focus background.

The diseases known as rusts are caused by complicated fungi. They live on another kind of plant before they spread to their final host – apples in this case.

Their alternate host is a kind of juniper known commonly as eastern red cedar.

Getting rid of eastern red cedar plants on or near your property will help prevent this disease. However, the spores can travel for miles, so that may not be feasible.

You can spray weekly with fungicide or sulfur to prevent cedar apple rust if you know that the fungus is active in your area.

Sooty Blotch and Flyspeck

These are two different types of disease that frequently occur together on the same near-mature fruit.

While all varieties are susceptible to both types of disease, yellow varieties exhibit the most severe symptoms.

A close up horizontal image of apples growing on the tree suffering from sooty blotch pictured on a soft focus background.

The fungal pathogens involved do not severely damage the fruit. It is still edible, but less valuable in the marketplace and difficult to sell, so it can be a major problem for commercial growers.

Sooty blotch, caused by a large number of different fungal species, produces symptoms that you would expect from its name.

The blotches may be one-quarter inch in diameter or larger and may cover almost the whole fruit. You can often rub off the blotches, but commercial growers may need to resort to bleaching if the fruit are infected early in the season.

Flyspeck, caused by Zygophiala jamaicensis fungi, also produces symptoms that are reflected in its name. As many as 50 or more shiny black dots may appear on the surface of the fruit. These are more difficult to rub off than sooty blotches.

A close up horizontal image of an apple suffering from a disease commonly known as flyspeck set on a dark gray surface.

Both diseases tend to occur in damp shady areas of an orchard. Opening up the trees to allow greater air movement will help to control these diseases.

Fortunately backyard gardeners do not need to worry much about sooty blotch or flyspeck. The fruit will be fine to eat if it is washed, rubbed, or peeled first.

Southern Blight

The fungus Sclerotium rolfsii can infect several hundred species of plants, and unfortunately apple trees are among them.

A close up horizontal image of a pruned branch of an apple tree suffering from southern blight set on a blue surface.

It typically strikes in the southeastern part of the US and manifests as a weblike white mycelium that often grows on the bases and lower parts of the trunks of infected trees.

Regrettably, this disease is fatal and usually rapidly kills infected trees. Fortunately apple trees become resistant to southern blight as they age, and those that are most severely affected are typically one to three years old.

The best you can hope for is to prevent this nasty disease when trees are young. Don’t plant in locations where southern blight has been known to be severe on previous crops.

And purge organic material from around the base of the tree, since it can serve as food for the pathogen.

White Rot (aka Bot Rot)

White rot is also known as bot rot, named for the pathogen that causes it, Botryosphaeria dothidea.

For a nice change of pace, the causal agent of this disease is a relatively weak pathogen and infection only becomes a problem when the tree is stressed.

A close up horizontal image of an apple cut in half to show the symptoms of Botryosphaeria canker, aka white rot (Botryosphaeria dothidea).

However, if it does infect a tree, fruit losses can be heavy. New infections become visible in early summer, and cankers form on the tree.

It can be difficult to tell them apart from black rot cankers, so you may need to have samples of your infected tree tested at a local agricultural agency to determine which fungus is causing the disease.

Two types of fruit rot can develop. The primary one affects the external surface and manifests as slightly sunken brown spots that may have a red halo around them. If this infection progresses, the entire fruit can rot. The name white rot comes from the second type, fruit that can bleach as they decay and turn light brown.

Since it only occurs when the trees are stressed, management includes minimizing stressors like winter injury, water stress, insect damage, and other types of disease.

Also prune any dead wood on the tree, so the fungus can’t grow on it. Be sure and remove any mummified fruit because they are a tremendous source of spores.

Viral Infections

There is no known cure for apple trees infected with viruses. Therefore, it is of paramount importance to carefully select rootstocks and scion buds that are uninfected.

Most viruses are spread by grafting, so if you already have a tree, there is not much you can do to prevent potential viral infections.

Another thing to keep in mind is that if you live in an area where nematodes may spread apple viruses, you should have your soil tested for these pests. If they are present, you should choose cultivars and rootstocks that are tolerant – or even better, resistant – to viruses.

You will also want to control weeds and limit moving the soil around, so you don’t inadvertently spread an infection.

Common viral diseases spread by nematodes include the cherry rasp leaf virus (CRLV), which is described below, tobacco ringspot virus, and tomato ringspot virus, which causes apple union necrosis.

Flat Apple Disease

The virus that causes this disease, known commonly as cherry rasp leaf virus or CRLV, is found in the western US and British Columbia.

However, experts are concerned that it could spread to growing regions in the northeast and strongly suggest using caution when buying trees, scion buds, or young plants from operations in western states.

CRLV readily infects a large number of common orchard weeds, and dagger nematodes (Xiphinema americanum) can spread it between trees, both apple and cherry. One good thing is that nematodes move very slowly, so it takes a while for this disease to spread.

A close up horizontal image of six fruits suffering from "flat apple" caused by the cherry rasp leaf virus, set on a blue surface.

You can tell that your plants have this disease when the fruit becomes flattened from both sides. Another symptom you may or may not note is leaves that roll up from the midrib.

As with other apple viruses, there is no available control or cure for this disease. As soon as you discover that your tree is infected with this pathogen, you should remove it.

Physiological Disorders

Many disorders that appear to be diseases are actually due to problems with the tree or fruit physiology instead, with no active pathogen involved.

A number of factors can disrupt apple production. One common cause is a lack of nutrients due to unfavorable soil pH. We’ll briefly break these disorders down according to their symptoms here.

Bitter Pit

The first symptom of bitter pit is small, water-soaked lesions on the fruit. These spots will gradually change to look like bruises and will eventually become sunken.

A close up horizontal image of a harvested apple showing signs of calcium deficiency pictured on a black background.

Even though the fruits show symptoms while on the tree, they will not become bitter until after harvest.

This is one physiological condition that is not due to soil pH. It appears to happen when calcium becomes concentrated in the leaves rather than the fruit.

A hot and dry climate can increase the chances that the fruit will develop bitter pit. The leaves transpire more in a climate such as that of New Mexico, and the calcium diverts to the leaves.

There is no control available once the fruit develops symptoms. Your best bet is to avoid excessive use of nitrogen and potassium fertilizer, which can cause the tree to grow an abundance of foliage at the expense of fruit.

You may also be able to prevent this issue by spraying it with calcium chloride or calcium nitrate over the summer.

Chlorosis

Many types of insects and diseases can cause apple leaves to become discolored, a condition known as chlorosis.

If the yellowing occurs throughout the leaves of your tree and is not limited to small patches of yellow color, your tree may be deficient in iron.

The symptoms of this physiological issue include yellowing and even the dying off of leaves. A classic indicator is that the veins stay green while the foliage around them turns yellow. This happens first to young leaves but can spread to the whole tree.

The problem may not be that your soil lacks iron, but rather, it could be that the pH is too high. This is a particular problem with soils rich in lime like those in New Mexico.

One way to solve this problem is to add chelated iron, although this is just a temporary fix.

You may also see symptoms similar to those of chlorosis due to iron deficiency when the problem is actually due to a lack of adequate manganese levels.

A soil test can help you to figure out which specific deficiency your tree is suffering from.

To solve this condition, you can either use an acid-forming nitrogen fertilizer, or apply a foliar spray of manganese sulfate in April, according to the results of your soil test.

Cork Spot

If your apples look like they have insect or hail damage, be sure to look more closely. A disorder called cork spot manifests with these symptoms.

These spots may progress from being small dimples to half-inch-wide corky or soft spots.

Instead of being caused by an organism, these spots are the result of low soil pH that leads to a deficiency of calcium.

This disorder is curable. You can add lime to your soil if the pH is below 6.0. Another thing you can do is spray the trees with calcium chloride every ten days until you have harvested all your apples.

Soggy Breakdown

Many people keep their fruit cool during storage to prolong the shelf life of their harvest. However, storage at temperatures that are too cold can result in chilling injury.

One such disorder is soggy breakdown, common in ‘Honeycrisp’ apples, in which the flesh can develop brown rings.

Keeping the fruit at temperatures above 2ºC (about 36ºF) can minimize the development of symptoms.

Sunscald

Just like people, fruit can become sunburned. The first indication that your fruit are being scalded is when the skin develops yellow or flushed areas.

These areas will turn dark while the fruit is still on the tree. You should avoid these fruit when you harvest, because it will not store well. Since this condition is not due to an infectious organism, you can dispose of it on your compost pile.

A close up vertical image of a ripe apple suffering from sunscald.

In addition to large areas of the fruit turning yellow, this disorder can appear first as small yellow spots. However, it is easy to miss them. These spots become much worse when the harvested fruit are in storage.

You can manage sunscald with proper pruning or training. Some gardeners and farmers use overhead irrigation to cool the fruit, but that can lead to disease problems, so it may be best to avoid that process.

How to Prevent Disease in Your Apple Trees

Many apple pathogens spread slowly over the course of years and will not be noticeable until they overwhelm your tree.

Taking measures to prevent disease ahead of time can help to keep your apple trees healthy and disease-free.

Practice Good Hygiene in the Fall

Many of the apple diseases that you may face overwinter in leaves on the ground and fruit that has fallen from your tree.

It is critical that you remove, bag, and throw out these leaves and fruit. Doing this will greatly reduce the numbers of pathogens waiting to attack in the following spring.

And one more thing – absolutely do not add this debris to your compost pile!

Sterilize Your Pruning Shears Between Cuts

When you are pruning your tree, sterilize your pruning shears between each cut. If you don’t, you risk spreading disease throughout the tree or between trees.

You can sterilize your pruning shears using liquid solutions of 70-95 percent alcohol or 10-50 percent bleach.

This is particularly prudent if you are cutting back limbs damaged by fire blight, which is highly infectious.

Practice Good Water Management When Planting

Be sure to provide adequate drainage. Do not plant in areas that frequently flood, in low spots, or heavy soils.

Make sure the graft union is positioned well above the soil line.

It is critical to keep water from accumulating around the tree crowns, or your trees could contract a fatal Phytophthora disease.

Many Common Problems May Affect Apples

Apples are prone to more than their fair share of diseases, and physiological problems as well. But they’re still deliciously rewarding, once the harvest comes in.

A close up horizontal image of apples growing in the garden suffering from disease pictured on a soft focus background.

While it’s easy to say that you should plant resistant varieties, if you buy a house with an apple tree or two in its yard already, your trees may not be resistant to the local pathogens.

In this case, practicing good hygiene with leaves and fruit on the ground can go a long way to preventing some nasty issues, along with following best practices to maintain adequate airflow, keep an eye on drainage, and properly sanitize pruning tools.

You may have to rely on fungicides to cure your trees of the many types of fungi that can infect them. But the pathogens’ sensitivity to particular fungicides can vary around the country, so check with your local experts to see what to use to treat your trees.

Have you had success rescuing or resurrecting an infected apple tree? Or do you want to vent about a tree that you lost? Either way, we would love to hear your comments below.

Original post here https://ift.tt/3gsizdx.

from AAA Tree Lopping Ipswich https://ift.tt/3vaVRfa
via IFTTT