How to Cut Tree Roots Without Killing the Tree

Written by Emily Gleeson and published on https://www.doityourself.com/

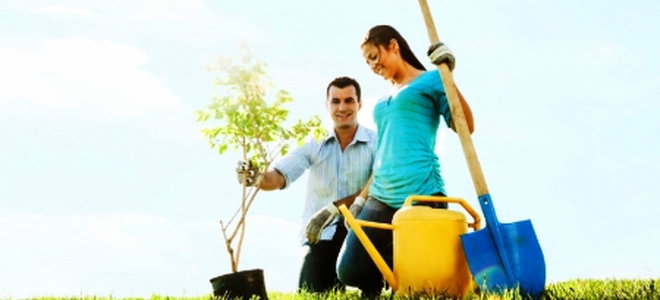
Trees ornament our lawns, provide shade, block wind and provide refuge for scores of birds and other critters. Healthy, growing trees, however, also have healthy, growing roots. Vigorous roots can eventually threaten or invade underground utilities, foundations and the roots of other trees and vegetation. Prevent roots from taking over by trimming them. Careful trimming includes shortening roots in a way that does not compromise the health of the tree. After trimming, take measures to keep the roots from extending back into unwanted areas.

How to Remove a Tree Root Without Hurting the Tree

large root system on a big tree seen from the ground

A tree’s roots are its foundation, and its lifeline. While they’re best left alone, there are a few reasons to cut or remove them—for the tree’s health, to protect a building or structure, or for aesthetic and safety reasons. In these cases, it can be okay to take out a portion of the root system, however, it must be done delicately, and with care. Here’s how to remove a tree root without hurting the tree.

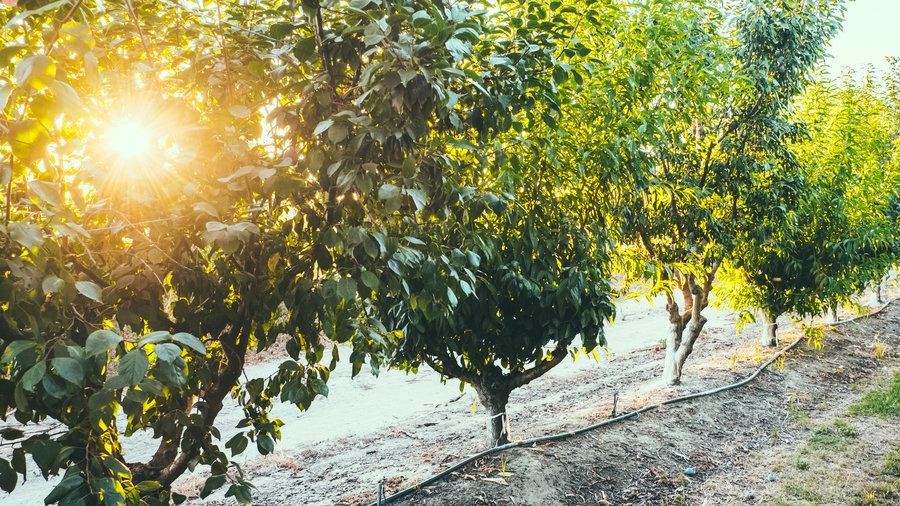
Overview of Tree Root Systems

Generally speaking, about a quarter of a tree’s overall structure is found in its roots. Structural roots help keep the tree sturdy and in place, while feeder roots go searching for water and food.

Structural roots are larger, and most times run deep and directly below the tree, like a large taproot. Feeder roots are more commonly found just below the surface, anywhere from a few inches to around two feet. Of course, there are anomalies where you find a root above ground, or possibly going deeper in its search for nutrients and moisture.

large root system under big tree

Do Your Research First

Tree roots have a mind of their own, and can get into places that they shouldn’t. Each tree will be a little different when it comes to their root systems, so the first thing to do is research the the tree that you are dealing with. Some will have shallower surface roots, or will react more severely to being tampered with.

You’ll need to determine if cutting or removing roots is overall the best idea in the long run, especially when it comes to the size of the tree, and its health. If it hasn’t reached maturity, and already roots are a problem, removing the whole tree may be a better solution, as they will continue to grow larger. You’ll have to weigh the pros and cons of the work that needs to be done, and whether removing the root will stop the problem in the first place.

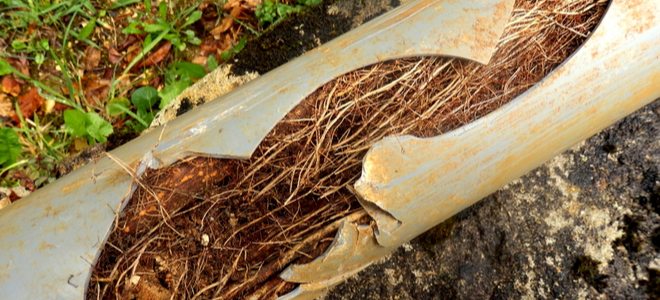
Roots Are Impairing Structures

Tree roots can get into or obstruct water lines and pipes, or in even rarer cases, may disrupt a home’s foundation, but these are usually more a problem with bad construction, old pipes, and loose soil. Nonetheless, these are serious situations in which the root(s) responsible must be removed in order to save the structure in question.

This is where you must determine the right course of action: if the root you need to remove is too close to the main trunk of the tree, you’ll risk severely injuring, or killing it. In this case you would want to consider removing the whole tree instead. If the root is far enough away then you can prune or remove it safely, and place a barrier to stop it from growing into the structure again.

root system cracking a large pipe

Roots are Above Ground

Some exposed tree roots look neat as they snake along the landscape, however if this is happening in your lawn or close to your property you may have an aesthetic, or a safety reason to remove them. Again, consider how far they are from the main trunk and whether you can cut them without injuring the tree.

Any kind of root removal is going to affect the tree’s health, even if it’s minor, so ask yourself if there are ways to work around, or live with the exposed root. Adding soil and re-seeding is not always the best thing for the tree, either, as it can suffocate the root, and it will likely continue to grow upward in time anyway. Adding a mulched or compost area over top of an exposed root can be a healthier alternative, as it provides oxygen and organic material.

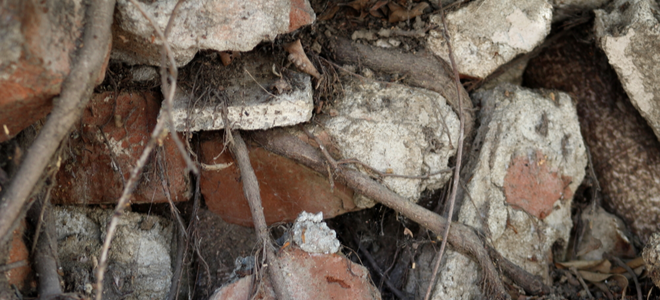
Roots are Lifting Pavement

This is another situation in which you must weight the pros and cons of cutting parts or sections of roots that are causing pavement or concrete to break. Small areas can be trimmed, even tops of exposed roots could be shaved without too much trauma, however, the root will likely continue to grow back. A barrier can be installed at the cut point to prevent roots from lifting concrete areas again.

This can cause major uncertainty to the health of the tree and its structure, especially if a large root is removed. Without proper support a tree has a better chance at being blown over in a storm, or falling. Remember, any kind of tampering with tree roots will potentially harm the tree in some way, so consider whether you can construct around them.
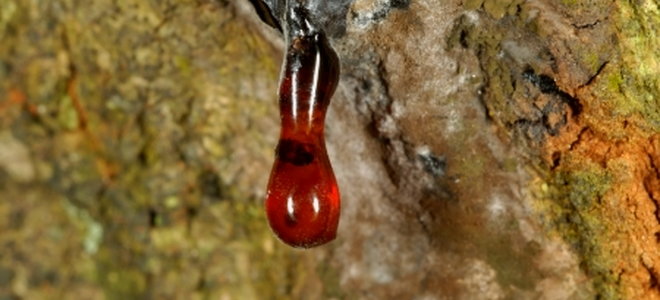
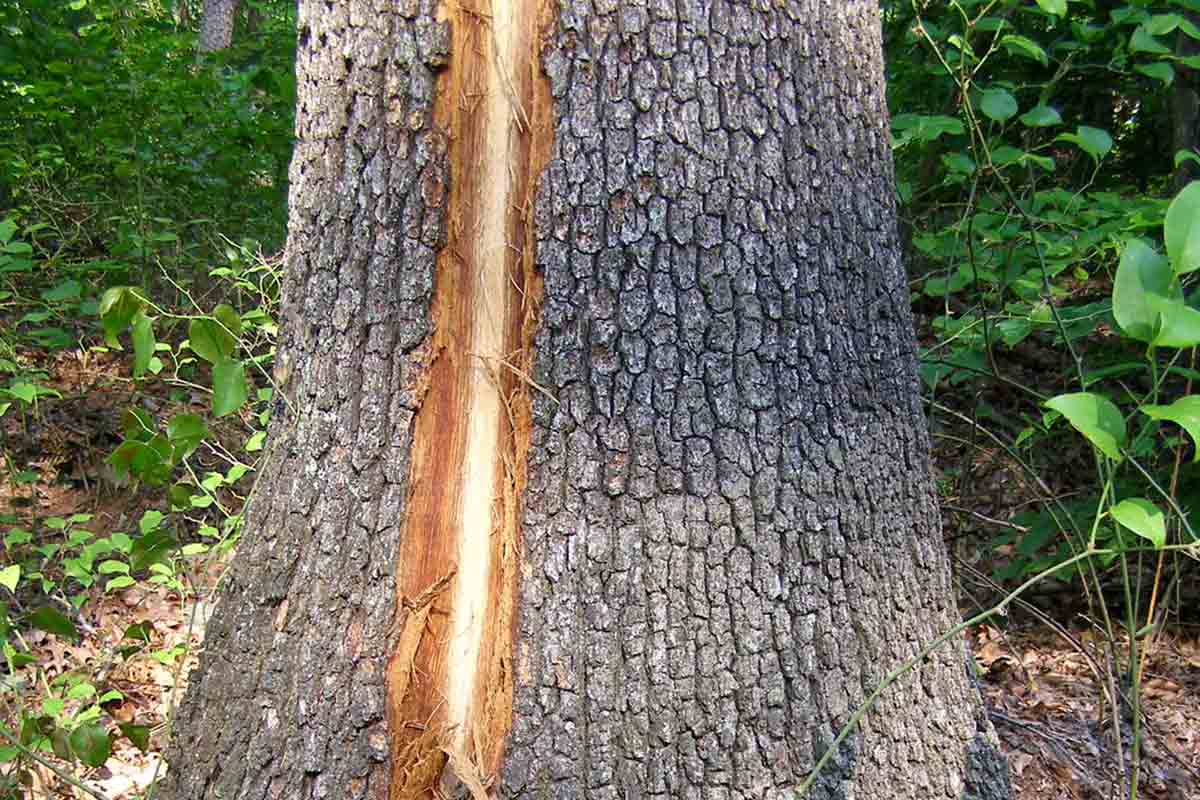
Injured Roots

If construction, environmental factors, or high impact has somehow exposed and damaged any tree roots the best thing to do is to cut the damaged area cleanly with a sharp saw or shears, as this will help the root heal, and prevent disease. Similar to pruning branches – the cleaner the cut, the less damage to the tree.

You don’t want to leave the roots exposed, either, so filling eroded land back in, or pushing roots into the ground will help, as well. Extra water should be provided. Sometimes a tree will develop girdling roots in which they wind around the base of the trunk. In most cases, it may be better to leave them, instead of removing or cutting the roots.

tree roots tangled in brick and cement

Root Cutting and Removal Basics

If you do end up deciding to remove a root, there are essential rules to follow that will give the tree its best chance at surviving the trauma.

Keep Two Thirds or More

Never remove more than a quarter of a tree’s root system, especially not all in one place as this can cause the tree to lean and possibly fall over.

Avoid the Trunk

You shouldn’t remove roots that are close to the base and trunk of the tree, as this causes the most shock to its system: multiple the tree’s diameter by at least three in order to gauge the safe distance. For example, if the tree is two feet round, you can cut roots that are six feet away, at minimum.

Let the Plant Rest

Give the tree at least a couple of years to recover before removing or cutting roots again.

Prune During Dormancy

Like pruning branches, make sure cuts are clean and done during a time that the tree is not budding or in active growing season. Late fall and early spring are the best times to do any work, generally speaking.

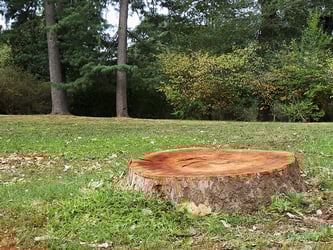
Only Trim Roots as a Last Resort

Roots are best left in tact, and should only be pruned or removed if absolutely necessary. If a cut is going to be too close to the trunk of the tree, you risk killing the tree, and may want to either forego the work, or take the tree down altogether in a safe way. Making the right decision to remove roots, leave them alone, or take down the tree is not something you should take lightly. Talk to a local arborist before any major work gets u

Original post here https://ift.tt/3pAwJxj.

from AAA Tree Lopping Ipswich https://ift.tt/3pEW5KC
via IFTTT

Tree Planting Ultimate Guide: How to Plant Your Trees

Written by Admin and published on https://www.doityourself.com/

Trees make our world a beautiful place. They provide us with many lasting benefits – shade, privacy, increased property value, shelter and food, and they contribute to our mental well-being.

Planting trees is one small way each of us can help improve the environment. Tree planting is easy if you follow these simple steps and remember to “keep the green side up!”

Tree Planting – How to Plant Your Trees

Cheerful young couple planting a tree.

A properly planted and maintained tree will grow faster and live longer than one that is incorrectly planted. Late summer or early fall is the optimum time to plant trees in many areas. This gives the tree a chance to establish new roots before winter arrives and the ground freezes. When spring arrives, the tree is ready to grow. The second choice for planting is late winter or early spring. Planting in hot summer weather should be avoided. Planting in frozen soil during the winter is difficult and tough on tree roots. When the tree is dormant and the ground is frozen, there is no opportunity for the growth of new roots.

Planting Tree Types

Trees are purchased as container grown, balled and burlapped (B&B), or bare root. Generally, container grown are the easiest to plant and successfully establish in any season, including summer. With container grown stock, the plant has been growing in a container for a period of time. When planting container grown plants, little damage is done to the roots as the plant is transferred to the soil. Container grown trees range in size from very small plants in gallon pots up to large trees in huge pots.

B&B plants frequently have been dug from a nursery, wrapped in burlap, and kept in the nursery for an additional period of time, giving the roots opportunity to regenerate. B&B plants can be quite large.

Bare root trees are usually extremely small plants. Because there is no soil on the roots, they must be planted when they are dormant to avoid drying out. The roots must be kept moist until planted. Frequently, bare root trees are offered by seed and nursery mail order catalogs or in the wholesale trade. Many state operated nurseries and local conservation districts also sell bare root stock in bulk quantities for only a few cents per plant. Bare root plants usually are offered in the early spring and should be planted as soon as possible upon arrival.

Carefully follow the planting instructions that come with your tree. If specific instructions are not available, follow these tips:

Utilities – Before digging, call your local utilities to identify the location of any underground utilities.

Hole Size – Dig a hole twice as wide as, and slightly shallower than, the root ball. Roughen the sides and bottom of the hole with a pick or shovel so that roots can penetrate the soil.

Root Prep – With a potted tree, gently remove the tree from the container. Lay the tree on its side with the container end near the planting hole. Hit the bottom and sides of the container until the root ball is loosened. If roots are growing in a circular pattern around the root ball, slice through the roots on a couple of sides of the root ball. With trees wrapped in burlap, remove the string or wire that holds the burlap to the root crown. It is unnecessary to completely remove the burlap. Plastic wraps must be completely removed. Gently separate circling roots on the root ball. Shorten exceptionally long roots, and guide the shortened roots downward and outward. Root tips die quickly when exposed to light and air, so don’t waste time.

TIP: Our expert gardening advisor, Susan Patterson reminds you, “Keep bare root trees moist until planting.”

Planting – Place the root ball in the hole. Leave the top of the root ball (where the roots end and the trunk begins) 1/2 to 1 inch above the surrounding soil, making sure not to cover it unless roots are exposed. For bare root plants, make a mound of soil in the middle of the hole and spread plant roots out evenly over mound. Do not set trees too deep. As you add soil to fill in around the tree, lightly tamp the soil to collapse air pockets, or add water to help settle the soil.

TIP: Susan suggests, “Have someone hold the tree straight while you backfill the hole.”

Form a temporary water basin around the base of the tree to encourage water penetration, and water thoroughly after planting. A tree with a dry root ball cannot absorb water; if the root ball is extremely dry, allow water to trickle into the soil by placing the hose at the trunk of the tree.

TIP: Susan advises, “Be careful not to plant the tree too deeply as it will interfere with oxygen transfer and healthy root development.”

Mulching – Mulch around the tree. A 3-foot diameter circle of mulch is common.

Staking – Depending on the size of the tree and the site conditions, staking may be beneficial. Staking supports the tree until the roots are well established to properly anchor it. Staking should allow for some movement of the tree. After trees are established, remove all support wires. If these are not removed they can girdle the tree, cutting into the trunk and eventually killing the tree.

Original post here https://ift.tt/3gmRDeZ.

from AAA Tree Lopping Ipswich https://ift.tt/3gp75aw
via IFTTT

All-In-One Basics For Caring A Fruit Trees

Written by Thomas J. Story and published on https://www.sunset.com/

Fruit trees need full sun to thrive. Most also must have well-drained soil, though apples, pears, and plums are somewhat more tolerant of less-than-ideal conditions. If poor drainage is a serious problem, plant your trees in raised beds.

Deciduous fruit trees are sold bare-root during the dormant season and containerized throughout the growing season. Plant bare-root trees as soon as possible after purchase. 

Though fruit trees often prosper with only minimal care, paying attention to their needs will reward you with a larger, more flavorful crop.

All the Basics: Planting & Caring for Fruit Trees

Planting tips

Planting

After the decisions of where and what kind of tree to plant, deciding when to plant is much less complicated. Though most people don’t think about fruit trees until later in the spring, when they begin to bloom, winter or very early spring (as soon as it is possible to work the soil) is the ideal time to plant. You’ll have access to a wider variety of cultivars earlier in the season, and spring rains will help new trees settle, grow roots, and get acclimatized before the drier and warmer months of summer.

How to Plant a Fruit Tree

No matter what type of tree you select, the protocol for planting is generally the same. Dig a hole at least two times the size of the tree roots and about the same depth. The hole should be V-shaped, with the sides sloping upward. When planting a bare-root tree, it’s helpful to pile up a bit of soil at the bottom so the roots can be draped on either side of the mound. Don’t loosen the soil at the base of the hole, as this can lead to the tree settling too low, which will put it at risk of root rot.

While the care instructions for most other plants advise you to amend the soil at planting time, fruit trees should be planted in plain soil with no additional fertilizer or compost. Research has shown that fruit trees planted in enriched soil are reluctant to spread roots out beyond the area where the soil has been amended.

Plant your tree so that the crown flare—the point at which the roots begin to spread out at the base of the trunk—is at the soil line. As most fruit trees are grafted, look for the bump on the lower part of the trunk that signals the graft point and make sure that it is not buried (it should be 2 to 4 inches above the soil line). Try to position the tree so the outward bump from the graft is pointing to the northeast, to reduce the likelihood of sunburn.

Fill in the hole with the soil that was removed, making sure to tamp it down to avoid air pockets. It’s good if the soil, once the tree is planted, slopes downward a bit on all sides—this will prevent water from pooling at the base of the trunk, which can lead to rot. Water the tree well and keep an eye on it, as there may be some settling of the soil over the first few days.

Cutting Back Bare-Root Trees

If you are planting a bare-root tree, your job is not yet finished. The great benefit to bare roots is the opportunity to shape them to your liking; they are the closest thing the tree world has to a clean slate. To take advantage of this, however, you will have to summon your courage and make one hard cut.

After planting your bare-root tree, you need to cut the main trunk back to about 2 feet tall (roughly knee height). This is called a heading cut. It’s a painful thing to do, especially for someone new to pruning, but it’s for the best. If this cut is done to a bare-root tree while in winter dormancy, before the tree has leafed out, it will stimulate growth in the buds below the cut—which encourages low branches and a strong frame for the tree. Use a sharp set of loppers that have been cleaned, and cut the main trunk at a slight angle, just above a bud, with the higher side of the slanted cut directly above the bud. If you are buying from a local nursery, you might want to ask them to help you make the cut. A full-service nursery should be able to assist you.

This is the only time it is possible to do such an aggressive pruning, when the tree is small and young. It feels like an awful thing to do, but young trees grow quickly. You will be surprised by how soon the tree resprouts.

If there are small branches on the trunk below the cut line, you can either keep them or remove them if they are weak or poorly formed.

After making a hard heading cut, the tree will begin putting out shoots from the buds on the trunk below the cut. Some of these buds will put out two or even three shoots, in which case you want to remove the weaker of the two shoots, or the two side shoots if there are three. The center shoot that remains on the trunk will grow into a branch.

Watering Young Trees

Unless your soil is very heavy, it’s a good idea to create a basin around the newly planted tree for summer watering. Mound the soil so there is a low berm built in a circle about 3 feet out from the tree. This will allow you to water the tree by filling up the basin and letting it soak in slowly. The inside of the berm can be filled with 2 to 4 inches of wood chips, which will conserve moisture and keep the area free of weeds. Make sure to pull the wood chips back a few inches from around the trunk, to avoid creating an environment that is conducive to crown rot. You’ll want to remove the berms once the fall rains start, so the tree doesn’t get too much water, and so standing water doesn’t freeze in cold temperatures.

Young fruit trees need about an inch of water a week, so additional water will be required during the dry months of summer for the first few years. This can be accomplished with soaker hoses or an in-ground irrigation system, or by using the basin system described above. It’s important to water slowly and deeply, to make sure the entire root area is soaked. If using a garden hose, it’s best to apply water at a trickle, and make sure not to place the hose right at the trunk. The roots of a tree grow beyond the branches, so apply water to a wide area around the tree.

Because summer water needs will vary due to the type of soil, the average temperatures in your area, and whether or not you mulch, it’s good to monitor the soil around your young tree the first year or two. Though the surface of the soil may be dry, dig down a few inches to assess the moisture level in the root zone and adjust your watering accordingly.

You can reduce water application in late August, which will begin to prepare a tree for the dormancy stage of winter. Too much water late in the season encourages shoot growth and can lead to lower fruit quality.

Pruning and Maintenance

It is pruning, more than anything else, that intimidates new fruit tree owners the most. How to cut? Where to cut? When to cut? It can all be a little overwhelming starting out. So first, let’s talk about why to cut.

The truth is, trees survive fine without pruning—no one prunes trees in the wild, do they? Then why bother doing so for the trees in your yard? Well, there are several reasons.

It doesn’t matter if a tree grows bushy or tall when it’s in the wild— and the birds don’t generally complain about the quality of the crop. But we want to get the best yield of the tastiest fruit from our backyard trees, and that requires a little effort. Pruning a tree will control its size and growth, which means you can create a strong scaffold that will help support a bumper crop. Pruning also allows for better airflow and helps sunlight penetrate the branches to ripen fruit—trees in the wild can grow into dense thickets that produce fruit only on the outermost branches. Pruning will help grow the sweetest, most abundant fruit crops, so it’s worth getting over a fear of the pruning shears.          

I was lucky. Not long after I started tending fruit trees, I spent a day volunteering in Piper’s Orchard in Seattle, an heirloom fruit tree orchard in Carkeek Park. There were two professional arborists there that day, also volunteering their time, and they told stories and jokes as we worked. I had never heard pruning jokes before, but this one was my favorite:

What is the difference between two pruning strategies?

Their point was that the same person looking at the same tree 20 minutes apart might come up with two very different ideas about how to prune; there isn’t necessarily one absolutely right way to go about it.

I’ve thought of that many times since, and it makes me feel better every time I pick up my clippers. Pruning doesn’t need to be scary—it’s simply a series of choices.

You might choose not to do your own pruning at all. There are plenty of arborists who can help you with this job. In this case, make sure the person you hire is knowledgeable and experienced (not all gardeners or landscapers have a background in tree care, and not all tree care professionals are experienced with fruit trees). One way to do this is to hire arborists certified through the International Society of Arboriculture (ISA), and make sure they have experience working specifically with fruit trees. The ISA certification requires 3 years of professional experience and academic study, as well as a certification exam. Don’t assume the person who comes to your door offering to prune your trees has the experience you need; there are too many horror stories from people who have done just that.

How to Prune a Tree

If you’d like to do your own pruning, there is some education needed. There are entire books written on the topic of tree pruning, but here are some basics to get you started.            

Pruning should only be done with clean and sharpened tools. Depending on how much your tools get used, you may want to sharpen them annually. Any store that sharpens knives will usually be glad to sharpen your pruning tools as well.

Clippers and loppers can be cleaned between uses with a solution of half rubbing alcohol to water. You’ll want to clean your tools even between pruning different trees, as this reduces the possibility of transferring diseases. Soak tools for at least 5 minutes before rinsing with water and drying.              

Trees should be pruned twice a year—once in summer and once in winter (though some experts disagree on this). My feeling is that pruning twice a year allows you to accomplish different things. In winter, when the leaves are off the tree, it is easier to look at the shaping and structure of the tree; summer pruning, when the tree is fully leafed out, helps you focus on controlling overall size and allows you to see whether or not the fruit is being shaded out. Make sure to schedule your winter pruning for after you’ve had some freezing temperatures, which put the tree into a dormant state.

One of the most important things to keep in mind is how much you prune at one time. Aggressive pruning will cause a tree to respond with vigorous growth—by sending out a lot of thin, vertical branches called watershoots or watersprouts that tend to be weak and unproductive. A good rule of thumb is to make sure to remove less than 25 percent of total tree branches. If you’re concerned, err on the side of removing less. You will always get another chance, at your next pruning, to do more.

When pruning, start with three basics:

  • First, remove any damaged or diseased branches, or any branches that rub and chafe against each other (take out the weaker branch, or the one that may be awkwardly located).
  • Second, prune out any shoots growing from below the root graft at the base of the trunk.
  • Third, consider airflow and sunlight and remove branches that may impede circulation or shade out fruit, or prevent you from being able to access the fruit to pick it.

Original post here https://ift.tt/3gp74Du.

from AAA Tree Lopping Ipswich https://ift.tt/3waItJj
via IFTTT

Pruning Trees While Treating and Preventing Tree Wounds

Written by Admin and published on https://www.doityourself.com/

Trees are incredible survivors in spite of the challenges from pests of all kinds, including us! They are vulnerable to injuries such as mechanical wounds from lawn equipment, vehicles and ice. Pruning results in an intentional wound which is of importance to consider. Tree owners and managers need to prune trees to maintain aesthetic characteristics, remove infected limbs, reduce risk, or improve structural stability. Proper pruning practice and understanding tree wounds can minimize the impact of creating wounds on trees.

Pruning Trees – Treating Tree Wounds

Resin oozing from the bark of a pruned tree

When you prune a tree, you create a wound. If you use the correct methods on a healthy tree, you don’t need to worry. Tree sap, gums, and resins are the natural means by which trees combat invasion by pathogens. Although unsightly, sap flow from pruning wounds is not generally harmful; however, excessive “bleeding” can weaken trees.

TIP: “Always sterilize your pruning tools before using.”Continue reading below

Oaks and Elms

When oaks or elms are wounded during a critical time of year (usually spring for oaks, or throughout the growing season for elms)–either from storms, other unforeseen mechanical wounds, or from necessary branch removals–some type of wound dressing should be applied to the wound. Do this immediately after the wound is created.

TIP: “To avoid injury, prune trees in winter when they are dormant.”

In most other instances, wound dressings are unnecessary, and may even be detrimental. Wound dressings will not stop decay or cure infectious diseases. They may actually interfere with the protective benefits of tree gums and resins, and prevent wound surfaces from closing as quickly as they might under natural conditions. The only benefit of wound dressings is to prevent introduction of pathogens in the specific cases of Dutch elm disease and oak wilt.

TIP: “Before using a wound dressing or wound paint, check with your local Cooperative Extension Office regarding the prominence of specific disease in your area.”

Original post here https://ift.tt/3v8dGve.

from AAA Tree Lopping Ipswich https://ift.tt/3554RI4
via IFTTT

How To Prepare Your Trees For This Coming Winter

Written by Admin and published on https://heattrak.com/

The winter season is hard to even for the trees in your house and they need extra care. As the season approaches, it’s best to find an arborist to take care of your trees. Your trees may experience a number of problems that result due to extreme temperatures. In this article, we look at winter tree problems and how to deal with each one of them. Although it may be impossible to protect your trees from the harsh weather, taking precautions will ensure that your trees are healthy throughout winter

Tree and Landscaping Precautions to Take Before Winter

Tree and Landscaping Precautions to Take Before Winter

Your facility trees and carefully manicured landscaping enter the “danger zone” with every approaching winter season. Unless you take the proper precautions, and in a timely manner, you run the risk of losing the money you have already invested, spending more than you should on “post-winter recovery,” and allowing your trees and landscaping to become a danger to those present on the property.

Some potential problems, along with some corresponding precautionary actions to take, are mentioned below:

Winter Time Tree Care

The first danger your trees face during the winter is from internal stresses caused by intensely cold temperatures. The radical differences between daytime/nighttime temperatures can stress trees to the point of cracking, the “sunniest side” of the tree being most vulnerable. The best thing one can do to prevent this is to protectively wrap the tree trunk prior to winter (normally with young trees only). Most trees, however, will recover naturally, and it is just a matter of guarding against insects/diseases infiltrating the crack in the spring.

A second problem is early frosts bursting the cell structure of late-season growth that has not had enough time to re-acclimate for the winter, and leaving branches with dead ends. Waiting until trees have gone dormant to prune them is the best defense since it curbs late growth. Another factor is using a root rather than a leaf growth fertilizer in the autumn.

Another danger to avoid is “winter drought,” meaning when a tree dehydrates because it can’t draw water out of the frozen ground, even as the sun hits it all day long. Dehydration caused by dry, cold winter winds also contributes. The best defense is to mulch around the tree base in late fall. This helps to keep the temperature up and the ground unfrozen and also slows moisture loss.

Finally, tree branches are more likely to break off during winter as the cold makes the wood become more brittle. Add in ice and snow load and strong, gusty winds, and the danger is even greater. Not only does this damage your trees, but falling branches may hit your building, a car, a pedestrian, or a power line. To prevent this, have an arborist inspect all facility trees at least bi-annually to root out dead/dying branches, especially along sidewalks, roads, and parking areas.

Winter Time Landscape Care

Your sod, plants, and shrubs also need special attention to get safely through the winter and avoid causing you trouble. First, be sure to remove all leaves/debris from the lawn to prevent “winter kill” and harboring diseases and rodents. Second, cut grass down to 2 or 2.5 inches (5 or 6 cm) on the final pre-winter mow to prevent death of late-growth grass tips. Third, aerate and fertilize your turf just before the first winter freeze. This helps drainage and gives grass a head start on growth in early spring.

As to plants/shrubs, winterize them by post-dormancy pruning, mulching, and fertilization, the same way as with trees and for all the same reasons. Some plants without deep, hardy root systems, however, may need to be removed into a greenhouse and re-planted in spring.

Finally, be sure to properly winterize your irrigation system, shut down and cover all outdoor water spigots, and inspect and do maintenance tasks on all landscaping equipment before putting them away in storage.

Protecting your trees and landscaping during the harsh days of winter requires careful planning and appropriate action long before winter weather first arrives. Regular care and maintenance throughout the year should be augmented by specialized attention in late fall to ensure your greenery looks its best in the spring.

Original post here https://ift.tt/3fOav6l.

from AAA Tree Lopping Ipswich https://ift.tt/3xblXAm
via IFTTT

Use Drip Irrigation To Survive Your Trees In Summer

Written by Jasper Boekelman and published on https://www.growingagreenerworld.com/

Drip irrigation is a low-pressure, low-volume lawn and garden watering system that delivers water to home landscapes using a drip, spray or stream. A drip irrigation system keeps roots moist, but not soaked, all while using less water than other irrigation techniques.

You can hide most of the drip irrigation parts under a layer of mulch, as long as you keep any parts that emit water on top of the mulch to prevent clogging. The system can also run on top of the soil or mulch, allowing the plants to conceal it as they grow and spread.

Drip Irrigation: A Smart Way to Help Plants Survive Summer

This water filled bag by Treegator is one type of drip irrigation

Remote supplemental watering can be easily accomplished using  drip irrigation in a bag

In my neck of the woods, it’s been about two months without any measurable rainfall. I decided several years ago, most plants in my garden were on their own for survival. As you can imagine, they’re not looking so great right now. I’d plant the right plant in the right place, nurse them along until they got established and then it was up to them.

I’ve softened a bit since then. Now, I provide occasional supplemental watering to help plants survive summer. But in an effort to save time and still water properly, I’m using some very efficient methods.

Water effectively

First, I water deeply but infrequently. This saturates the entire root zone and minimizes the total loss of water due to evaporation. By watering only about once a week, as the surface area dries, moisture is still available more deeply, where roots will grow in search of available moisture.

By watering infrequently, roots are encouraged to grow down to find water. All of my methods of watering now incorporate this deep but infrequent watering regime and drip irrigation is a great place to start the discussion.

Drip Irrigation

For beds and containers, the best way I’ve ever seen to keep plants hydrated right at the root zone is with drip irrigation. The water is delivered through a supply line which is typically flexible, plastic tubing. Along the supply line, small holes punctured into it where needed, allowing water to drip out at those points. Flexible tubing can also be tapped into the line, directing water precisely to the base of any plants or containers.

The rate at which water drips from the end of the tubing is controlled by a plastic tip called an emitter. They come in different sizes depending on your desired flow rate. Drip irrigation kits and supplies can be purchased at garden centers and home improvement stores. They’re easy to install. Add an automatic timer and you’ll have a worry free way to water effectively.

Portable Drip Irrigation in a bag

There comes a point where it becomes impractical to extend a drip irrigation line too far into your yard or to a remote setting of your landscape. That can create a problem as you think about efficient ways to water trees and shrubs.

Treegator is a product that addresses that very issue. It’s essentially a portable drip irrigation system in a bag. The ‘bag’ is a leak proof bladder that has tiny pinholes in the bottom. Wrap the Treegator around the trunk, fill it with water and over the next 6 – 12 hours water is released slowly into the soil.

There are currently two models. One is a cone shaped style that holds 20 gallons of water. The second is a more low-profile style that holds 14 gallons. It’s the ideal solution for watering trees and shrubs in a way that allows the water to slowly soak the area around the roots. More information and ordering information is available through their website, http://www.treegator.com.

The most critical phase of a plant or tree surviving is while it is becoming established in the ground. Getting sufficient water to the roots is critical. Having a way to deliver that water slowly enough to soak deeply into the soil is essential. Using the right drip irrigation method is a great way to assure that happens, no matter where your plants are located.

Original post here https://ift.tt/3uXtjWs.

from AAA Tree Lopping Ipswich https://ift.tt/3cpYuDx
via IFTTT

Stump Removal: How To Kill A Tree Stump With Epsom Salt

Written by Max and published on https://www.trees.com/

If you have ever asked the question of “how to kill tree stumps” Epsom salt can help naturally remove tree stumps without the use of toxic chemicals.

In high dosages, Epsom Salts (Magnesium Sulfate) can kill weeds and plants so it can also be used to kill the stump of a tree – which is why it is one of the most popular “natural” options for removing tree stumps, not to mention the cheapest.

How to Remove a Tree Stump with Epsom Salt

Remove a Tree Stump with Epsom Salt

If you have a tree stump on your property, you may be wondering how you can get rid of it. Tree stumps can ruin the look of a garden, and can even remain alive and cause problems in the future. One natural and budget-friendly way to remove a stump is with Epsom salts, but how can this common household item be utilized in tree stump removal?

When Do You Need Epsom Salt to Kill a Tree Stump?

Epsom Salt

If you have had a tree chopped down on your property, you might think the hard part is over, but actually, felling a tree is often just the beginning of the story when trying to remove a tree from your landscape. Although most of the visible part of the tree will have been removed, the tree’s stump will still be left, and the root system will still be intact.

While there are healthy roots, there is still life, and tree roots will often continue to absorb moisture and nutrients in an attempt to regrow. It is common to see tree stumps with saplings growing from them, and if left to grow, these can become full-sized new trees. Some stumps will even have several saplings sprout from them, which could lead to numerous trees growing in close proximity to each other, which can lead to many more problems.

The best way to prevent any of these issues is to remove the tree in its entirety, including the stump and all of the attached roots. Unfortunately, removing the stump of a tree can be very costly, time-consuming, and labor-intensive. There are several options when it comes to removing the remaining parts of a tree, and one of these options is by using Epsom salts. You might want to consider using Epsom salts to kill your tree stump if any of the following scenarios apply to you. Besides using Epsom salts to grow plants like tomatoes or roses, you can also use Epsom salts to kill tree stump gradually with very great results.

Low Budget

Hiring a tree surgeon or contractor to remove a remaining tree stump in your yard can run into thousands of dollars. Professionals will typically use heavy-duty equipment such as a stump grinder, or smaller tools like chainsaws and shovels. Whichever method they employ to remove the stump, it will typically take a whole day, or even longer, and labor costs can rack up.

Professional tree surgeons are well trained in these areas with plenty of experience of safely removing tree stumps using potentially dangerous equipment. For this reason, they are able to charge sums of money which can be unrealistic to many people.

If you are trying to keep costs low while removing your tree stump, then Epsom salt could offer a good solution. Epsom salt is very inexpensive, especially if bought in bulk. The added bonus of using Epsom salts is that if you have any leftovers after your tree stump is removed, you can use them in the bath or for other health purposes. This will mean that there is zero product wastage, so no money is wasted.

No Time Restraints

The benefit of hiring a tree surgeon, or attempting to manually remove a tree stump yourself, is that the job will be completed within a matter of hours or days. Using Epsom salts is a much longer process, as you will have to wait for the Epsom salts to dry out the roots and starve the tree of moisture and nutrition.

The time this takes can vary depending on the size of the stump, but you can expect to need a fair bit of patience. If you are not in a hurry to remove your tree stump, then an Epsom salt treatment could be an ideal natural and low-cost option.

Minimize Physical Work

Many DIY enthusiasts will attempt to remove a tree stump themselves by hacking it to pieces with an ax or chainsaw or trying to dig it out. For some people, who have experience in these areas, these may be valid options. But for the average homeowner, attempting a task of this size will prove to be too much.

Manually removing a tree stump from the ground is a daunting task that requires plenty of strength and stamina. If you would prefer not to get your hands dirty, then Epsom salts might be a better solution. The process of tree stump removal using Epsom salts is simple and requires little or no physical aspect, making it achievable for almost anyone.

Failed Commercial Chemical Stump Removal

If you’ve been looking for a chemical stump removal solution to minimize costs and physical exertion, then you may have thought about trying a commercial stump removal solution, or maybe you have tried one and found that it didn’t work.

Commercially available stump removal products are made from potassium nitrate, and these are effective at decomposing and dissolving a tree stump, which is already dead. However, if your tree stump still has healthy roots, then a commercial stump removal product will have little to no effect. A chemical stump removal solution with a much higher rate of success is Epsom salts.

Safety Concerns

There are many DIY methods of removing a tree stump, but most are not considered to be particularly safe. Some ideas for removing a tree stump yourself include chaining the stump to a pickup truck and driving away to wrench the stump out of the ground, along with setting fire to the stump or hacking it apart with a chainsaw. If these options sound too dangerous to you, then a chemical solution would be a much safer bet. Using Epsom salt to kill a tree stump is both safe and easy.

How Does Epsom Salt Kill a Tree Stump?

Epsom salt contains magnesium and sulfur. While these are nutrients plants need to survive, if used in excess, they can kill plants and weeds. Epsom salt is able to draw moisture out of everything it comes into contact with. When used as directed on a tree stump, Epsom salt will dry out the root system, and prevent it from absorbing the moisture and nutrients it needs to live. It will also dry out the tree stump itself, which will cause it to rot and break down, at which time it will be easy to manually remove.

Step-by-Step Guide to Using Epsom Salt to Kill a Tree Stump

There are two ways you can use Epsom salt to kill a tree stump, and which one you use will largely depend on whether you have a drill and are able to operate one.

Drilling Method

1. Using a 1-inch drill bit, drill several holes into the stump, leaving a few inches between each hole. Drill as deeply as you can; holes should have a minimum depth of 8 inches.

2. Pour Epsom salt directly into the drilled holes, filling them to the top.

3. Add enough water to the holes to moisten the salt. Do it slowly so that the salt doesn’t overflow (SF Gate).

4. Depending on the season, you may need to cover the stump over with a tarp. This will prevent rainwater from filling the holes and diluting the Epsom salts too much.

5. Repeat the process every three weeks until the stump is dead. Pale wood typically still has life left, while dark and brittle wood is dead.

This video below explains in details how to do the driling method.

Soaking Method

1. Mix together Epsom salts and water to a ratio of one part Epsom salts, two parts water. For each stump soak, the ideal amount is around one gallon of salts, and two gallons of water.

2. Drench the stump and any exposed roots with the mixture.

3. Cover the stump with a tarp, and repeat soaking every week until the stump appears visibly dried out.

Whichever method you use will result in the eventual drying out and rotting of the stump, though this may take several months. Once dead, the stump will decompose naturally, but you can speed up this process by adding a high nitrogen fertilizer around the base of the stump.

Alternatively, a rotten stump can be dug up and disposed of without too much trouble. You can then refill the hole with soil and cover it over with lawn seed, or create a new flower bed in its place. Another benefit of having used Epsom salt to kill the tree stump is that it will leave the surrounding soil in good condition compared to other chemical solutions, which can make it difficult to grow plants in the place of the stump after it has been removed.

Conclusion

Epsom salts kill a tree stump by drying out the roots and remaining trunk stump. They are a good option for removing tree stumps in a variety of situations, especially if you want a DIY option that is safe and isn’t physically demanding. Epsom salts provide a solution for tree stump removal that is low cost, easy to achieve, and doesn’t harm the environment.

The only drawback of using Epsom salts to kill a tree stump is that it can take an extended amount of time compared with other alternatives. If you are happy to wait a few months for Epsom salts to dry out your tree stump, then it could be the right solution for you.

Original post here https://ift.tt/3g48Efm.

from AAA Tree Lopping Ipswich https://ift.tt/3w4nBU9
via IFTTT

What Are The Different Types Of Tree Damage

Written by Stephanie Grant and published on https://www.bestpickreports.com/

If you are a tree person or have trees in your area, there are things you need to know about their maintenance. It is when you see damage on a tree, and there are different causes of it. For the sake of treatment, you need to recognize the exact cause of tree damage. And if it’s confusing, you can find an arborist, who can inspect your tree.

If there are chewed areas on a branch, they show squirrel damage. Furthermore, there are other sources of damage, such as floods, lightning strikes, tornadoes, and animal damage. And by having a piece of useful information regarding tree damage, you can look after them properly. So, here’s a list below of the major types of damage that trees usually come across.

Types of Tree Damage

Trees provide beautiful foliage almost year-round as well as cooling benefits during the dog days of summer. Tall, well-manicured trees can even increase the value of your home by approximately 10 to 20 percent, and studies have shown that they have a positive psychological impact on humans.

Because of the wealth of benefits trees provide to homeowners, it can be difficult to part with one. But if a damaged or dead tree on your property could jeopardize the safety of your home or loved ones, it’s time to have it removed. Below are different types of tree damage and some warning signs to look out for.

Tree Damage from Severe Weather

While trees can stand firm against rainstorms, snow, and sweltering days, severe weather can be tough on trees, especially if you live in a climate not used to certain weather conditions. To maintain the health of your trees, professional arborists recommend that you perform safety checks after experiencing any of the conditions listed below.

Flooding

Flooding can damage trees in three key ways:

  1. Harming the soil due to water saturation
  2. Creating chronic issues stemming from the rapid change in environment
  3. Toppling trees from the water’s sheer force

Flooding can also inhibit root growth, cause rot, suffocate seeds, and rob the soil—and thus the tree—of precious oxygen, among many other problems.

Soil and root systems act like brick and mortar, working together to create strength and rigidity. If the soil or the root system is compromised, disaster can follow.

Pro tip: Be on the lookout out for standing water after a flood, as this can also damage trees.

Lightning

lightening strike on tree base

Trees can sometimes survive a lightning strike, but if a lightning strike has reached the root system, the tree is likely dead and poses a danger to your home and the area around it. If you have an older, healthy tree that would be impossible to replace and is in an area prone to lightning, consider having a tree professional install a copper wire system to redirect electricity from the root system as a protective measure.

Severe storms

Storms can devastate anything unlucky enough to be caught in their path. The most violent of these weather events can have wind gusts of up to 300 miles per hour.

Though you might think you can easily see wind damage—like broken limbs, exposed and broken root systems, and broken trunks—many kinds of wind, tornado, and hurricane damage aren’t immediately visible.

Strong windstorms can twist tree trunks, which can be very difficult to spot. This twisting can separate the wood’s fibers, weakening the tree and making it susceptible to falling.

Other kinds of storm damage include wind-stripped bark, which can leave trees open to pests and other diseases, and bent or leaning trees, which can be prone to breakage.

Tree Damage from Pests

Like most plants, trees are susceptible to damage from insects and other pests. Some insects, like bark borers, hurt trees in visible ways. A bark borer can kill a tree by destroying the phloem (the cells that move nutrients throughout the tree). Bark borers are found all over North America, so if you see a ring of holes in your trees, you may have an infestation.

Other pests target areas where it’s harder to see the damage. One example is the balsam woolly adelgid (normally found in Tennessee, North Carolina, and the Pacific Northwest), which sucks out a tree’s sap, ultimately starving the tree of necessary nutrients. In addition to bark and sap, common arboreal pests can target leaves, seeds, and roots of trees.

Tree Damage from Environmental Changes

Frequently, trees are put at risk because they are unable to withstand the changes in the environment around them. Though these changes can come from mother nature herself, the situations mentioned below are due to human interaction.

Heavy pruning or topping

People who choose to prune or top trees may have the best intentions in mind, like shortening too-tall trees or keeping limbs away from electrical wires, but the result of these actions could be detrimental to the tree. Heavy pruning and topping leaves the tree vulnerable to insects, disease, and damage from storms.

Recent construction or excavation

During construction or excavation, tree roots are at high risk for damage. Sometimes, the roots are cut back to make way for changes in the landscape. If a tree experiences more than 50 percent of damage to its root structure, then it could be difficult for it to recover.

Warning Signs

If you believe that your trees have been exposed to any of the conditions above, it’s important to inspect them for the following signs:

  • Large, dead branches
  • Detached branches
  • Large cavities or rotten wood on the trunk or branches
  • Fungi or mushrooms on the base of the tree
  • Cracks in the trunk or branches
  • Fallen branches
  • A lean in the tree
  • Damage to the roots from construction projects
  • Unusual changes to the leaves

Tree Inspections

arborist inspecting tree

A certified arborist can provide an in-depth inspection of the health of your trees if you happen to notice any of the warning signs mentioned above or have recently experienced a severe weather event. Many Best Pick tree companies employ certified arborists.

Tree professionals can often mitigate damage and improve the health of your trees. If any particular tree is beyond recovery, a professional can assist you with safely removing the tree from your property and planting a replacement.

Having a damaged tree that may potentially need to be removed can be difficult to accept, but it’s important that you keep your overall home safety in mind when evaluating your trees. Remember to inspect your trees after a severe weather event and at regular intervals throughout the year, and if you’re unsure about anything, that’s where the professionals come in.

Original post here https://ift.tt/2SltkGv.

from AAA Tree Lopping Ipswich https://ift.tt/3wa1lbC
via IFTTT

Fall Planting: Tips for Fall Planting Success

Written by JOE LAMP’L and published on https://www.growingagreenerworld.com/

Many folks are surprised to learn that autumn runs a close second to spring as an ideal planting time, but it’s true: cool temperatures, reliable rainfall, and short, bright days help plants make a quick and easy transition to your landscape. Despite the cold weather lurking around the corner, the entire first half of autumn (and then some) provides ample opportunity for plants to grow roots and get off to a good start in their new home. Before you run off to the garden center, though, there are a few things you should know to ensure success with fall planting:

Fall Transplanting Success

Current research indicates the planting hole should not be amended unless amending the entire area

In many parts of the country, trees and shrubs can be transplanted all year, but no matter where you live, fall is the very best time. The cool air and warm soil temperatures are the perfect combination for establishment. The cooler air is kind to plants and especially to ones that have just lost a major portion of their roots from being dug up. In addition, soil temperatures are still warm, creating an excellent environment for the production of new root growth.

Another benefit to fall transplanting is that most plants and trees are entering a period of dormancy. Rather than continuing to transfer energy into new foliage and aboveground growth, plants are now are transferring energy into their roots and storing nutrients and resources for the cool months ahead.

By spring, the result should be a well-established root system and a plant that can handle the upcoming demands of summer. Here are a few additional tips to ensure the success of all your fall transplants.

When transplanting, always dig a ten-dollar hole for a one-dollar plant. Its not always easy but is always worth it. Make the planting hole two to three times wider than the current root ball but don’t make the hole any deeper than the plant was growing in its previous environment.

Contrary to traditional planting methods, the latest research-based data indicates that you should not amend the hole with additional organic material. Plants roots growing in amended soil rarely venture into the harder native soil. The roots become spoiled so to speak and tend to stay only within the modified area. The long-term affect is a smaller root system, reduced growth and a less hardy plant.

Instead, simply break up the existing soil, remove the rocks and backfill. Studies show plant roots simply growing in the native soil actually do better at expanding beyond the original hole.

Place transplants in their new environment at or slightly above the surrounding soil level. Newly disturbed soil has a tendency to settle and plants growing below grade can easily succumb to root rot or disease. It is better to plant a tree or shrub slightly high and allow the area to drain than for a plant to sit in a bowl and collect excess water.

Next, lightly tamp or hand-pack the soil around the plant roots to ensure good soil to root contact. A critical step at this stage is to water well. Not only does it provide needed moisture but the water helps eliminate air pockets that could otherwise result in dead roots or worse.

The final step is to mulch with 3-4 inches of organic matter such as shredded leaves, ground bark or straw. Mulch helps retain moisture and keeps soil temperatures moderate. Winter conditions can be very dry so water throughout the winter if soil conditions become dry. Roots are still growing and soil moisture is essential for proper establishment.

The fall season is inspiring and the perfect time to relocate plants you thought about moving over the summer. It’s easier on you and the plants and you’ll be rewarded for your efforts next spring and beyond. The time is now so what are you waiting for?

Original post here https://ift.tt/2ShLfhf.

from AAA Tree Lopping Ipswich https://ift.tt/35d6XGd
via IFTTT

Need Professional Tree Care? These Are The Signs That You Need One

Written by JOE LAMP’L and published on https://www.bestpickreports.com/

When it comes to your yard, tree maintenance is essential to the overall appearance and safety of your property. Monitoring the health of your trees will ensure the safety of your loved ones and your property. Dead trees pose many dangers due to their unpredictability and increase the likelihood of harming your home, landscape, and loved ones. While regular tree maintenance keeps your trees lasting longer, work together with a professional tree expert. We will help you decide whether you need to remove your trees, in order to save you more time and effort in the long run. 

Signs You Need Professional Tree Care

The International Society of Arboriculture (ISA) recommends having mature trees inspected annually. It’s important to set up a full tree inspection to maintain healthy trees during critical summer months.

Supplement this care by periodically examining the trees on your property for the following signs of tree damage or other problems:

Trees With No Leaves in Spring

Dead trees can be difficult to spot in the winter, but if a tree doesn’t sprout leaves in the spring, it’s likely dead. A professional should be called in immediately to avoid damage or injury should the limbs or the entire tree fall.

Fungus and Mushroom Growth

When a tree’s roots begin to rot, mushrooms and other fungi invite themselves to feed on the decay.

Roots support the weight of a tree and deliver vital nutrients, so when they become compromised, a tree is more likely to split or fall. If you’ve had a rainy spring, be sure to carefully inspect your trees for signs of fungi.

Loose or Missing Bark

Bark is the living, protective layer around a tree, so if it is damaged or missing, the exposed wood becomes vulnerable to insect infestation and disease.

Dead Branches

Tree damage, such as dead branches, should be seen by a professional immediately as falling limbs can damage property or cause injury. Dead branches also allow decay to enter formerly healthy portions of the tree.

Changes in Growth Patterns

Take notice of any general changes in the size and shape of the crown, the twig growth in the spring, the size and color of the leaves, or the overall lean of the tree.

During a full tree inspection, a certified arborist or degreed forester will be able to determine the source of these problems.

Unusual Insect Presence

While insects are vital to the health and reproduction of trees, some species can be fatal. Certain beetle species tunnel into the bark to lay their eggs, which disrupts the normal flow of nutrients throughout the tree’s transport tissue, known as the xylem and phloem.

If you notice discoloration or chewed-off sections on the leaves, there may be sucking or chewing insects that are disrupting the health of your tree. A tree professional can tell you which species are common in your region and if your tree is experiencing a problem.

Changes Around Your Property

The most active portion of a root system usually lives near the soil surface but extends outward one to three times the height of a tree. Companies working on underground lines on or near your property can often carelessly hack through roots.

Roots can also be damaged during sidewalk repair, pavement installation, and soil leveling. Seeking out professional tree care can help to minimize potential damage.

Original post here https://ift.tt/2TdxH6k.

from AAA Tree Lopping Ipswich https://ift.tt/3coZjfE
via IFTTT